Does setting a Password or biometric security really protect your phone? Or are these things just only protect your mobile data from the attackers. From this article, we'll learn how to set up a security environment for a Mobile Application that includes android penetration testing tools & genymotion.
Table
of Content
Install
Genymotion
·
Install
Virtual Android Device
·
Installation
of Gapps
Connect to
Android shell using Ubuntu
Android
Penetration testing using Frida
·
Install
Frida in Ubuntu
·
Install
Objection in Ubuntu
Install
Frida-Server in Android
Install
Genymotion
Let’s first download
“genymotion” form here, according to our
system type (window or Linux). Also, thus then create an account on genymotion as
in order to use it we need to login inside the application.
Thereby, run the
installer & login with your genymotion credentials, if it asks for the
licence key click on personal use.
Here since we are using community edition, therefore,
I chose the second option.
Install
Virtual Android Device
Once, it get installed up, let’s now install
an android simulator using Genymotion for any type of device, but Android
API should be above than API23.
Further, let’s opt NAT as the
Network Mode while installing the android phone.
As you can see, I have installed the Google
Nexus 5X with API26.
Now turn on your virtual box and here also change
the network adapter to NAT for your android mobile.
Now switch ON your phone through Genymotion and thereby we’ll get an IP at the top of the Phone’s screen.
Installation of Gapps
Gapps also is known as Google applications,
an application similar to - Google Play
Yes, we can use Google Play to download any
play-store program, or we can drag and drop any APK file on this Genymotion device
that will automatically install up the application
To install Gapps, all you need to click the
“Open GAPPS” button, and this will start installing it at the
background.
After the restart, you can see the Google
Play application inside the Genymotion’s device.
Connect to Android shell using Ubuntu
To perform penetration testing we are
supposed to access an android shell, here we are using ubuntu to connect it, so
let’s install some tools.
apt install android-tools-adb
Execute the following command to connect
with the phone
adb connect 192.168.41.101
adb shell
Once you will get the Android shell, you
will find it similar as a Linux one.
Android Penetration Testing using Frida
Frida is a powerful open-source tool that
allows a software professional to intercept the data and thus injects the
malicious payloads.
To install Frida, ensure you have the root privilege of the Ubuntu machine and thus
then execute the following command –
pip3 install Frida-tools
“Objection” is a runtime mobile exploration
toolkit, powered by Frida, built to help us to assess the security postures of
our mobile applications, without needing a rooting.
pip3 install objection
Install Frida-Server in Android
Before, you install the Frida-Server for
your android device, identity its architecture with the help of the following
command:
adb shell
getprop |grep abi
Visit the given URL https://github.com/frida/frida/releases
and download the zip file for your device. Since we have x86architecture
therefore I have downloaded the for x86.
Once we have downloaded & extracted the
Frida server, we thus renamed the file as “Frida-server” and copied the folder
inside the /tmp directory of the android device with the help of the following
command.
adb push frida-server /tmp
Change the permission for the Frida-server
inside the /tmp of the android device.
adb shell
cd /tmp
chmod 777 frida-server
With the help of the Frida, you can
identify the process for the android application running at the background.
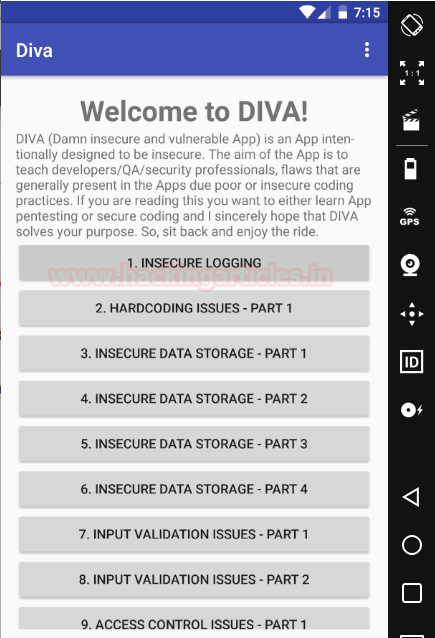
Here we are testing for DIVA which is a
vulnerable apk used for android penetration testing tutorials. So, we have
installed this apk in our android device and will test this apk using Frida.
Grep the
process for DIVA and then use objection tool to explore it. It allows you to
perform many tasks as listed below:
§
Interact with the filesystem,
listing entries as well as upload & download files where permitted.
§
Perform various memory-related
tasks, such as listing loaded modules and their respective exports.
§
Attempt to bypass and simulate
jailbroken or rooted environments.
§
Discover loaded classes and
list their respective methods.
§
Perform common SSL pinning
bypasses.
§
Dynamically dump arguments from
methods called as you use the target application.
§
Interact with SQLite databases
inline without the need to download the targeted database and use an external
tool.
§
Execute custom Frida scripts
frida -ps -U | grep diva
objection -g jakhar.aseem.diva explore
android root disable
android sslpinning disable
As you can see, we have bypass
root-detection & SSL-Pining. SSL Pinning is an additional security layer to
prevent Interception & MITM attack.
Reference: https://github.com/sensepost/objection/wiki/Features


0 comments:
Post a Comment