Hello friends!! Today you will learn how to install and
configure MS SQL server in windows 10 operating system.
Requirement:
1.
Download setup
file ENU\x64\SQLEXPR_x64_ENU.exe
Configure SQL express
setup
Open the 1st download file for SQL
server installation and run as administration. Click on installation then go
with New SQL server standalone
installation.

To install sql server2012 follow given below three steps:
·
License terms
·
Product updates
·
Install setup files
Here enable the check box for “I accept the license terms”
and click on next.

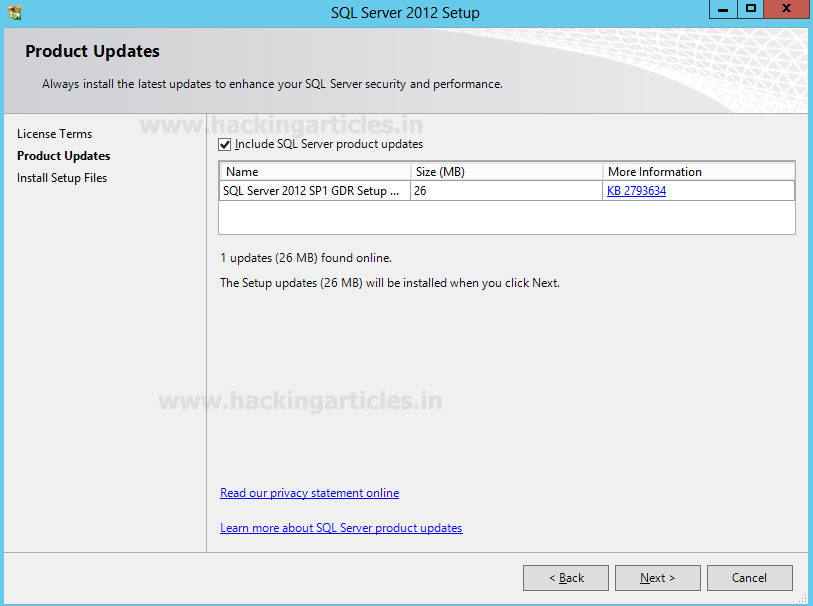
Enable the check box for “Include SQL server
product updates” to enhance the SQL server security and performance. It found
26 MB setup online which will get install when you will click on next.
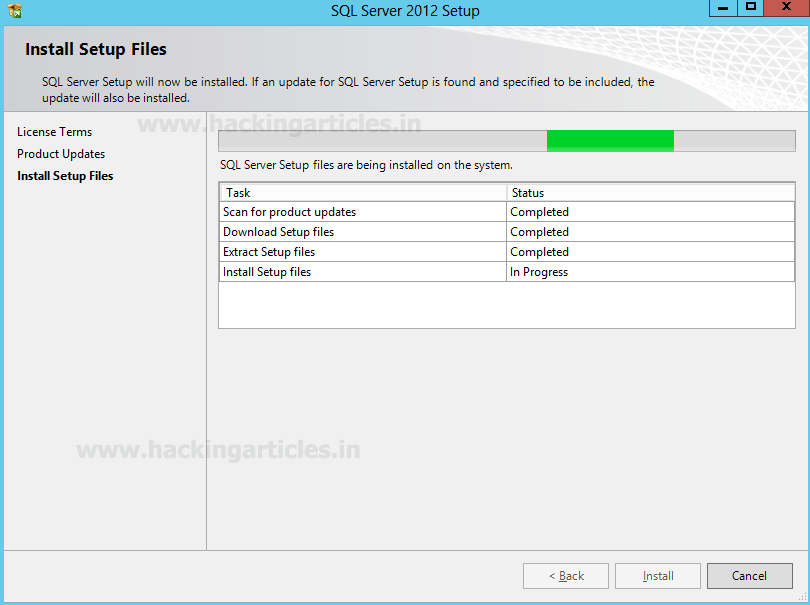
Now it will start installing SQL server setup
file on your system which takes some time. As soon as setup gets installed you
will get new window screen of feature selection for your SQL server.
Feature Selection
Now select the features you want to install from given image
you can see I had enable check box
for following features.
·
Database Engine service
·
SQL Server Replication
·
SQL Client Connective SDK
Click on next.

Specify the name and instance ID for instance
of SQL server. The
directory structure, registry structure, and service names all replicate the
instance name and a specific instance ID. Instance ID becomes part of
installation path.
·
Enter
SQLExpress in text filed for Name
Instance
·
Enter
SQLExpress in text filed for Instance ID
After
then click on next
You can select Default Instance also if an
instance of SQL Server is not installed previously. It does not need
a user to give the name of the instance to create a connection.

Your SQL server 2012 installation completed successfully,
here you can check the status for installed features.

Now open the SQL
server configuration manger where you will see left and right panel.
Click on protocol for SQLExpress in left panel and then
after select protocol name “TCP/IP” in right panel.

Under IP Addresses specify TCP port 1433 tab, Click on Apply and Enable the TCP/IP.

Configure SQL Management
Studio setup
Now open 2nd downloaded application for SQL server
management setup and add new feature in it.

No updates for SQL server 2012 click on next.

Installation type
Since we have already created instance “SQLExpress” now we
can add featured in SQLExpress
instance of SQL server 2012.
From
given below image you can observe the table for installed instance. Click on
next

Feature selection
For installation of instance feature enable the check box for Management tool basic as shared featured
then click on next and next.

Management tool basic installation completed
successfully, here you can check the status for installed features. Click on
installation then go with New SQL server
standalone installation.

Now login into SQL Server using admin credential and click
on connect.

Once you are login into SQL server then Explore security
folder and create a new login account for other users.

Enter the user name as I had given “ignite” and
set password by choosing sql server authentication for this user.
From given image you can observe that master is default database.

Connect to server
Run heidisql tool
to connect with MS SQL Server through Ignite user as given below:
Network type: TCP/IP
Hostname /IP: 192.168.1.104
User: ignite
Password: 123456
Port: 1433
HeidiSQL
is a useful and reliable tool designed for web developers using the popular MySQLserver, Microsoft SQL databases and PostgreSQL. It enables you to browse and edit data, create and edit
tables, views, procedures, triggers and scheduled events.
Now
click on open

Grate!! We have successfully access the database system of
MSSQL server. You can modify or create new table or new database and much more
things.


0 comments:
Post a Comment