Configure Penetration Testing Lab Setup in Ubuntu

Hello friends! Today you will learn how to configure your own web server using ubuntu inside virtual machine and install LAMP services for web server configurartion.
Let’s Begin!!
We are using VM  worksatation 12 pro for ubuntu installation, now for the guidance step by step.

Choose typical (1st options)for configuration and click on next.

Since I have already downloaded ubuntu 14.04 of 64 bit in my windows operating system, so let browse it as shown in given image.
Click on next.


Now enter information for personalize Linux inside text filed
Full name: pentestlab
Username: raj
Passwords: 123
Confirm: 123
Then click on next.

Specify disk capacity according to your desire as 20 GB I had specified.
Choose split virtual disk into multiple file and then click on next.

Now make some changes in setting through customize hardware before you click on finish.


Change network adapter setting into Bridge and select the check box for replicate physical network connection state.
Then click on close then Finish.
This will create a new virtual machine inside your VM workstation.

Now wait for small period of time till it boot up automatically after then it will start installation which will take some time.

Now  your enter the password for login.


Now we need to install LAMP service, which is collection of open source software used to make web servers up and running. The LAMP stands for Linux, Apache, MySQL, and PHP. 
For installation user must have root privileges now type following command inside terminal to begin.
sudo bash
apt-get update


Apache HTTP Server is cross-platform, meaning that it is built for Unix-like system. Apache played a key function for the World Wide Web.
Apt-get install apache2

MySQL is the world's most popular open-source database. MySQL is simple to set up and easy to use.

Apt-get install mysql-server


You will get a prompt, Press enter to set password “blank” for root user in mysql configuration


Again press enter

phpMyAdmin is a free software tool written in PHP, proposed to handle the administration of MySQL over the Web. phpMyAdmin supports a wide range of operations on MySQL.

Apt-get install phpmyadmin


Choose apache2 web server that will be automatically configure to run phpmyadmin.


Again a prompt will open for submit the password for phpmyadmin, to register with database server.
Press enter to left password “blank” for phpadmin.


Now in order configure phpmyadmin under Apache, you need to edit “/etc/apache2/apache2.conf” at the end of apache2.conf file. Therefore type following command to open the apache2.conf

cd etc/apache2

gedit apache2.conf


Once the file get opened type following text at the end of file as shown in given image
# phpMyAdmin Configuration
Include /etc/apache2/apache2.conf


After editing save the file.

Since we had given blank space as password for phpmyadmin therefore we need to make some changes inside its file “ configuration.inc.php” so that it could Allow No Password while login into database.
Type following command to open config.inc.php

gedit /etc/phpmyadmin/config.inc.php


Focus on highlighted comment remove double pipe (||) to activate this comment.


Now you can observe the given image is highlighting following comment:

ALLOW NO PASSWORD = TRUE


Now open myphpadmin in browser as localhost/phpmyadmin as shown in image.


Install the PHP 5 module for Apache 2 and all of its dependencies.
apt-get install php5 libapache2-mod-php5

Hence we had install LAMP services inside ubuntu therefore it will operate like as web server.


Now install some other useful services for sharing data between server and client.
Secure Shell (SSH) is a cryptographic network protocol for operating network services securely over an unsecured network. It is a TCP protocol holds port 22 to establish communication between server and client.
Apt-get install openssh-server


Install vsftpd service, it is the default FTP server in the Ubuntu, it is also a tcp protocol hold port 21 for data transfer.
Apt-get install vsftpd


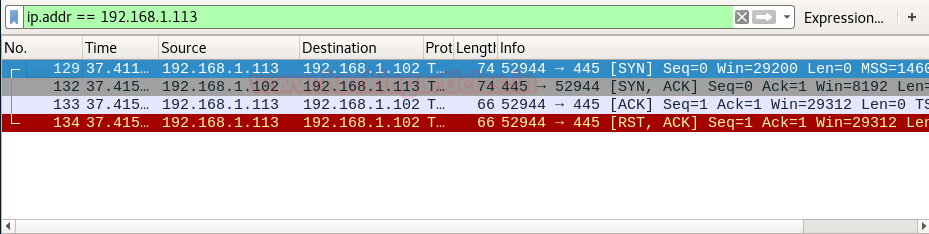
In order to ensure that above service has been installed properly in your system use nmap which will scan your system and then tell open ports and running services on your system.
To run nmap,  first install it through following command
Apt-get install nmap


Now scan your system using nmap to make sure for running services.
Nmap 127.0.0.1
From given below image you can check it has dump the result which has disclosed the running service of my system.

Understanding Nmap Scan with Wireshark

In this article you will learn how to capture network packet using Wireshark when attacker is scanning target using NMAP port scanning method. Here you will notice that how Wireshark captured different network traffic packet for open and close ports.

Lets start!!!
TCP SCAN

Tcp scan will scan for TCP port like port 22, 21, 23, 445 etc and ensure for listening port (open) through 3-way handshake connection between source and destination port. If port is open then source made request with SYN packet, as response destination sent SYN, ACK packet and then source sent ACK packets, at last source again sent RST, ACK packets.

Type following NMAP command for TCP scan as well as start wireshark on other hand to capture the sent Packet.
nmap -sT -p 445 192.168.1.102
From given image you can observe the result that port 445 is open.
Look over the sequence of packet transfer between source and destination captured through wireshark.
You will notice that it has captured same sequence of flag as described above:
  • Source sent SYN packet to destination
  • Destination sent SYN, ACK to source
  • Source sent ACK packet to destination
  • Source again sent RST, ACK to destination.

Let’s figure out network traffic for close port. According to given image it is showing if scanning port is closed then 3-way handshake connection would be not possible between source and destination.
Source sent SYN pack and if port is close the receiver will sent response through RST, ACK.


Type following NMAP command for TCP scan as well as start Wireshark on other hand to capture the sent Packet. 
nmap -sT -p  3389 192.168.1.102
From given image you can observe the result that port 3389 is closed.


Look over the sequence of packet transfer between source and destination captured through wireshark.
You will notice that it has captured same sequence of flag as described above:
  • Source sent SYN packet to destination
  • Destination sent RST, ACK packet to source
 

Stealth Scan
SYN scan is the default and most popular scan option for good reasons. It can be performed quickly, scanning thousands of ports per second on a fast network not hampered by restrictive firewalls. It is also relatively typical and stealthy since it never completes TCP connections.
The port is also considered open if a SYN packet (without the ACK flag) is received in response.
This technique is often referred to as half-open scanning, because you don't open a full TCP connection. You send a SYN packet, as if you are going to open a real connection and then wait for a response. A SYN, ACK indicates the port is listening (open)

Type following NMAP command for TCP scan as well as start wireshark on other hand to capture the sent Packet.
nmap -sS-p  22 192.168.1.102
From given image you can observe the result that port 22 is open.

Look over the sequence of packet transfer between source and destination captured through wireshark
  • Source sent SYN packets to destination
  • Destination sent SYN, ACK packets to source
  • Source sent RST packets to destination
 
Now figure out traffic for close port using stealth scan. When source sent SYN packet on specific port then if port is closed then destination will reply by sending RST packet.


Type following NMAP command for TCP scan as well as start wireshark on other hand to capture the sent Packet.
nmap -sS -p  3389 192.168.1.102
From given image you can observe the result that port 3389 is closed.
Look over the sequence of packet transfer between source and destination captured through wireshark
  • Source sent SYN packets to destination
  • Destination sent RST, ACK packets to destination
 

Fin Scan
A FIN packet is used to terminate the TCP connection between source and destination port typically after the data transfer is complete. In the place of a SYN packet, Nmap start a FIN scan by using a FIN packet.  If port is open then no response will come from destination port when FIN packet is sent through source port.

Type following NMAP command for TCP scan as well as start wireshark on other hand to capture the sent Packet.
nmap -sF -p 22 192.168.1.102From given image you can observe the result that port 22 is open.
 

Look over the sequence of packet transfer between source and destination captured through wireshark
  • Source sent FIN packets to destination
  • Destination sent no reply to source 
 

Similarly if Fin scan is performed against any close then source port will sent FIN packet to specific port and destination will reply by sending RST, ACK packets.
Type following NMAP command for TCP scan as well as start wireshark on other hand to capture the sent Packet.
nmap -sF -p 3389 192.168.1.102
From given image you can observe the result that port 3389 is close.

Look over the sequence of packet transfer between source and destination captured through wireshark
  • Source sent SYN packets to destination
  • Destination sent RST packets to destination


Null Scan
A Null Scan is a series of TCP packets which hold a sequence number of “zeros” (0000000) and since there are none flags set, the destination will not know how to reply the request. It will discard the packet and no reply will be sent, which indicate that port is open.

Type following NMAP command for TCP scan as well as start wireshark on other hand to capture the sent Packet. 
nmap -sN -p 22 192.168.1.102
From given image you can observe the result that port 22 is open.
 Look over the sequence of packet transfer between source and destination captured through wireshark
  • Source sent Null packets to destination
  • Destination sent no reply to source 
 

If the port is closed, the Destination will send an RST, ACK packet in response when source send null packets on specific port. 

Type following NMAP command for TCP scan as well as start wireshark on other hand to capture the sent Packet. 
nmap -sN -p 3389 192.168.1.102
From given image you can observe the result that port 3389 is close.
Look over the sequence of packet transfer between source and destination captured through wireshark
  • Source sent Null (none) packets to destination
  • Destination sent RST, ACK to source 
UDP Scan
UDP scan works by sending a UDP packet to every destination port; it is a connection less protocol. For some common ports such as 53 and 161, a protocol-specific payload is sent to increase response rate, a service will respond with a UDP packet, proving that it is open. If no response is received after retransmissions, the port is classified as open|filtered. This means that the port could be open, or perhaps packet filters are blocking the communication.

Type following NMAP command for TCP scan as well as start wireshark on other hand to capture the sent Packet. 
nmap -sU -p 161 192.168.1.119
From given image you can observe the result that port 161 is open.
 Look over the sequence of packet transfer between source and destination captured through Wireshark
  • Source sent UDP packets to destination
  • Destination sent UDP packet with some data to the source   
 

Similarly if source sent UDP packet on a close port to the destination then destination sent reply with ICMP packet port unreachable with appropriate error 

Type following NMAP command for TCP scan as well as start Wireshark on other hand to capture the sent Packet. 
nmap -sU -p 53 192.168.1.119
From given image you can observe the result that port 53 is close.
 
Look over the sequence of packet transfer between source and destination captured through wireshark
  • Source sent UDP packets to destination
  • Destination sent ICMP packet port unreachable to the source  
 
Xmas Scan
These scans are designed to manipulate the PSH, URG and FIN flags of the TCP header, Sets the FIN, PSH, and URG flags, lighting the packet up like a Christmas tree. When source sent FIN, PUSH, and URG packet to specific port and if port is open then destination will discard the packets and will not sent any reply to source.

Type following NMAP command for TCP scan as well as start wireshark on other hand to capture the sent Packet. 
nmap -sX -p 22 192.168.1.102
From given image you can observe the result that port 22 is open.

Look over the sequence of packet transfer between source and destination captured through wireshark
  • Source sent FIN,PUSH and URG packets to destination
  • Destination sent no reply to source 
 
Similarly if source sent FIN, PUSH and URG packets to specific port and if port is closed then destination will sent RST, ACK packets to source.

Type following NMAP command for TCP scan as well as start Wireshark on other hand to capture the sent Packet. 
nmap -sX -p 3389 192.168.1.102
From given image you can observe the result that port 3389 is close.
Look over the sequence of packet transfer between source and destination captured through wireshark
  • Source sent FIN,PUSH and URG packets to destination
  • Destination RST, ACK packet to source