In this article, we are discussing Remote Desktop penetration testing in four scenarios. Through that, we are trying to explain how an attacker can breach security in a different- different scenario and what types of the major step should take by admin while activating RDP services to resist against attack.
Table of Content
·
Introduction
o
Enabling RDP
·
Nmap Port Scan
·
Login Bruteforce Attack
o Hydra
·
Mitigation Against
Bruteforce
o
Account Lockout Policy
·
Post Exploitation using
Metasploit
o
getgui
o
enable_rdp
·
Persistence
o stickey_keys
·
Credential Dumping
o Mimikatz
·
Session Hijacking
·
Mitigation Against Session
Hijacking
o Detection
o Session Time Limits
·
DOS Attack
o
Max Channel
·
Exploitation
o
BlueKeep Attack
·
Change RDP Port
·
Man In The Middle Attack
o
SETH Toolkit
·
Conclusion
Introduction
Remote Desktop Protocol (RDP) also known as
“Terminal Services Client” is a proprietary protocol developed by Microsoft,
which provides a user with a graphical interface to connect to another computer
over a network connection. RDP servers are built into Windows operating
systems; by default, the server listens on TCP port 3389.
In a network environment, it is a best
practice to disable the services that are not being used as they can be the potential
cause for a compromise. The Remote Desktop Service is no exception to this. If
the service is disabled on the system, it can be enabled using the following
steps. Inside the Control Panel of the System, there exists a System and
Security Section. Inside this section, there is a System Section. After
traversing inside this section, in the left-hand side menu, there exists a
Remote Settings option as depicted in the image below. It can also be verified
that the System that we working on is Windows 10 Enterprise Edition.

Clicking on the Remote Setting option, we
see that a small window opens. It consists of multiple tabs. However, inside
the Remote Tab, we see that there is a section labeled as Remote Desktop. This
section can be used to Enable or Disable the Remote Desktop Service. For the
time being, we are enabling the Service as shown in the image below.

Nmap Port Scan
Since we have enabled the Remote Desktop
service on our Windows Machine, it is possible to verify the service running on
the device by performing a Nmap Port Scan. By default, the port that the Remote
Desktop service runs on is port 3389. It can be observed that the Windows
machine with IP Address 192.168.1.41 has Remote Desktop Service successfully.
It is also able to extract the System Name of the Machine, it is MSEDGEWIN10.
nmap -A -p3389 192.168.1.41

Login Bruteforce
In a process of performing a penetration
test on the Remote Desktop service, after the Nmap scan, it is time to do a
Bruteforce Attack. There is a long list of tools that can be used to perform a
Bruteforce attack but one of the most reliable tools that can make the job done
is Hydra. Although called a Bruteforce, it is more like a dictionary attack. We
need to make two dictionaries one with a list of probable usernames and another
with a list of probable passwords. The dictionaries are named user.txt and
pass.txt. With all this preparation, all that is left is to provide the
dictionaries and the IP Address of the target machine to the Hydra to perform a
Bruteforce attack on the Login of RDP. We see that a set of credentials was
recovered. It is possible to initiate an RDP session using this set of credentials.
hydra -L user.txt -P pass.txt
192.168.1.41 rdp

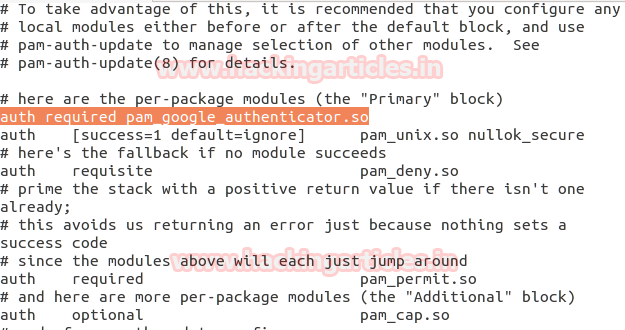
Mitigation Against Bruteforce
The Bruteforce attack that we just performed
can be mitigated. It requires the creation of an Account Policy that will
prevent Hydra or any other tool from trying multiple credentials. It is
essentially a Lockout Policy. To toggle this policy, we need to open the Local
Security Policy window. This can be done by typing “secpol.msc”. It will open a
window similar to the one shown below. To get to the particular policy we need
to Account Policies under Security Settings. Inside the Account Policies, there
exists an Account Lockout Policy. It contains 3 policies each working on an
aspect of the Account Lockout. The first one controls the duration of the
lockout. This is the time that is required to be passed to log in again after the
lockout. Then we have the Lockout Threshold. This controls the number of
invalid attempts. Please toggle these as per your requirements. This should
prevent the Bruteforce attack.

After trying the Bruteforce attack using
Hydra, it can be observed that it is not possible to extract the credentials as
before. Although there is still some risk that can be prevented by forcing the
users to change the passwords frequently and enforcing good password policies.
hydra -L user.txt -P pass.txt
192.168.1.41 rdp

As we enabled a lockout policy, we will not
be able to log in on the machine even with the correct password until the time
passed that we toggled in the policy. You will be greeted with a Lockout
message as shown in the image below.

Post Exploitation using Metasploit
Although it has been years since its
introduction, the Metasploit Framework is still one of the most reliable ways
to perform post-exploitation. During Penetration Testing, if there exists a
machine that has RDP disabled, it is possible to enable RDP on that device
through a meterpreter. In the image below, we have the meterpreter of the
machine that has RDP disabled. We use the getgui command on meterpreter to
create a user by the name of ignite with a password as 123. After completion,
we can log in on the machine as ignite user through RDP.
run getgui -e -u ignite -p 123

This was the meterpreter command getgui. It
uses the post/windows/manage/enable_rdp module to add a new user with RDP
privileges. Let’s try to use the module directly. We background the meterpreter
sessions and then open the enable_rdp module. We provide the username and
password for the user to be created and the session identifier. It will create
another user by the name of Pavan with a password as 123 on the machine which
then can be used for accessing the machine through RDP.
use post/windows/mange/enable_rdp
set username pavan
set password 123
set session 1
exploit

Persistence
The session that can be accessed as the
user that is created using the enable_rdp module will be a low privilege
session. This can be further elevated to gain Administrative Privileges with
the combination of using the sticky_keys exploit. After selecting the exploit,
we need to provide a session identifier. In the image, it can be observed that
the exploit was created successfully. It replaces the Ease of Access Sticky
Keys operation to Command Prompt so that when Sticky Keys is initiated on the
machine, it opens a Command Prompt with elevated access.
use post/windows/manage/sticky_keys
set session
exploit

Since Sticky Keys can be initiated by
pressing the Shift key 5 times, we connect to the target machine using RDP and
then proceed to do so. This will open an elevated command prompt window as
shown in the image below.

Credential Dumping
Mimikatz can be
used to perform this kind of attack. As the attacker was able to gain the
session of the machine, they used Mimikatz and ran the mstsc function inside
the ts module. Mstsc is a process that runs when the Remote Desktop service in
use. It then intercepts the RDP protocol communication to extract the stored credentials.
It can be seen in the image below that Mimikatz can extract the credentials for
the user raj.
privielge::debug
ts::mstsc

Session Hijacking
Session Hijacking
is a type of attack where an attacker can gain access to an active session that
is not directly accessible to the attacker. To demonstrate this kind of
attacker we need to create a scenario. Here we have a Windows Machine with
Remote Desktop service enabled and running with two active users: raj and
aarti. One of the most important factors to perform a
Session Hijacking Attack is that another session that we are trying to hijack
must be an active session. Here, the raj user and aarti user both are active
users with active sessions on the target machine.

We log in to the raj user using the
credentials that we were able to extract using the Mimikatz.

Now we will need to run the Mimikatz again
after logging in as raj user. We need to list all the active sessions. We use
the sessions command from the ts module. Here we can see that there exists a
Session 3 for aarti user that is active.
privilege::debug
ts::sessions

We use the elevate command from the token
module to impersonate token for the NT Authority\SYSTEM and provide the ability
for connecting to other sessions. Back to the session output, we saw that the
aarti user has session 3. We need to connect to that particular session using
the remote command of the ts module.
token::elevate
ts::remote /id:3

As we can see in the image that we were
able to get the remote desktop session for the aarti user from the raj user
access. This is the process that a Session Hijacking is possible for the Remote
Desktop services.

Mitigation against Session Hijacking
To discuss mitigation, we first need to
detect the possibility of the attack. As all the services on Windows, Remote
Desktop also creates various logs that contains information about the users
that are logged on, or the time when they logged on and off with the device
name and in some case IP Address of the user connecting as well.
There exist various types of logs regarding
the Remote desktop service. It includes the Authentication Logs, Logon, Logoff,
Sessions Connection. While connecting to the client the authentication can
either be successful or failure. With both these cases we have different
EventIDs to recognise. The authentication logs are located inside the Security
Section.
EventID 4624: Authentication process was
successful
EventID 4625: Authentication process was
failure
Then
we have the Logon and Logoff events. Logon will occur after a successful
authentication. Logoff will tract when the user was disconnected from the
system. These particular logs will be located at the following:
Applications and Services Logs > Microsoft > Windows > TerminalServices-LocalSessionManager >
Operational.
Event ID 21: Remote Desktop Logon
Event ID 23: Remote Desktop Logoff
At last, we have the Session Connection
Logs. This category has the most Events because there are various reasons for a
disconnection and it should be clear to the user based on the particular
EventID. These logs are located at the following:
Applications and Services Logs > Microsoft > Windows > TerminalServices-LocalSessionManager > Operational.
EventID 24: Remote Desktop Session is
disconnected
EventID 25: Remote Desktop Session is
reconnection
We can see that in the given image that
aarti user was reconnected. This is a log entry from the time we performed the
Session Hijacking demonstration. That means if an attacker attempts that kind
of activity, you might be looking for this kind of logs.

For Mitigation, we can set a particular
time limit for disconnected sessions, idle Remote Desktop services that might
be clogging up the memory usage and others. These policies can be found at:
Administrative Templates > Windows
Components > Remote Desktop Services > Remote Desktop Session Host >
Session Time Limits.

When implemented, these policies will
restrict the one necessity required by the session hijacking i.e., Active User
Session. Hence, mitigation the possibility of Session Hijacking altogether.
DoS Attack
DoS Attack or Denial-of-Service in respect
of the Remote Desktop services is very similar to the typical DoS attack. One
of the things to notice before getting on with the attack is that DoS Attacks
through Remote Desktops are generally not possible. In this demonstration, we
will be using a Windows 7 machine. Before getting to the exploit, Metasploit
has an auxiliary that can be used to scan the machine for this particular
vulnerability. As it can be observed from the image below that the machine that
we were targeting is vulnerable to a DoS attack.
use auxiliary/scanner/rdp/ms12_020_check
set rhosts 192.168.1.21
exploit

Now that we have the confirmation for the
vulnerability, we can use it to attack our target machine. This attack is named
as max channel attack. This attack works in the following method. Firstly, it
detects the target machine using the IP Address. Then it tries to connect to
the machine through the RDP service. When the target machine responds that it
is ready to connect, the exploit sends large size packets to the machine. The
size of the packets is incremental until it becomes unresponsive. In our
demonstration, we can see that it starts with a 210 bytes packet.
use auxiliary/dos/windows/rdp/ms12_020_maxchannelids
set rhosts 192.168.1.21
exploit

It will continue to send packets until the
target machine is unable to handle those packets. It can be observed from the
image below that that target machine crashed resulting in a BSOD or Blue Screen
of Death.

Exploitation: BlueKeep
BlueKeep was a security vulnerability that
was discovered in Remote Desktop Protocol implementation that can allow the
attacker to perform remote code execution. It was reported in mid-2019. Windows
Server 2008 and Windows 7 were the main targets of these vulnerabilities. To
understand the attack, we need to understand that RDP uses virtual channels,
which are configured before authentication If a server binds the virtual
channel “MS_T120” with a static channel other than 31, heap corruption occurs
that allows for arbitrary code execution at the system. But since this attack
is based on heap corruption, there is a chance that if the configuration of the
exploit is incorrect it could lead to memory crashes. Metasploit contains an
auxiliary scanner and exploit for BlueKeep. Let’s focus on the scanner. It
requires the IP Address of the target machine. We are running this against a
Windows 7 machine with Remote Desktop enabled. We see that it returns that the
target is vulnerable.
use
auxiliary/scanner/rdp/cve_2019_0708_bluekeep
set rhosts 192.168.1.16
exploit

Since we now know that the target is
vulnerable, we can move on to exploiting the target. After selecting the exploit, we provide the
remote IP address of the machine with the particular target. It can vary based
on the Operating System; for Windows 7 use the target as 5. We can see that it
connects to the target and first checks if it is vulnerable. Then it proceeds
to inflict the heap corruption that we discussed earlier and results in a
meterpreter shell on the target machine.
use
exploit/windows/rdp/cve_2019_0708_bluekeep_rce
set rhosts 192.168.1.16
set target 5
exploit
sysinfo

Changing the RDP Port
There are a lot of mitigations that can
help a wide range of environments. It can include installing the latest updates
and security patches from Microsoft or as the NSA suggests to disable the
Remote Desktop Service until use and disable after use. The BlueKeep attacks
can be mitigated to the most extent by upgrading the Operating System from
Windows 7. There is a long list of other mitigation steps that can be
implemented such as implementing an Intrusion Detection Mechanism and other
defense mechanisms. One of the steps that can be taken with immediate effect is
changing the port number on which the Remote Desktop operates on. This although
seems that is not a big defense mechanism but if done correctly, the attacker
might not even look for this angle. Anyone who thinks RDP thinks 3389 but when
changed it is possible that the attacker won't even be able to detect the
presence of RDP. To do this, we need to make changes to the registry. Open the
registry editor and proceed to the following path:
Computer\HKEY_LOCAL_MACHINE\SYSTEM\CurrentControlSet\Control\Terminal
Server\WinStations\RDP-Tcp
Here we have the Port Number as shown in
the image. Change it to another value and save your changes and now the RDP
will be running on the specified port.

In our demonstration, we changed the port
to 3314 from 3389. We can use the rdesktop command from Linux to connect to the
Windows Machine as shown in the image given below.
rdesktop 192.168.1.41:3314

Man-in-the-Middle Attack: SETH
As we are familiar with the typical
Man-in-the-Middle Attacks that the attacker most likely impersonates the
correct authentication mode and the user who is unaware of the switch
unknowingly provides the correct credentials. Some other methods and tools can
be used to perform this kind of attack but the SETH toolkit is the one that
seems elegant. We start with cloning it directly from its GitHub Repository and
then installing some pre-requirements.
git clone
https://github.com/SySS-Research/Seth.git
cd Seth
pip install -r requirements.txt
apt install dsniff

After the installation, to mount the
attack, we require the local IP Address, Target IP Address, and the Network
Interface that will be used. In this case, it is eth0. Here we see that the
attack has been mounted and is ready for the victim.
/seth.sh eth0 192.168.1.5 192.168.1.3
192.168.1.41

We see that from the victim's perspective, they open up the Remote Desktop Connection dialogue and try to connect to the machine and user of their choice. It asks for the credentials to connect as any original security authentication prompt.

Next, we have is the Certificate Manager.
Here we can see that there seems to be a conflict regarding the Server Name and
Trusted Certifying authority. This is usually quite similar to the window that
asks for saving the certificate. The victim won’t think twice before clicking
Yes on the window.

As soon as the connection is established, we can go back to the Kali Linux where we mounted the attack. We can see that it was able to capture the NTLM hash as well as the password that was entered by the victim. This completes the Man-In-the-Middle Attack.

Conclusion
Remote Desktop Service is one of the most
used services. It was quite important when it was brought by Microsoft but the
Pandemic and Work from Home culture has made it the necessity of every enterprise.
This article serves as a detailed guide to how to perform a penetration test on
an RDP Setup. We hope it can give penetration testers the edge that they need
over threat actors targeting their RDP Environment.