Feroxbuster is a robust tool designed to identify directories and files on web servers using brute-force techniques. It is frequently utilized in penetration testing and security evaluations to detect concealed paths and resources. Here we are going to discuss about various tasks which we can perform using Feroxbuster.
Table of contents
·
Lab
setup
·
Installation
·
Default
mode
·
Redirects
·
Extensions
·
Result
output
·
User
agent
·
Filter
status code
·
Quiet
mode
·
Controlling
threads
·
Custom
wordlist
·
Disable
recursion
·
Limit
recursion depth
·
Force
Recursion
·
Filter
by character size
·
Filter
by number of words
·
Filter
by number of lines
·
Filter
by status code using deny list
·
Filter
by status code using allow list
·
Generating
random User-Agent
·
HTTP
methods
·
Custom
headers
·
Cookies
·
Adding
slash
·
Capturing
requests in Burp
·
Read
target from list
·
Resume
from last state
·
Follow
redirect
·
Timeout
·
Comparasion between Feroxbuster
and other tools
·
Conclusion
Lab setup
Target
Machine: 192.168.1.4
Attacker
Machine: 192.168.1.31 (Kali Linux)
After
setting up a web server in the target machine, we can proceed with the
enumeration in the kali linux after installing Feroxbuster.
Installation
To install
the Feroxbuster in kali linux, we can use the following command:
apt install
feroxbuster

Default mode
Once we are
done with the installation, we can proceed with the enumeration part. To
perform a default directory brute force, we can use the following the command:
feroxbuster
-u http://192.168.1.4

It can be
seen from above that the wordlist used in default mode is the raft-medium-directories.txt.
To get a
less verbose output, we can use the --silent
flag to hide the non-essential data.
feroxbuster
-u http://192.168.1.4 --silent

Redirects
In order to
allow the Feroxbuster to continue the directory brute forcing on the redirected
URL, we can use the -r or --redirect flag. For example if http://192.168.1.4
redirects to http://192.168.1.4/newpath, Feroxbuster will follow this
redirection and continue to scan http://192.168.1.4/newpath for directories and
files.
feroxbuster
-u http://192.168.1.4 -r

Extensions
To perform
brute-force for a particular type of file extension, the -x or --extensions flag
can be used.
feroxbuster
-u http://192.168.1.4 -x php,txt --silent

Result output
If we want
to log the output, we use the --output
flag and then mentioning the file name.
feroxbuster
-u http://192.168.1.4 --output results.txt

User agent
To set up a
custom user agent to send request at the server, we can use the -a or --user-agent flag. By default, the user agent used by Feroxbuster
is feroxbuster/<version>.
feroxbuster
-u http://192.168.1.4 -a "Mozilla/5.0 (Windows NT 10.0; Win64; x64)"

Filter status code
There are
times when we need to skip certain status codes responses, so we can use the -C or --filter-status, to skip the results of the mentioned codes. If we
want to include a particular status code in output, we can use the -s or --status-codes flag.
feroxbuster
-u http://192.168.1.4 -C 403,404

Quiet mode
To present
the output without showing the progress bar or banner, we can use the quite
mode by giving the -q or --quiet flag.
feroxbuster
-u http://192.168.1.4 -q

Controlling threads
To control
the number of concurrent threads depending on the environment type, we can use
the --threads or -t flag. The default threads value is
50.
feroxbuster
-u http://192.168.1.4 -t 20

Custom wordlist
To use a
custom wordlist, we can use the -w
or --wordlist flag and then give the
wordlist path. Here we are giving the common.txt
file path.
feroxbuster
-u http://192.168.1.4 -w /usr/share/wordlists/dirb/common.txt

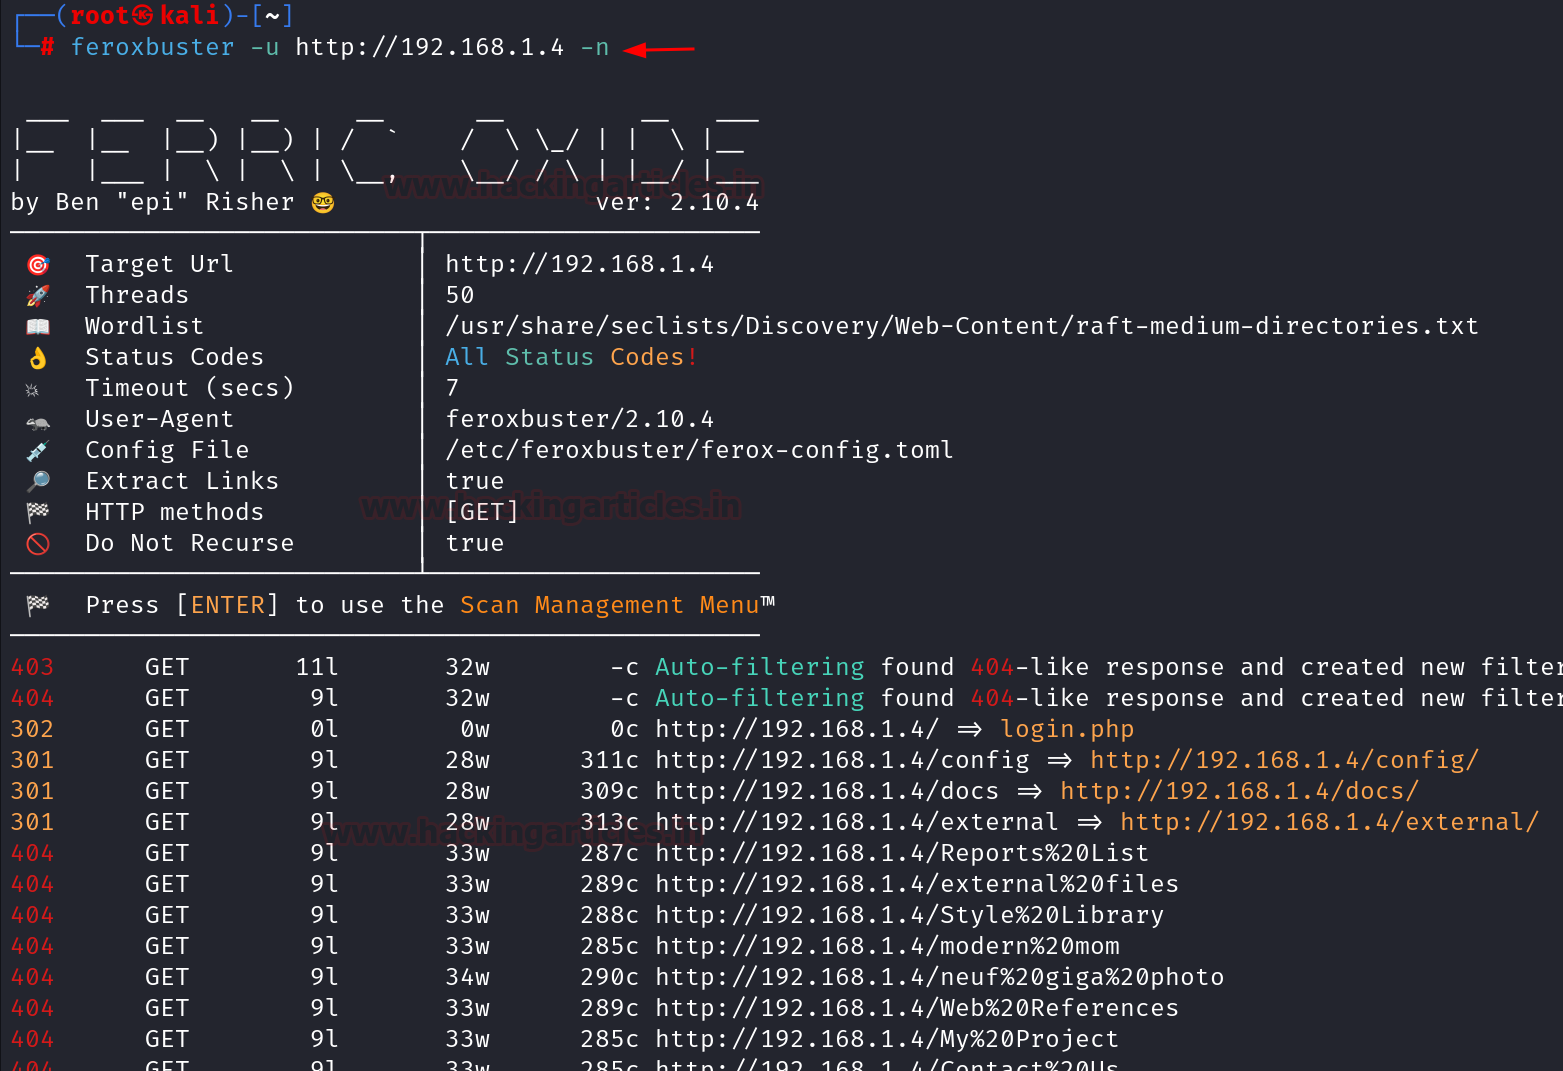
Disable recursion
To allow
the scanning of only top level directories, we can set the -n or --no-recursion
flag to disable the recursive scanning.
feroxbuster
-u http://192.168.1.4 -n
Limit recursion depth
To set a
limit on the depth of recursion, we can use the -L or --scan-limit.
feroxbuster
-u http://192.168.1.4 -L 4

Force Recursion
To ensure
that the recursion is used, we can use the --force-recursion
flag.
feroxbuster
-u http://192.168.1.4 --force-recursion

Filter by character size
To filter
out the messages of a particular length, we can use the -S or --filter-size flag.
This will filter based on character size.
feroxbuster
-u http://192.168.1.4 -q
feroxbuster
-u http://192.168.1.4 -q -S 285,286,283,289

Filter by number of words
To filter
out the results using number of words filter, we can use the -w or --filter-words flag.
feroxbuster
-u http://192.168.1.4 -q
feroxbuster
-u http://192.168.1.4 -q -W 33

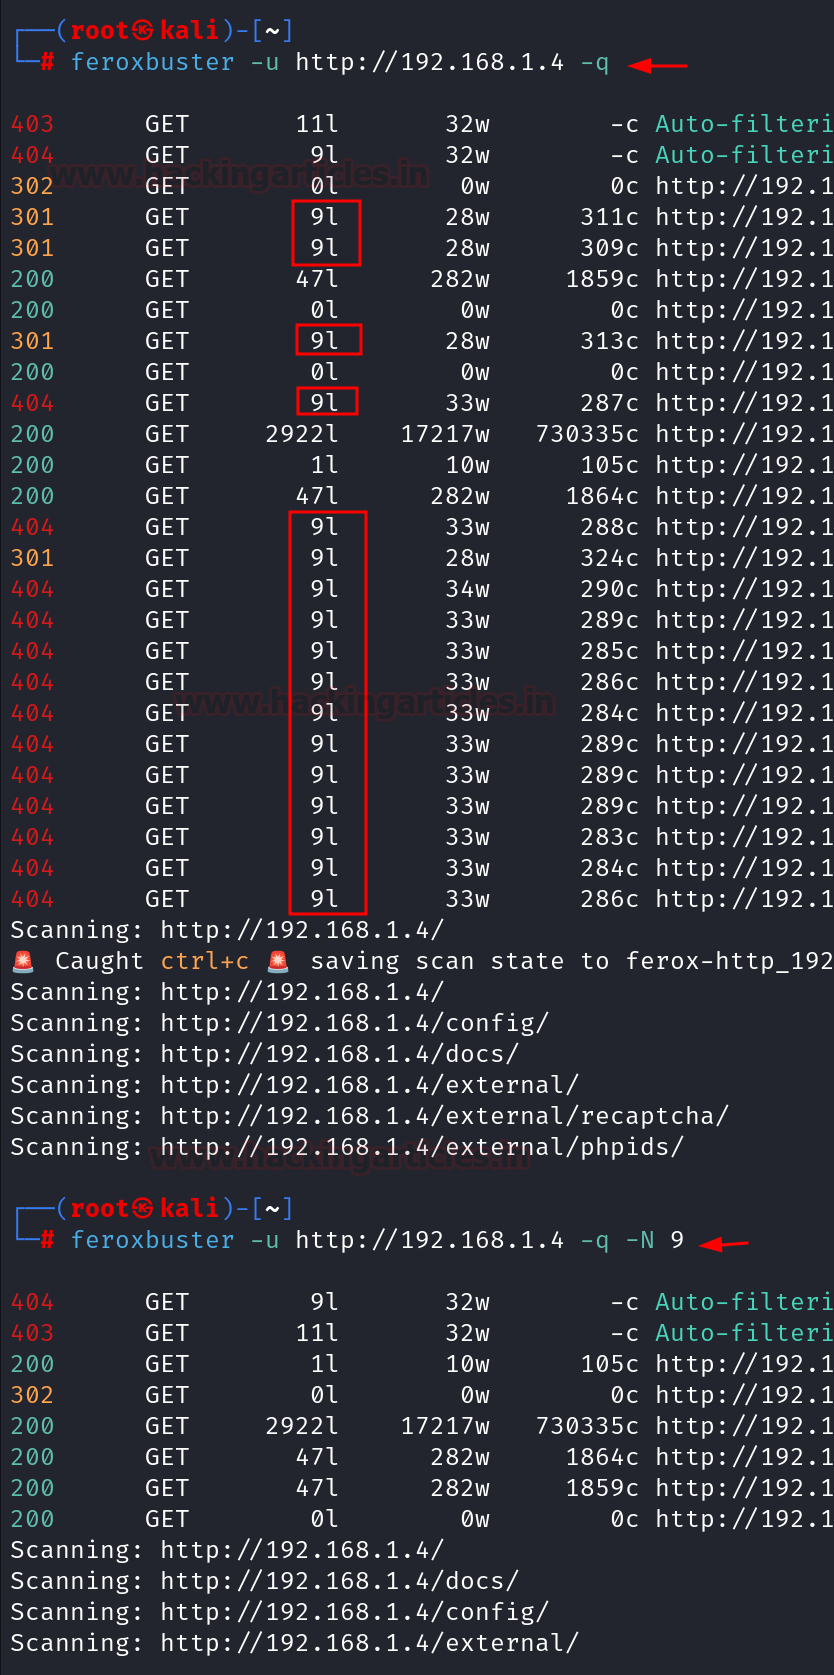
Filter by number of lines
To filter
out the results using number of words filter, we can use the -N or --filter-lines flag.
feroxbuster
-u http://192.168.1.4 -q
feroxbuster
-u http://192.168.1.4 -q -N 9
Filter by status code using deny list
To filter
the results using status codes (deny list), we can use the --filter-status flag.
feroxbuster
-u http://192.168.1.4 -q
feroxbuster
-u http://192.168.1.4 -q --filter-status 404

Filter by status code using allow list
To filter
the results using status codes (allow list), we can use the --status-codes flag.
feroxbuster
-u http://192.168.1.4 -q
feroxbuster
-u http://192.168.1.4 -q --status-codes 200,301

Generating random User-Agent
To use a
random user agent for every request, we can use the -A flag. Here we have used the --burp
flag simultaneously to show how the user agent looks in the requests.
feroxbuster
-u http://192.168.1.4 -A --burp

HTTP methods
To
explicitly define the HTTP methods to be used, we can use the -m flag and then state the method to be
used like POST. The default method is GET while running the Feroxbuster.
feroxbuster
-u http://192.168.1.4 -m POST

Custom headers
To
explicitly define the request header to be used, we can use the -H flag and then state the header
alongwith the value to be used like 'Content-Type:
application/x-www-form-urlencoded'. Here we have used the --burp flag simultaneously to show how
the user agent looks in the requests.
feroxbuster
-u http://192.168.1.4 -H 'Content-Type: application/x-www-form-urlencoded'
--burp -q

Cookies
To use a
specific cookie value in all the requests, we can mention the cookies header
alongwith the value. The flag which can be used here is --cookies or -b. Here we
have used the --burp flag simultaneously
to show how the cookie looks in the requests.
feroxbuster
-u http://192.168.1.4 --cookies PHPSESSID=t54ij15l5d51i2tc7j1k1tu4p4 --burp -q

Adding slash
To add a
slash (/) after every request, we can use the -f or --add-slash flag.
feroxbuster
-u http://192.168.1.4 -f

Capturing requests in Burp
To capture
a request in Burp Suite, we can use the --burp
flag while running the scan.
feroxbuster
-u http://192.168.1.4 --burp

Read target from list
To perform
the scanning on the targets provided in the list, we can use the following
command:
cat
target.txt
cat
target.txt| feroxbuster --stdin -q

Resume from last state
If we wish
to resume the scan from the last state, we can use the --resume-from flag and provide the .state file. There are times when we need to terminate the scan in
between, so Feroxbuster will save the results in the file.
feroxbuster
-u http://192.168.1.4 -q
feroxbuster
--resume-from ferox-http_192_168_1_4-1723370176.state -q

Follow redirect
While
scanning if there are requests which result in the redirection, so we can
control that by allowing the clients to follow the redirects using -r flag.
feroxbuster
-u http://192.168.1.4 -r

Timeout
To setup a
timeout limit, we can use the -T flag. This determines the amount of time the
Feroxbuster wil wait for the server response before terminating the scan. By
default, this value is set to 7 seconds, however we can modify it by using the
flag.
feroxbuster
-u http://192.168.1.4

The above
image shows the default timeout limit used and now we are going to modify it to
5 seconds.
feroxbuster
-u http://192.168.1.4 -T 5

Comparasion
between Feroxbuster and other tools
·
Feroxbuster
stands out for its comprehensive set of features, including extensive response
filtering, Burp Suite integration, and customization options. It provides a
balance between advanced functionality and user control, making it a powerful
choice for detailed and nuanced directory and file brute-forcing.
·
DirBuster
is user-friendly with its GUI but may not be as fast or flexible as
command-line tools like Feroxbuster.
·
Gobuster
offer speed and efficiency but with fewer advanced features and less
flexibility compared to Feroxbuster.
·
ffuf
provides high performance and extensive filtering but can be
complex to configure and use.
Conclusion
In
conclusion, we can say that Feroxbuster is
an excellent choice for those requiring precise control over their scanning
processes, advanced filtering capabilities, and the ability to integrate with
other tools.


