FTK®
Imager is a data preview and imaging tool that lets you quickly assess
electronic evidence to determine if further analysis with a forensic tool such
as Access Data® Forensic Toolkit® (FTK) is warranted. FTK Imager can also
create perfect copies (forensic images) of computer data without making changes
to the original evidence. With FTK Imager, you can:
·
Create forensic images of local hard drives,
floppy diskettes, Zip disks, CDs, and DVDs, entire folders, or individual files from various places within
the media.
·
Preview files and folders on local hard drives,
network drives, floppy diskettes, Zip disks, CDs, and DVDs
·
Preview the contents of forensic images stored
on the local machine or on a network drive
·
Mount an image for a read-only view that
leverages Windows Explorer to see the content of the image exactly as the user saw it
on the original drive
·
Export files and folders from forensic images.
·
See and recover files that have been deleted
from the Recycle Bin, but have not yet been overwritten on the drive.
·
Create hashes of files using either of the two
hash functions available in FTK Imager: Message Digest 5 (MD5) and Secure Hash Algorithm
(SHA-1)
First Download FTK Imager From
here and install in your pc.
ADD Evidence Item
Click on Add Evidence Item to add evidence from disk, image
file or folder.
Now
select the source evidence type as physical drive, logical drive or image file.
We have selected image file and click on next.
Select virtual drive image & click on open option.
Select the source path and click on finish.
Now select Evidence Tree and analyze the virtual disk as
physical disk.
Similarly to add raw image select again add evidence item
and click on image file and click on open option.
Click on finish.
Now raw image will be added as physical drive to analyze.
Mounting an Image as a Local Drive
To mount an image file, click on Image Mounting option.
Select virtual drive image.
Select Mount Type, Drive Letter and Mount Method and click
on mount option.
Now it will show the virtual drive.
Now select the image file to mount image to drive.
Capture Memory
Click on button “Capture Memory” how the picture below:
On
the next window choice the directory to storage the extracted files, and click
on the button “Capture Memory”
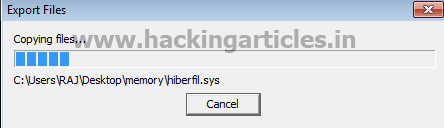
Wait for the
process finish.
A memory dump file will be created on the source
directory.
Create RAW Image
Now open the FTK Imager and Click on Create Disk Image
Now a “Select source”
box will open and choose “Physical Drive”
click NEXT
Now choose the drive of the Suspect Evidence you want to
make image.
After choosing the Drive Click on finish to Start
Creating Image of Suspect Evidence
(Note: choose
option “Verify images after they are created”)
Now
in Select Image Type Choose “Raw (dd)” and click on NEXT
Now
In” Evidence Item Information” Fill
the Following attributes, as you can see some random information given can be
random as per the Suspects Evidence. Click NEXT
Now choose the location of the image you want to create
and Name the Image Filename. And click on FINISH
Now in final Step Click START button to start Creating Image.
Successfully
the Suspects Evidence Image Is Created .Now you can audit the Suspects evidence
from the image Created from FTK Image.